This is another class eligible (60GP) or VRAA body kit – a Porsche 804 that raced in 1962. In the usual silver livery it is a pleasant alternative to the green, red, blue and yellow entries in this class and a car that everyone should have in their 1960’s Grand Prix stable. I’ve decided to make two versions, one using the existing original car/driver detail and another which will be modified to include enhanced details, including added cockpit/driver detail, wire roll bar & aluminium exhaust detail (mirrors, wire roll bar and exhaust pipes are included in the DArt kit). This version is utilizing the original details but for the added mirrors. This vintage representation of the 804 is quite nice despite the fact that the nose is more ‘bulbous’ (sp?) than the original to accommodate a guide/front axle… other slot car manufacturers have struggled with this problem too with various levels of success. As with any 1/32nd model made to perform on track compromise with the silhouette of a car is unavoidable.
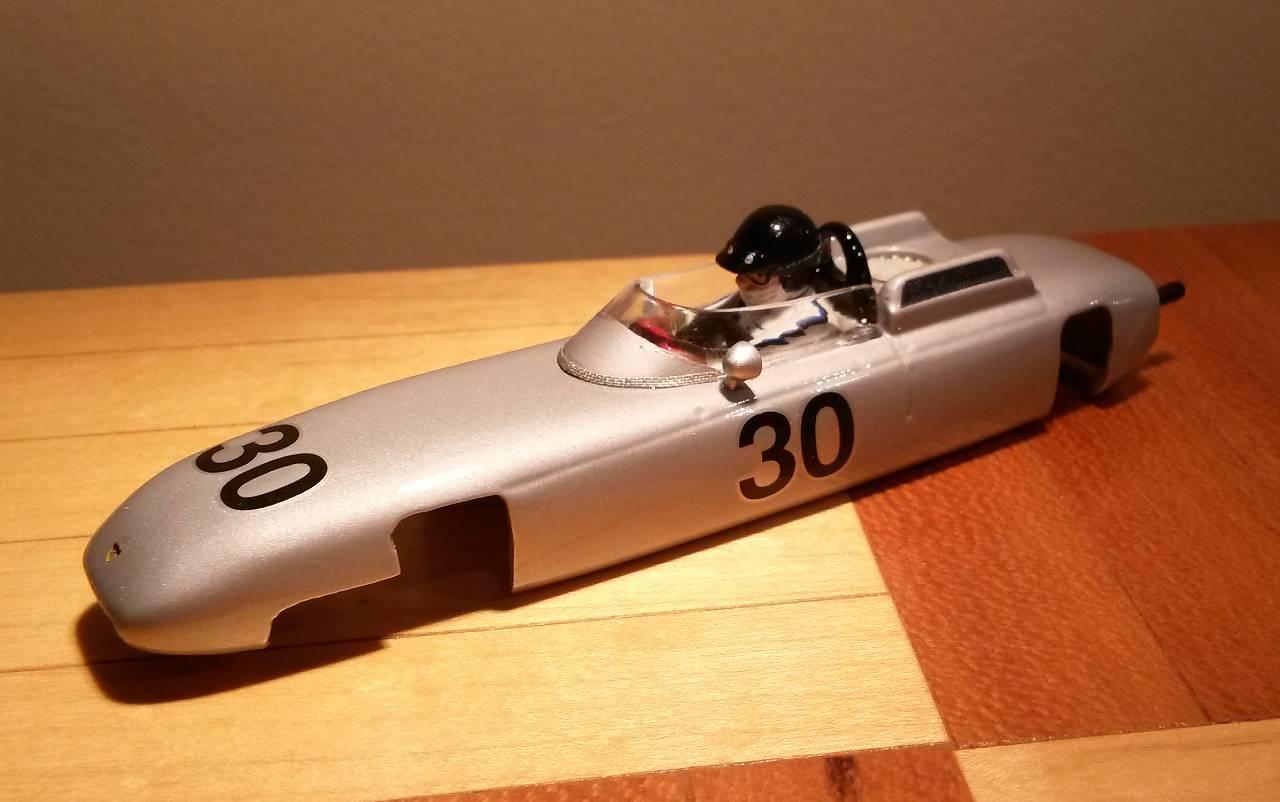 I chose to go with a livery of the #30 car (driven by Gurney) with the only victory for Porsche in the French GP. I exchanged the kit head (which is very nice and should be used for Bonnier (or others)) with the Gurney head from Scaley releases. The driver shoulder and arm detail along with the fan & transmission and exhaust details are not bad on the original model. Of course I am talking about the original Scaley release of this model from the 60’s… The windscreen is nice too, although a touch large but for a model to be raced that is just fine…
First I removed any flashing on the body and windscreen using a fine x-acto knife. The original finish of the body in this kit is good, not perfect, since the original model/material was quite rough in areas and required a tonne of work, but just a little more sanding of the kit body will remove any remaining blemishes (and should be done for any body you plan to paint). Regardless, the material is easily sanded. I also test fitted the windscreen to ensure a nice fit.
I trimmed the body post and drilled a hole for the mounting screw I planned to use – I may sleeve this with a piece of styrene tubing down the road depending on the abuse this car will take.
Although I would still use the original roll bar and exhaust detail that doesn’t mean I can’t improve it a little – so I drilled small holes into both exhaust pipes and drilled out the solid roll bar detail.
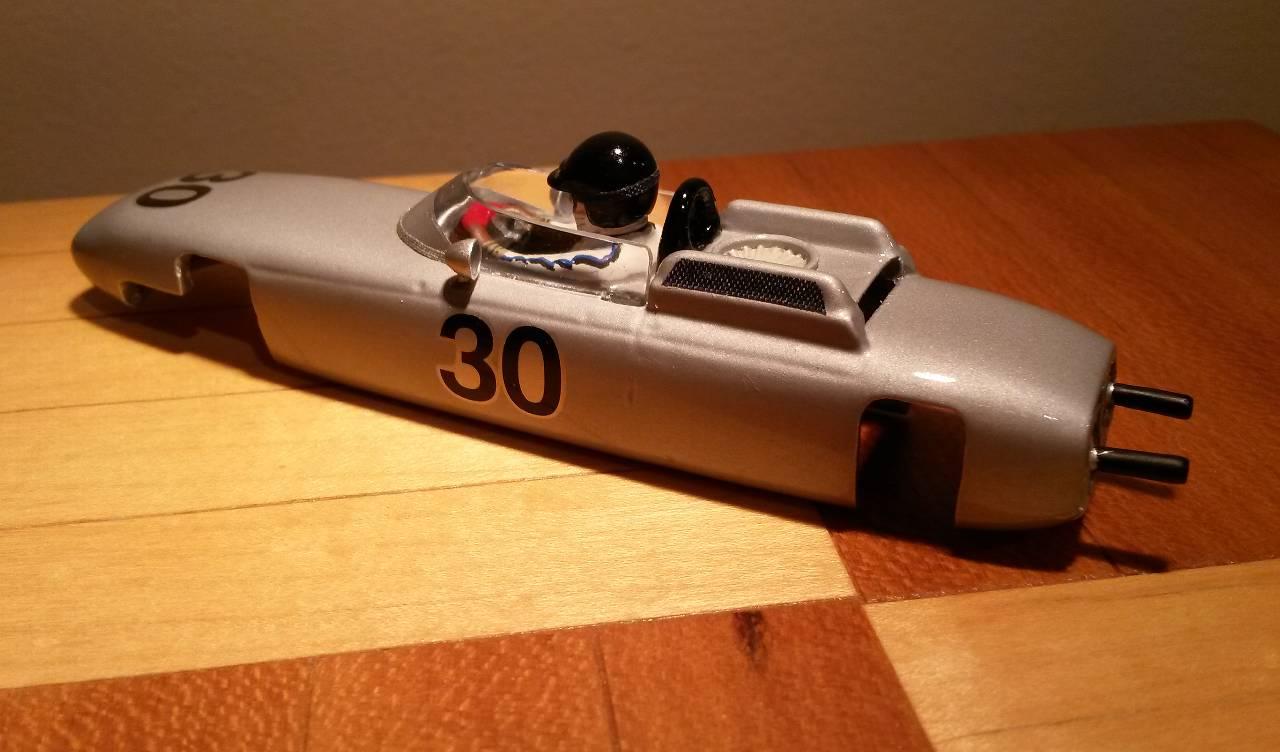
I decided to leave the air intake covers alone and not hollow them out since that would take a lot of work and the probability of screwing that up was way too high. Instead I planned to cut out the ‘openings’ from a dark coloured tent repair nylon ‘adhesive’ and fix that sticker in place, as I’ve done on other projects. In the end the result will look just like a dark grill is covering each opening. Just be sure to cut the nylon patch adhesive using a very sharp blade (for longer narrow strips I use a box cutter blade and after positioning it flat along the edge to be cut just tap it with a hobby hammer to make a clean cut – don’t waste your time cutting it by dragging your blade along a straight edge…)
After washing the pieces to be painted and letting them dry I primed them all using rattle can Tamiya Fine White Primer. Then the whole body was painted with Tamiya TS-30 (Silver Leaf) and given two coats. At this point I decided to paint the nose of the windscreen silver to match the body so it was masked using Tamiya Masking Tape and sprayed as well.
Standard Revell-Monogram black number decals were added using Micro Set/Sol. For the more detailed model I will airbrush the numbers instead… I finally painted a ‘suggestion’ of a Porsche logo on the nose…
I then decided to try something different – an acrylic spray for the finish – I used a can of Krylon Crystal Clear (41303) and gave the body two heavy coats. I have to say I am very happy with the gloss/finish using this stuff since I didn’t sand anything I sprayed. It did take a considerable amount of time to dry, not unlike Tamiya clear however. But patience is of course a virtue here.
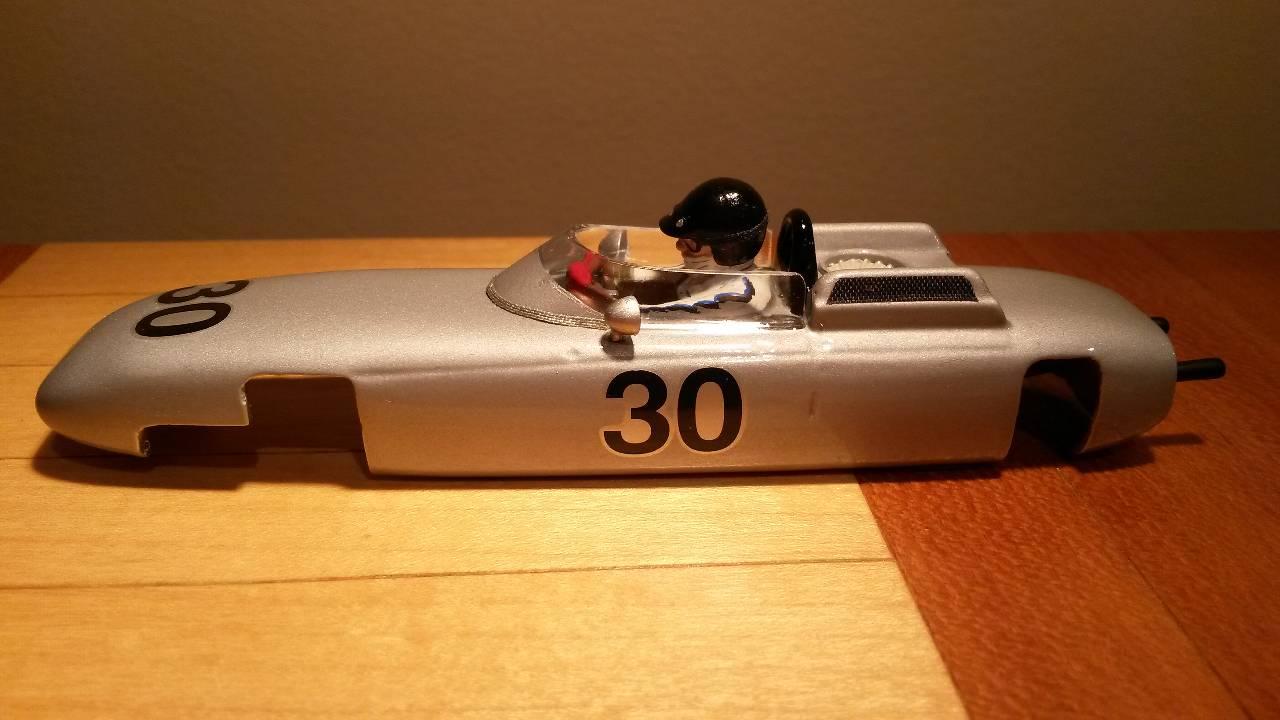
I hand painted the transmission & exhaust details, roll bar, driver’s chest/arms/hands & steering wheel – didn’t need primer – used Tamiya acrylics… some flat, some gloss depending on what I was painting. I also hand painted the driver’s head and mirrors. I used Citadel Mithril Silver (it closely matches the Tamiya silver paint) on the whole mirror and a darker grey on the mirror lenses since I like the effect it creates. I dropped in some Future floor polish into each goggle lens and used a strip of a dark coloured nylon tent repair adhesive for a goggle strap. There was no need for seat belts so none were made from tent repair…
After everything was finally cured I drilled two fine holes for each mirror and tested for fit. I glued the driver’s head into place with Amazing GOOP (clear). I glued the windscreen into place using Gorilla Glue Clear Epoxy. Rather than running a thin bead of epoxy along the bottom of the windscreen I simply applied the epoxy into each of the four mounting pin holes using a toothpick. This ensured a nice clean bond. As for the mirrors, since they were being mounted into the body and not the windscreen I opted to use a pin to apply a tiny amount of Gorilla Super Glue into each hole before pressing each mirror into place. I wasn’t worried about fogging so Super Glue was fine to use…
The front edge of the windscreen that was painted silver in my opinion needed something else to clean up the look where it touched the body (the unpainted sides gave a nice clean edge and didn’t need anything else). Since this is something that is easy to botch up if you try painting directly, I opted to brush on the same silver paint I used on the mirrors onto a very thin strip of nylon tent repair adhesive. I trimmed to fit and then applied along the leading edge of the windscreen that was painted silver too.
I was tempted to add more detail to this car but decided against doing so. In my opinion it looks fine as it is.
The complete painted body as is weighs in at 11.2 grams.
A fun project – time to get to work on the chassis now…
The Happy Canadian Scale Modeler!
