• Creator
    Topic
  • #42391

    A basement track (no matter how small) to test, run and possibly race a Mini Z in the comfort of ones’ own home is a rather nice luxury… so the project begins… let’s see what can reasonably fit into the space I have right now… if testing proves that it is enough then a more permanent solution can be pursued…

    Just using EVA tiles with generic square corner foam barriers doesn’t turn my crank – the track, just like the models on it, must have curb appeal.

    Let’s get going with a paper template to test with and see what’s possible.

    Laying out the basic footprint using scrap paper.
    Attachments:
    You must be logged in to view attached files.

    The Happy Canadian Scale Modeler!

Viewing 6 reply threads
  • Author
    Replies
    • #42398

      Now testing what’s possible in the space… These small scale models are not happy running on the tile floor – the wide tile spacing and recessed grout lines are too bumpy for such small diameter wheels – the paper/poster template provides a much more forgiving surface despite the taped seams. Grip on the paper is better than on the tile floor but still not as good as what I’m looking for. But it is a start.

      Round paper disks (with a penny glued to each centre) lie flat on the paper track template to delineate the course. To make changes these can be moved around quickly.

      Attachments:
      You must be logged in to view attached files.

      The Happy Canadian Scale Modeler!

    • #42477

      Time to figure out something of an infield style layout. Some key considerations for me:

      1. Curbs, transitions and everything fixed to the on road track surface must have a transition or height of no more than 2mm so that these hard body models can manage without snagging them (or tearing them up);
      2. Barriers will be EVA (Ethylene-Vinyl Acetate Copolymer) foam preferably 3 oz. weight (softest) and between 3/8″ – 1/4″ (or 12mm) in height – no taller – to avoid snagging rear wings or any other fragile body detail;
      3. Barriers must be fixed to the borders or track surface with some sort of detachable system so that they may be removed, added whenever the infield layout changes or simply break away in the case of a severe impact. Circular holes cut to fit a heavy object such as a hockey puck placed inside the barrier or magnets recessed into the foam attracted to thin steel plates fixed to the track are two simple options that I’ll try; I like the magnets because they are small and can be hidden in scale style narrow walls or ‘Jersey’ barriers… it is important that these barriers lie flat so that the models don’t submarine – which not only defeats their purpose but also causes lots of damage to the fragile antennae, mirrors, wipers, etc.

      I picked up a pack of TrafficMaster (Home Depot Brand) EVA foam floor tiles (12mm thick) from Home Depot for $18 for six – light grey and dark grey – 3 of each covering 24 sq. ft. – to cut up into barriers. EVA foam tiles can be cut cleanly (and channeled) on your table saw or band saw BTW…

      Painting the EVA foam works but it will rub off… something to keep in mind if you plan to use EVA foam tiles as a racing surface. This foam doesn’t give much grip unless it is damp – another thing to keep in mind…

      Let’s make some curbs and infield sections using white cardboard as the base and fixing 2mm EVA red foam squares (from the dollar store) on top. We’ll eventually fix these curbs to the track surface using Scotch brand double sided carpet tape (the indoor version works well for smooth surfaces but for rough or painted surfaces the outdoor version is much better but almost double the price):

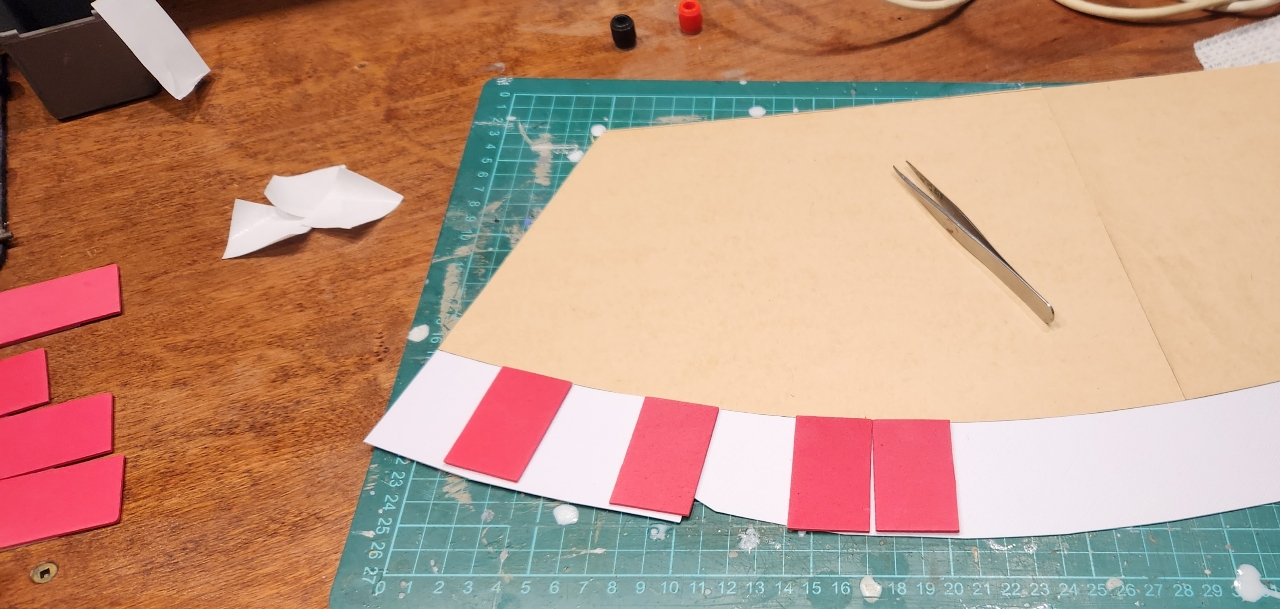
      For now we’ll simply place these loose around the unpainted floor plan to test – in various sizes and radii. I like the straight up against the back wall with a decreasing radius 1st corner (going counter clockwise).

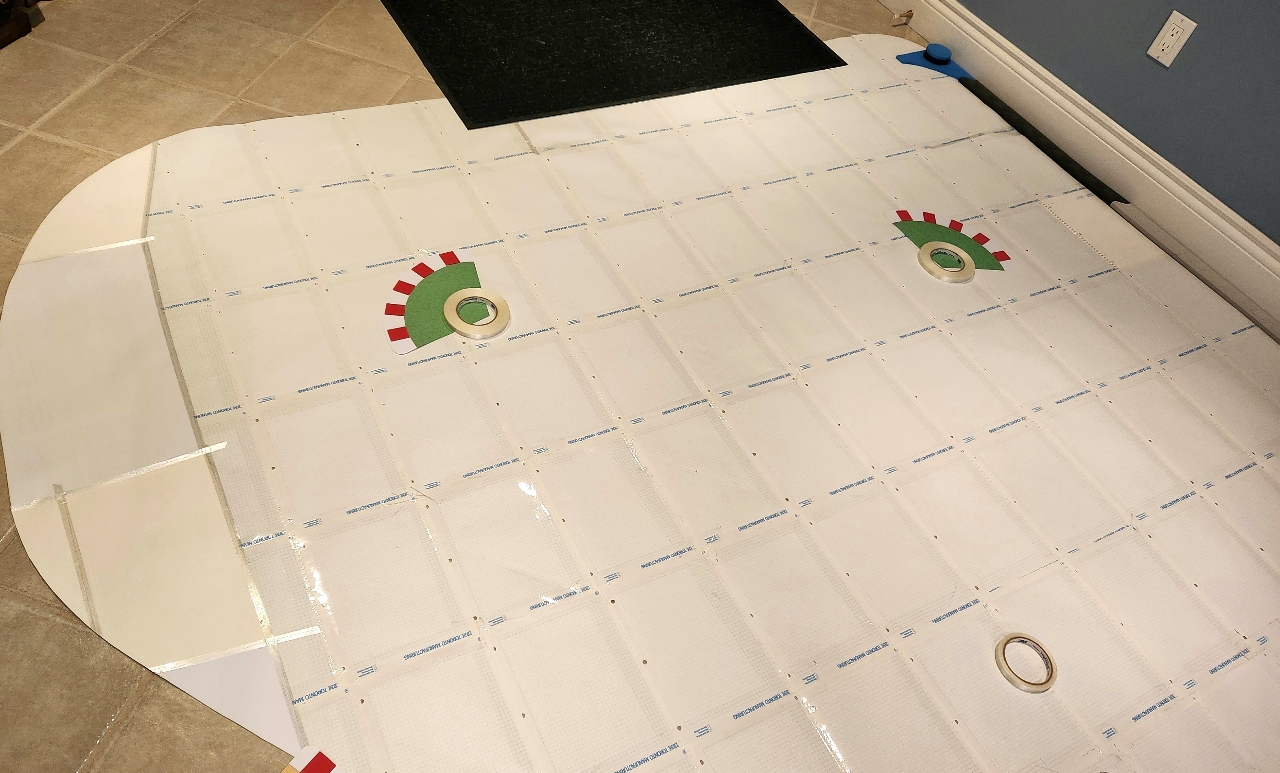
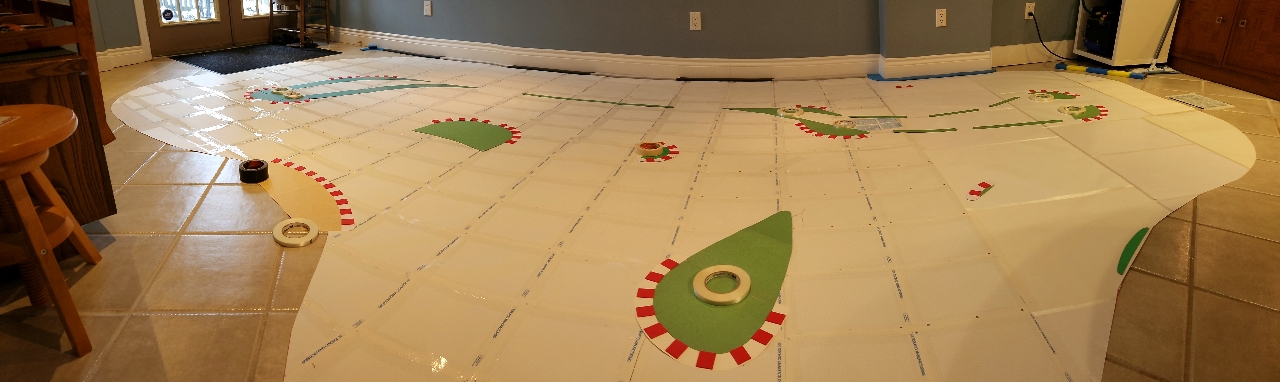
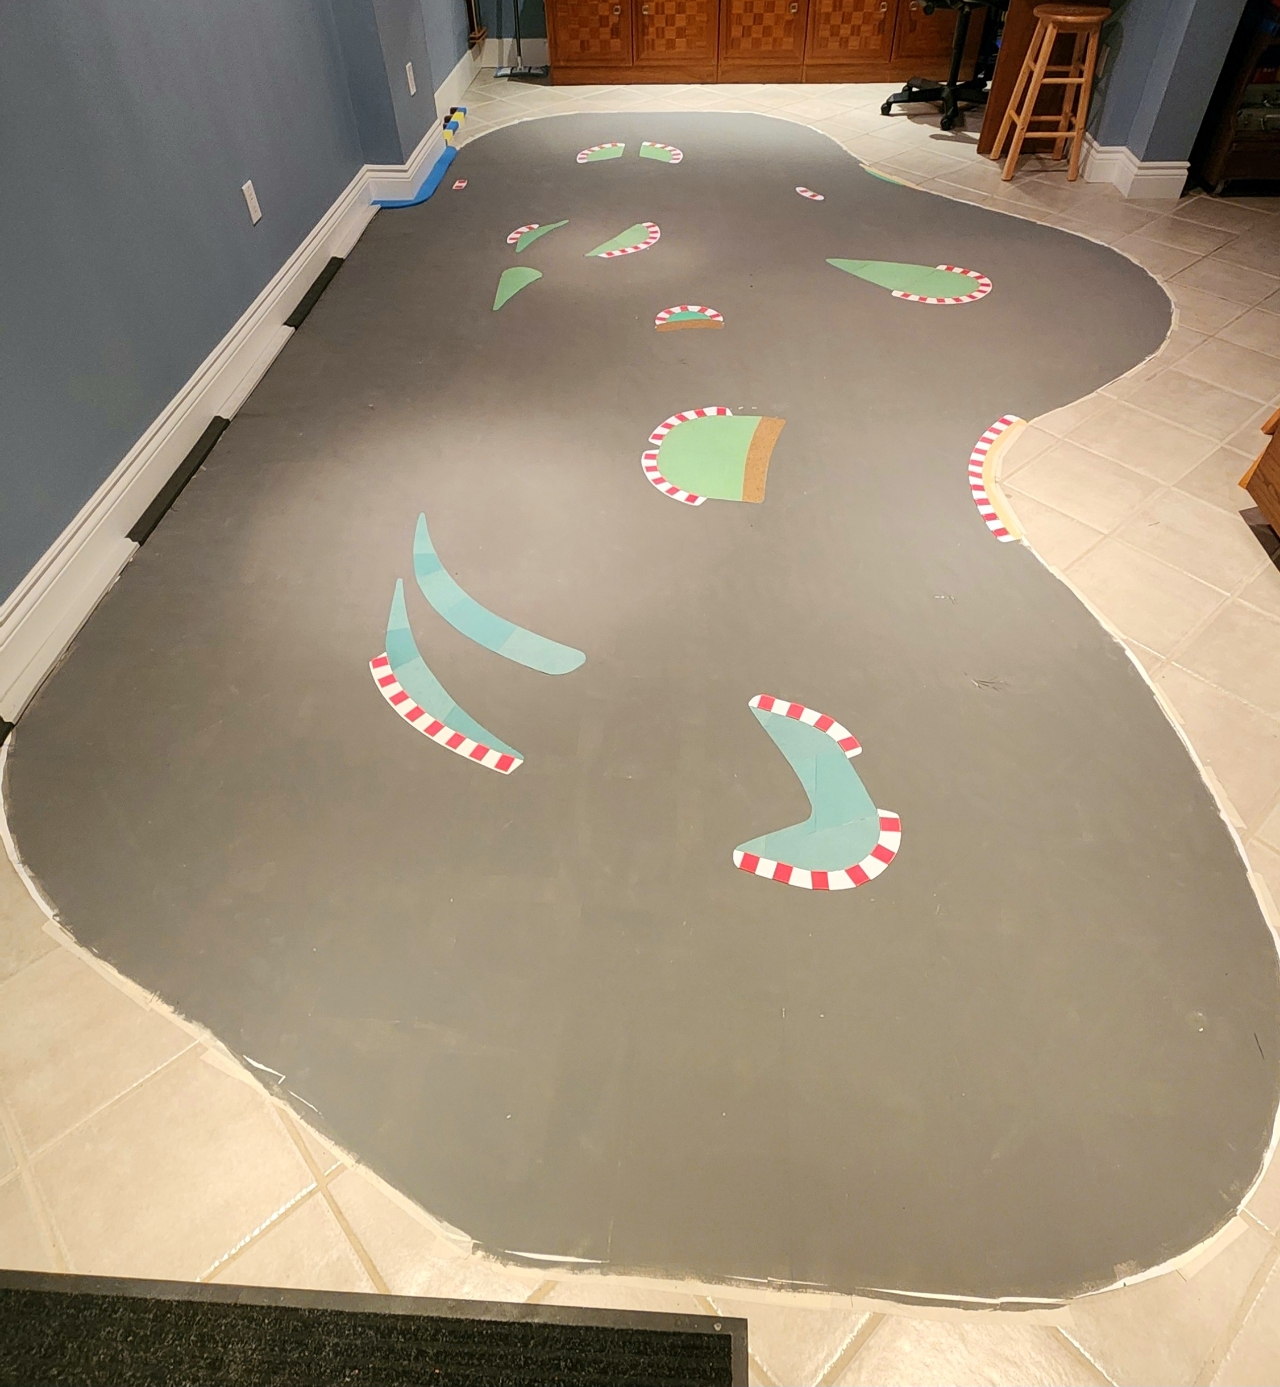
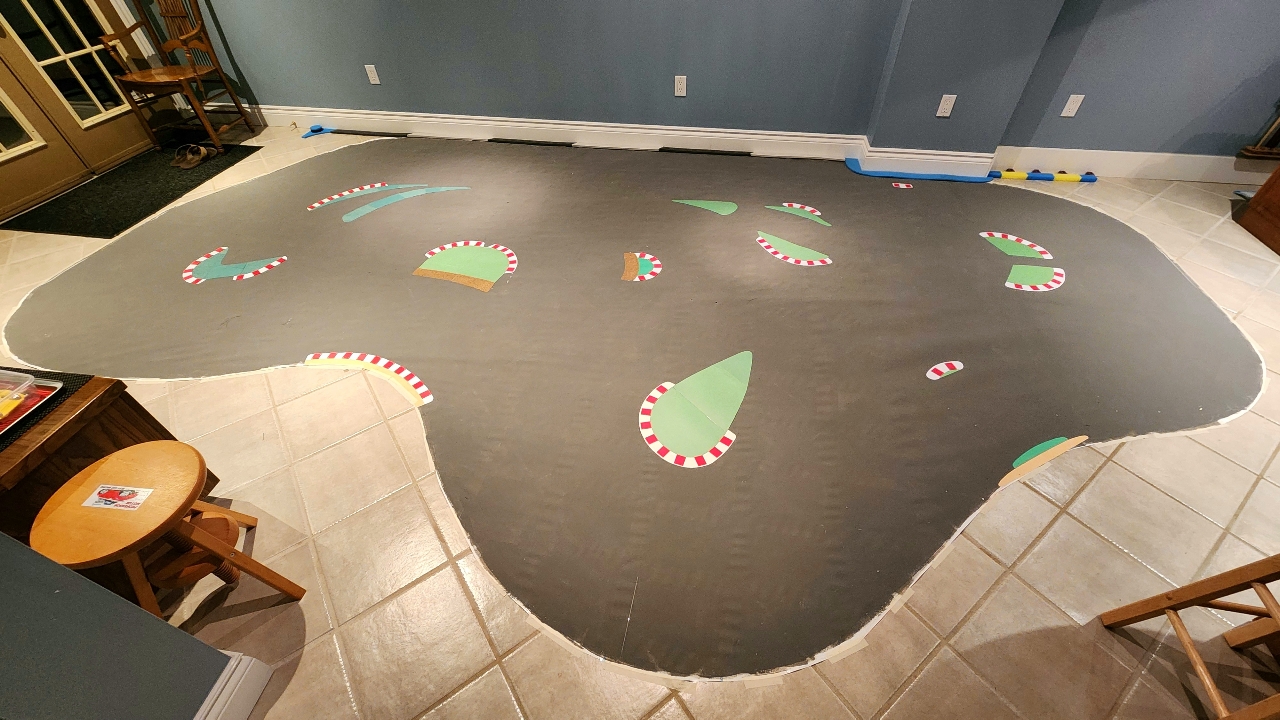
      Time to paint the paper – after stretching it out and fixing it to the floor using duct tape – using an ultra flat primer… then re-stretch the paper after the paint dried… and tape down all of the edges so that the transition for cars running wide is nominal – and more importantly without the possibility of submarining when re entering the track.

      Now lets fix the curbs and infield cardboard sections to the painted paper racing surface using Scotch brand outdoor double sided carpet tape.

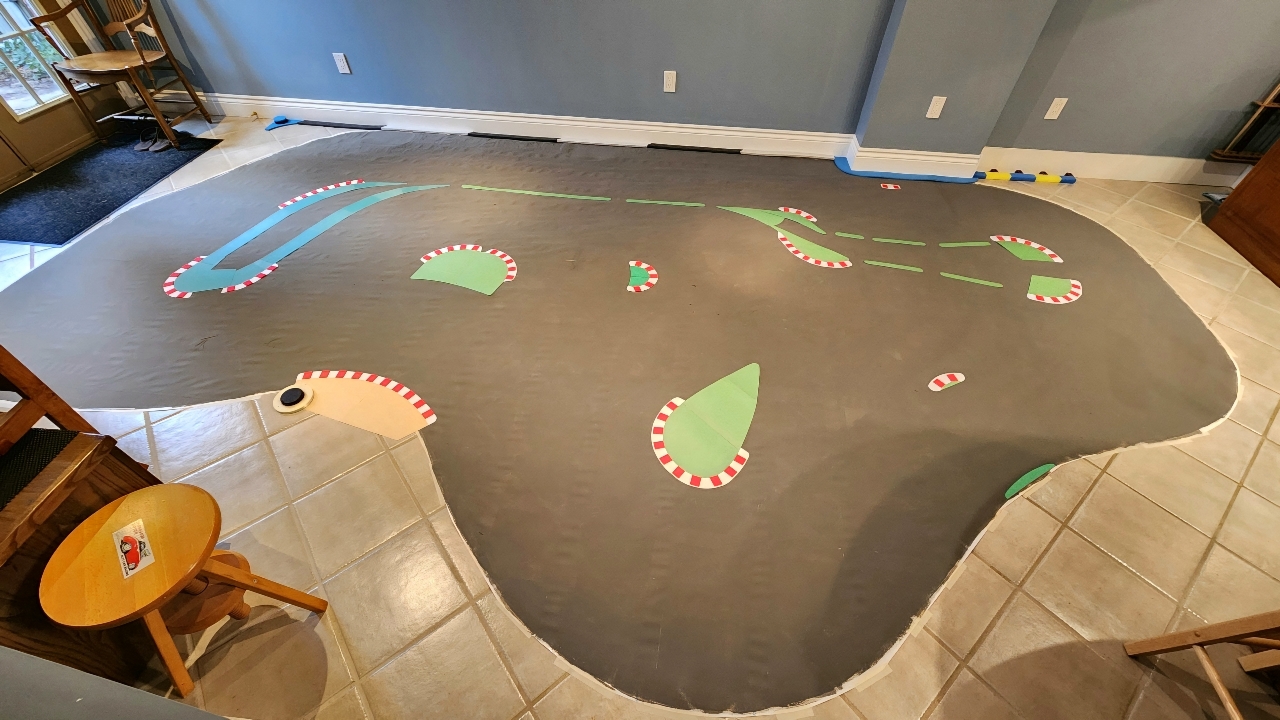
      Notice that I added some sandpaper to a few portions of the infield… let’s test that out too… I’m thinking 2 or 3″ wide sandpaper edges around the outside of the layout to improve the grip of any models sliding wide… do they provide more grip than the painted surface? Who knows… I think they’ll offer less grip which may be even more realistic… but they look like a gravel runoff without doing anything more… if they flip a car they’ll be removed but that’s why we test…

      Time to have some fun!

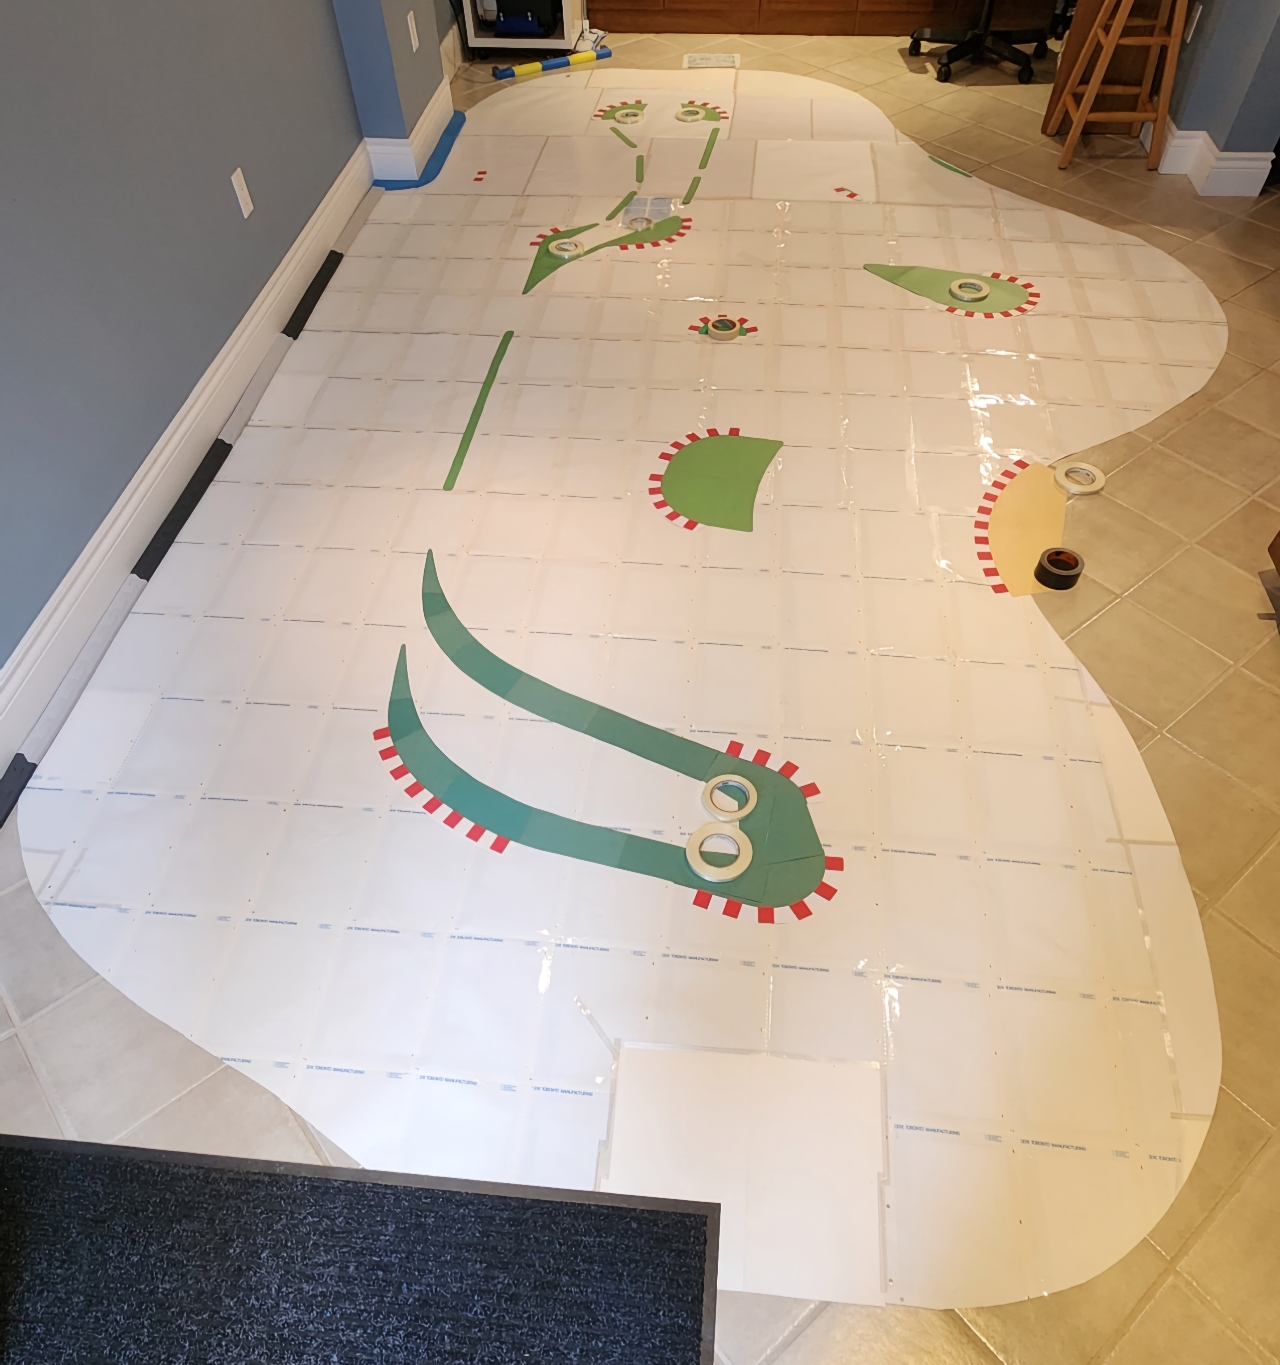
      The remaining ripples in the paper are not a problem for the models to cope with but in any final version of this floor or table layout a thick cardboard underlay or 2.7mm ply will be used. Remember, this is a test layout to sort out what works and what doesn’t… so far so good…

      Next up some infield removable raised walls/barriers…

      Attachments:
      You must be logged in to view attached files.

      The Happy Canadian Scale Modeler!

    • #42485

      Wow! This is looking pretty great!

    • #42518

      Great work Art, it looks promising, I have been looking at the Mini Z for the longest time, now with all this added possibilities that you are suggesting the idea is growing strong on me, unfortunately time remains a challenge for me but I enjoy very much what you guys are heading to.

    • #42530

      Well,

      The Zing test is coming along nicely… now I’ve added some white lines to help sight the car as it approaches the corners on both ends of the back straight. Didn’t realize how important this is and why racing on a single colour surface towards an obstacle is so much more difficult without them… and I don’t want to learn the hard way either. Now it is not just more comfortable approaching a corner at high speed but it makes it so much easier to set up the corner and plan your racing line through.

      So far with my testing on the Zing I’ve drawn several conclusions:

      • a small 17′ x 8′ (or more) footprint works well and is a worthwhile endeavor. A 28 or 30″ wide straightaway and 24″ wide corners also seem more than adequate – but testing with additional models on track is needed to see if the track width needs to be increased in the corners, the straight, or both – but one thing is certain – the footprint size is just fine. In fact, some of the Kyosho brand on road foam tracks (now discontinued) came with 60cm (24″) wide lane widths throughout (using 30cm square tiles).
      • a painted flat/primer acrylic surface together with untrued urethane tires offers plenty of grip for a smaller space allowing more precise control – without ever flipping the MR03-RWD-LM Grp C model that I’m using. Handling characteristics for this RWD model with the unaltered stock setup are fantastic! Slight under steer under hard acceleration through a corner and the opposite under braking. A very nice feel and level of responsiveness. Now I can’t do donuts though…
      • the raised 2mm red curb sections fixed to the white curb flat cardstock base still allow the model to run over them but because they are a little bumpy they’ll discourage overly aggressive curb cutting while still helping those that just touch them with their inside front wheel to turn in a little sharper.
      • painted white lines defining the surface edges (especially on straights) where there are no painted curbs help sight the models approaching corners and are a must.
      • playing on the floor works and there is a lot of forgiving runoff area should you go wide but the constant bending and kneeling on the hard floor to work on the track, to keep it relatively clean and to retrieve your model after a run is tough on the knees and back. Raising the track about a foot from the floor would make playing so much more comfortable without compromising your racing view. Placing it on a frame also opens up the possibility for elevation and camber – we’ll see…
      • EVA foam borders 12mm high are the ticket provided there is some give in addition to the foam itself – they must deflect and not be fixed in place otherwise they will still crack or break a Kyosho hard body. For instance, simply placing a 2″ wide solid piece of EVA foam against a wall baseboard isn’t good enough. Better to place a 1/2″ wide strip with narrow 1 1/2″ long perpendicular pieces resting against the wall baseboard (or hard track edge on a table top) every 6, 9 or 12″ or so… and fixing them only where they butt up against the wall baseboard (or hard track edge)… magnets are the other option especially for inside borders… more testing next week on these options…
      • making a lightweight table top surface using a pine/cedar frame, short folding legs and 2.7mm ply in 4 or 5 sections that can be set up or broken down in less than 10 minutes by a single person (with the sections possibly stored back to back on their side on a narrow dolly) is possible (and portable). Detail, such as magnetic barriers, buildings, lights, billboards and other scenic ‘island’ features can be removed and stored in a box… who knows…

      After I test the barriers on the Zing v1 I might go on to a v2 floor test:

      Home Depot carries a thick protective floor covering paper called ‘RAM Board’ that comes 38″ x 50ft (or 100ft if needed) – this should eliminate the bumps with painting regular paper – and with fewer seams will give a smoother surface that could be rolled up like a carpet…

      I might just skip the floor version and go straight to the table top for v2… we’ll see…

      Attachments:
      You must be logged in to view attached files.

      The Happy Canadian Scale Modeler!

    • #42617

      Magnetically fixed inner wall added! Using magnets (every couple of feet) to fix the inside wall in place works VERY well. Forgiving enough without being too easy to move – and I can always add more magnets if warranted – perhaps every foot or so…

      I used steel plates designed for cabinet doors which are small, rectangular in shape and less than 2mm thick – so I fixed them in place to the paper track surface using double sided carpet tape. Leftover slot car magnets were fixed within a channel made inside the foam barriers – on their side – to give the epoxy maximum surface area. So far so good!!!

      Attachments:
      You must be logged in to view attached files.

      The Happy Canadian Scale Modeler!

    • #42633

      Great Job Art, can’t wait to see what you do with the table top version

Viewing 6 reply threads
  • You must be logged in to reply to this topic.