
Forum Replies Created
-
AuthorReplies
-
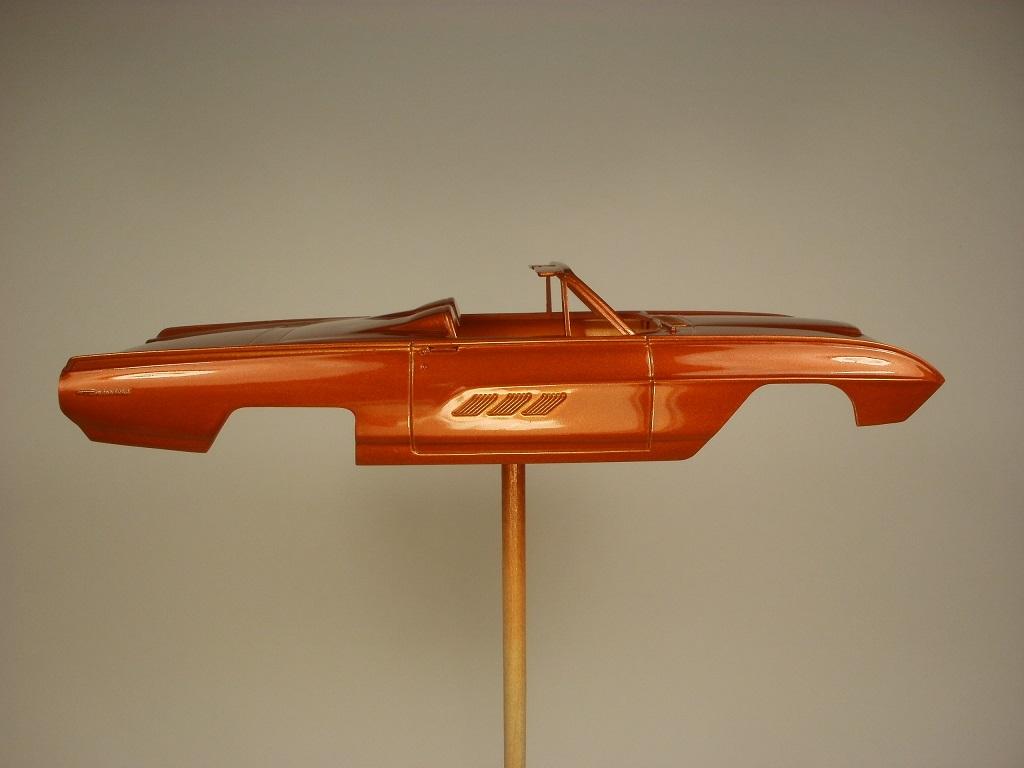
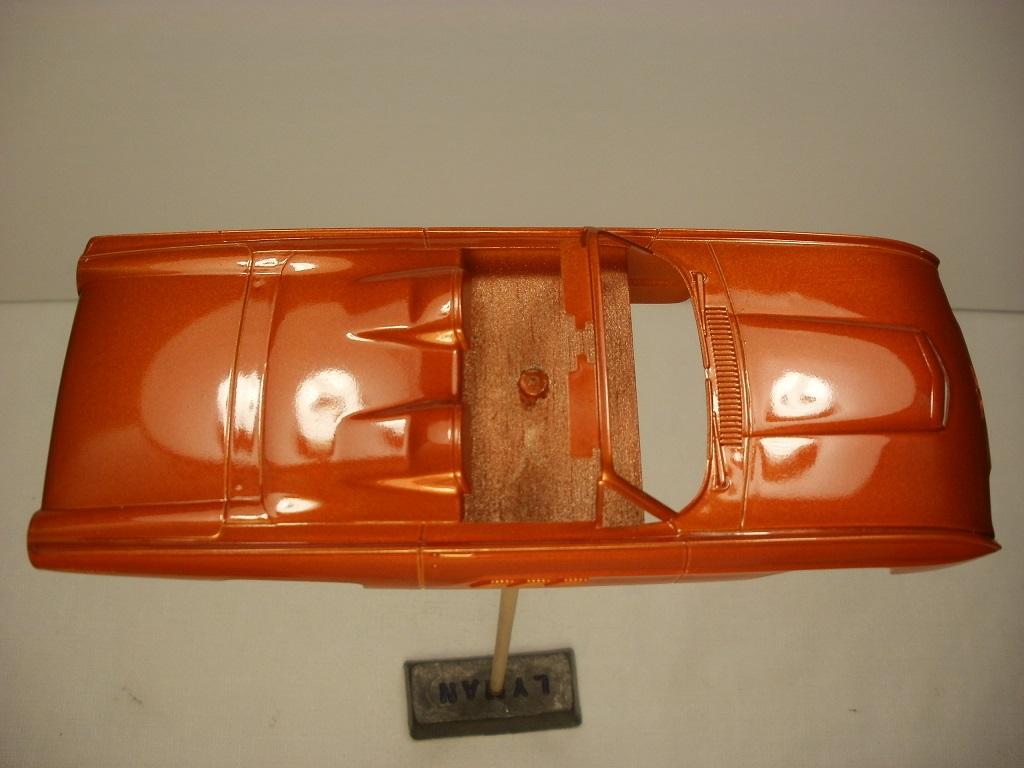
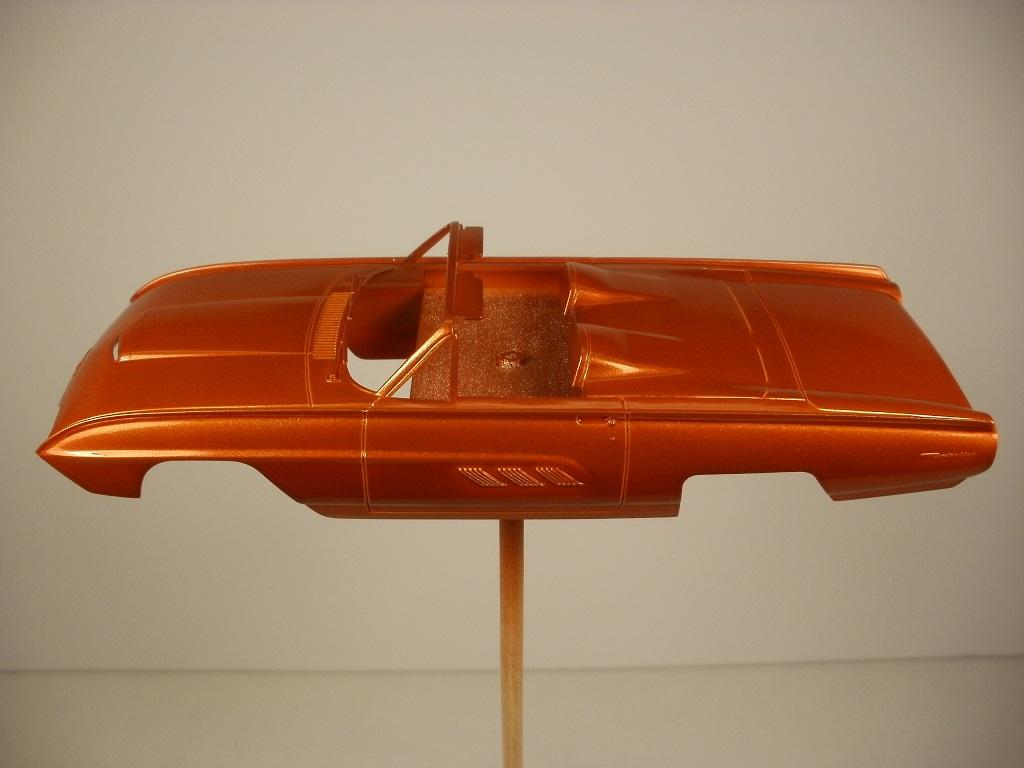
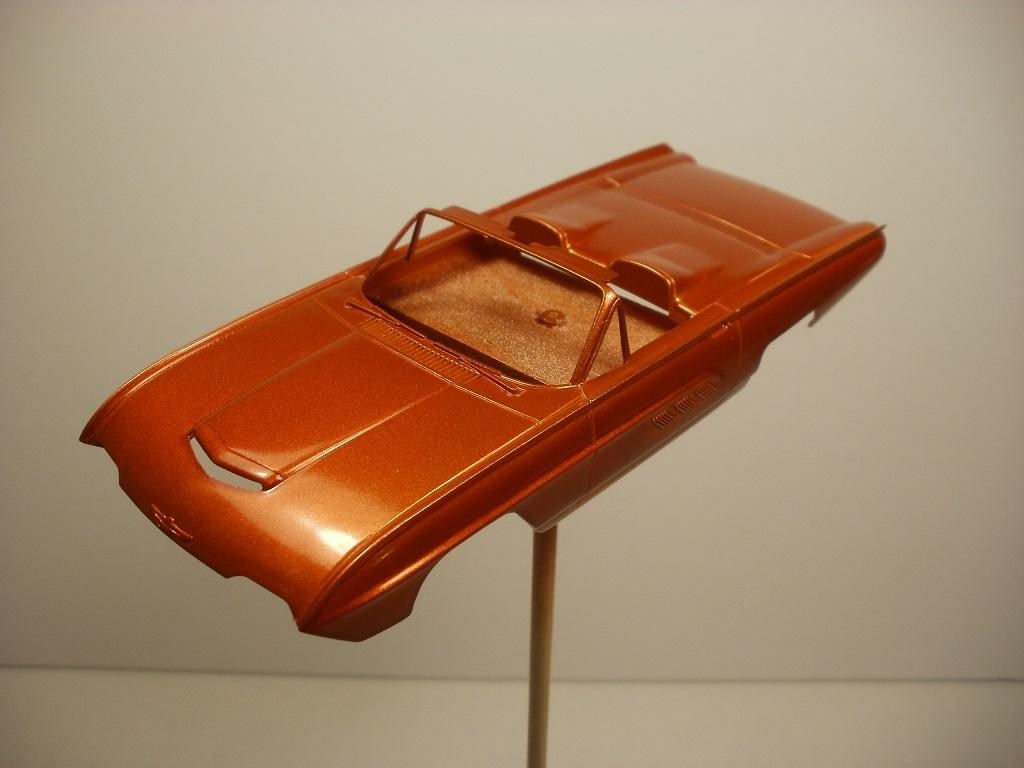
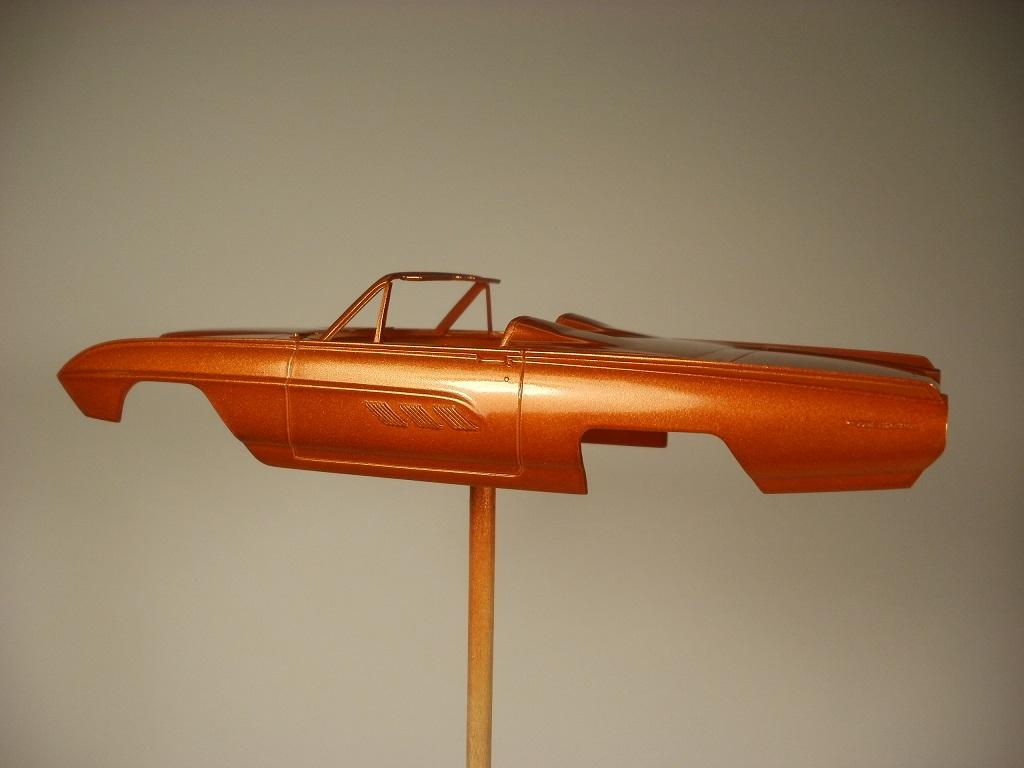
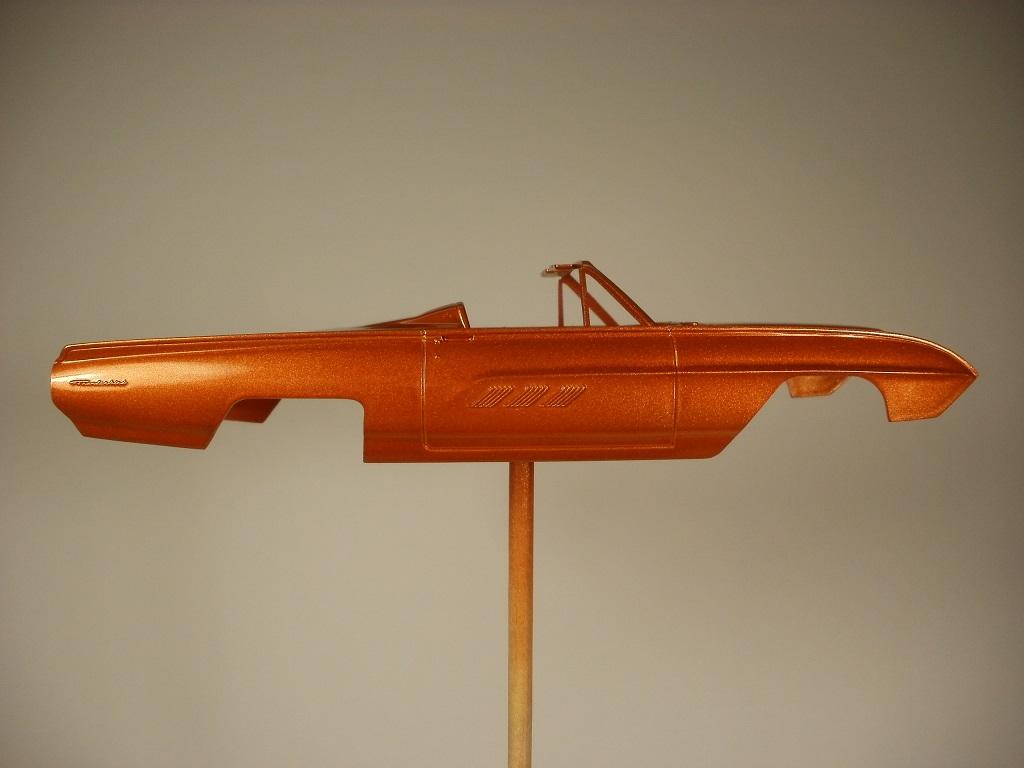
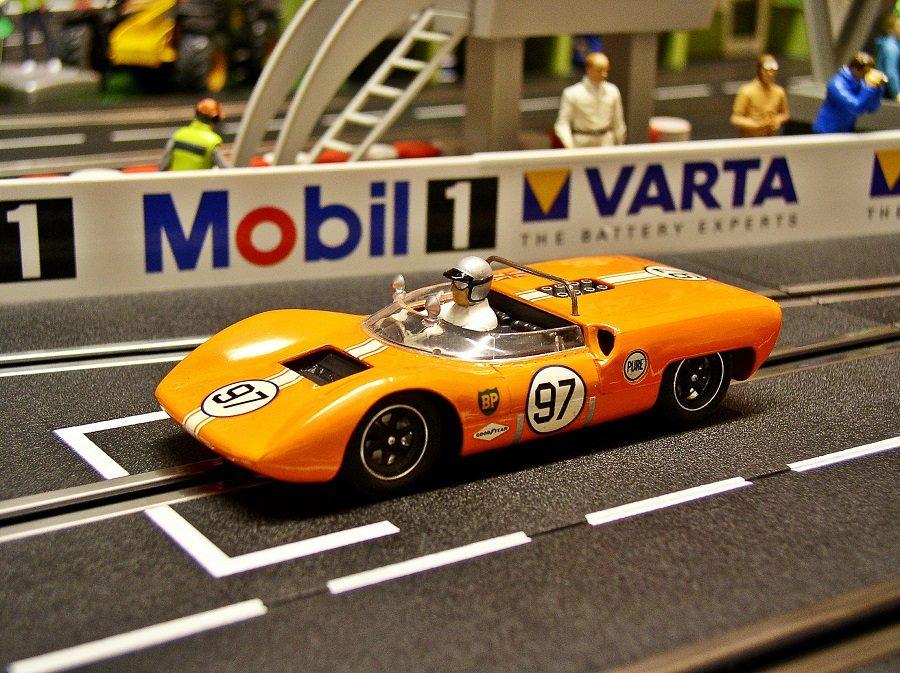
This is my second attempt at clear-coat. I don’t care who’s brand of metallic paint you use. They often have very little shine on their own as if designed to require clear-coat no matter how well the base paint is applied. Why fight gravity? I was not happy with the base coat shine, so I grabbed the can of clear. The difference is night and day. The first pic below is the same view as the last pic on the previous post above. I may not be as good as other builders. But this one paint application came out better than everything I’ve done before it. I’m sure glad this car/class isn’t getting a single decal. Let it sparkle!!! B-)

Good to hear from you JohnnySlots. Please post a pic of your Thunderbird when you can?
Very cool that your dad produced a movie! The T-Bird in the movie was a 1964 or 65?
Plain yellow isn’t a very good T-Bird colour to me so I went with something a bit more suited for a custom boulevard cruiser. I call it “deep fiery tangerine dream”. Tamiya calls it “metallic orange”. To each his own. :yahoo:
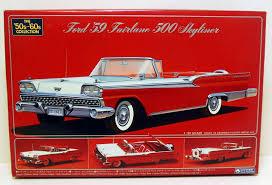
My niece was kind enough to throw the Fairlane 500 Skyliner kit into the mail for me. Perfect to add to the build list. However, gloss black is one colour I’ve never bought. I’ve never wanted a black slot car before. How do you buy black paint for a police car when everything is closed?
So I took a chance and called several hobby shops until someone answered the phone. John’s Hobbies answered and had the paint in stock. He says “How do you want it shipped? Canada Post or floor-mail?” I just laughed. I paid for the items in advance with my credit card. Called again when I pulled up to the store and it was on the floor just outside a locked door with one of the owners waving from behind the glass. I met not one person during the 20-minute trip which to me was an essential or I would not be able to continue building slot cars. I stayed within the boundries of self-isolation. Mission accomplished.
Happy building on whatever you’re building!
Ken
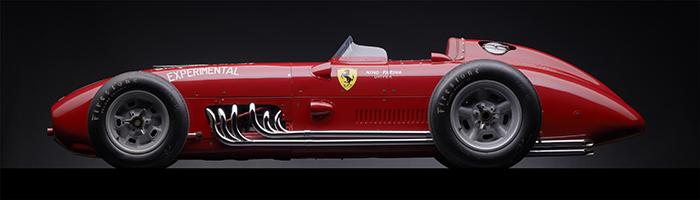
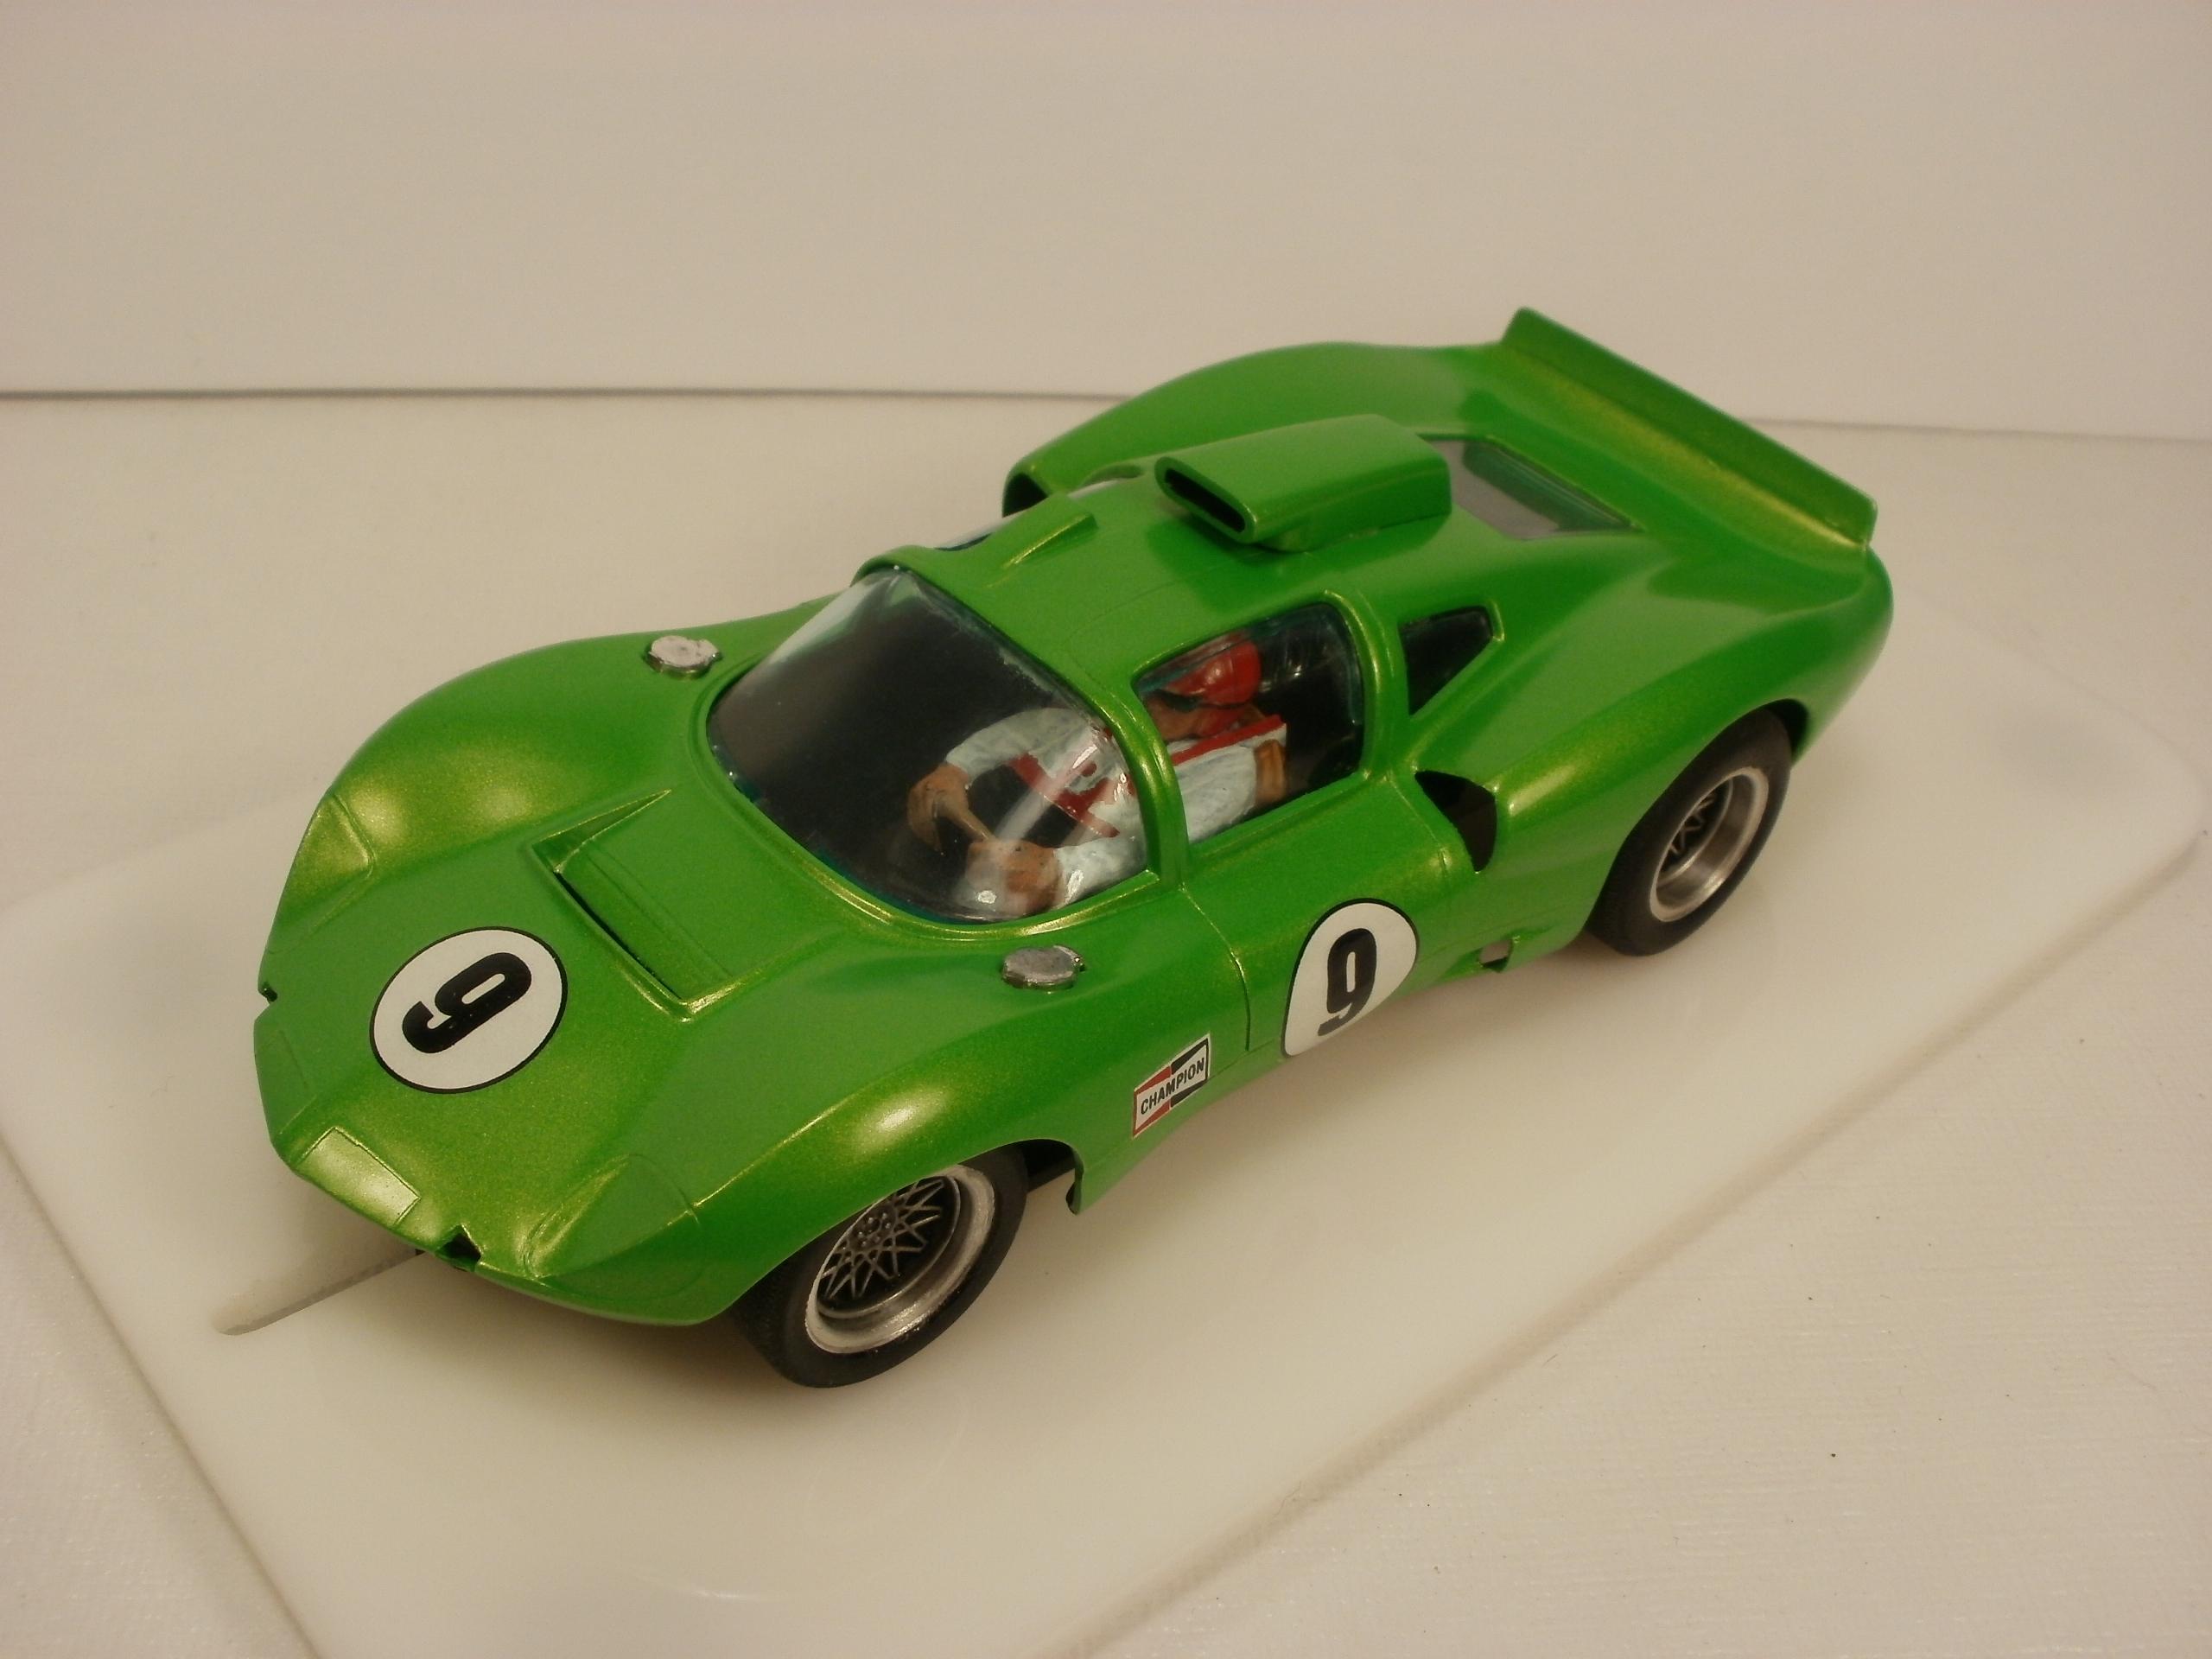
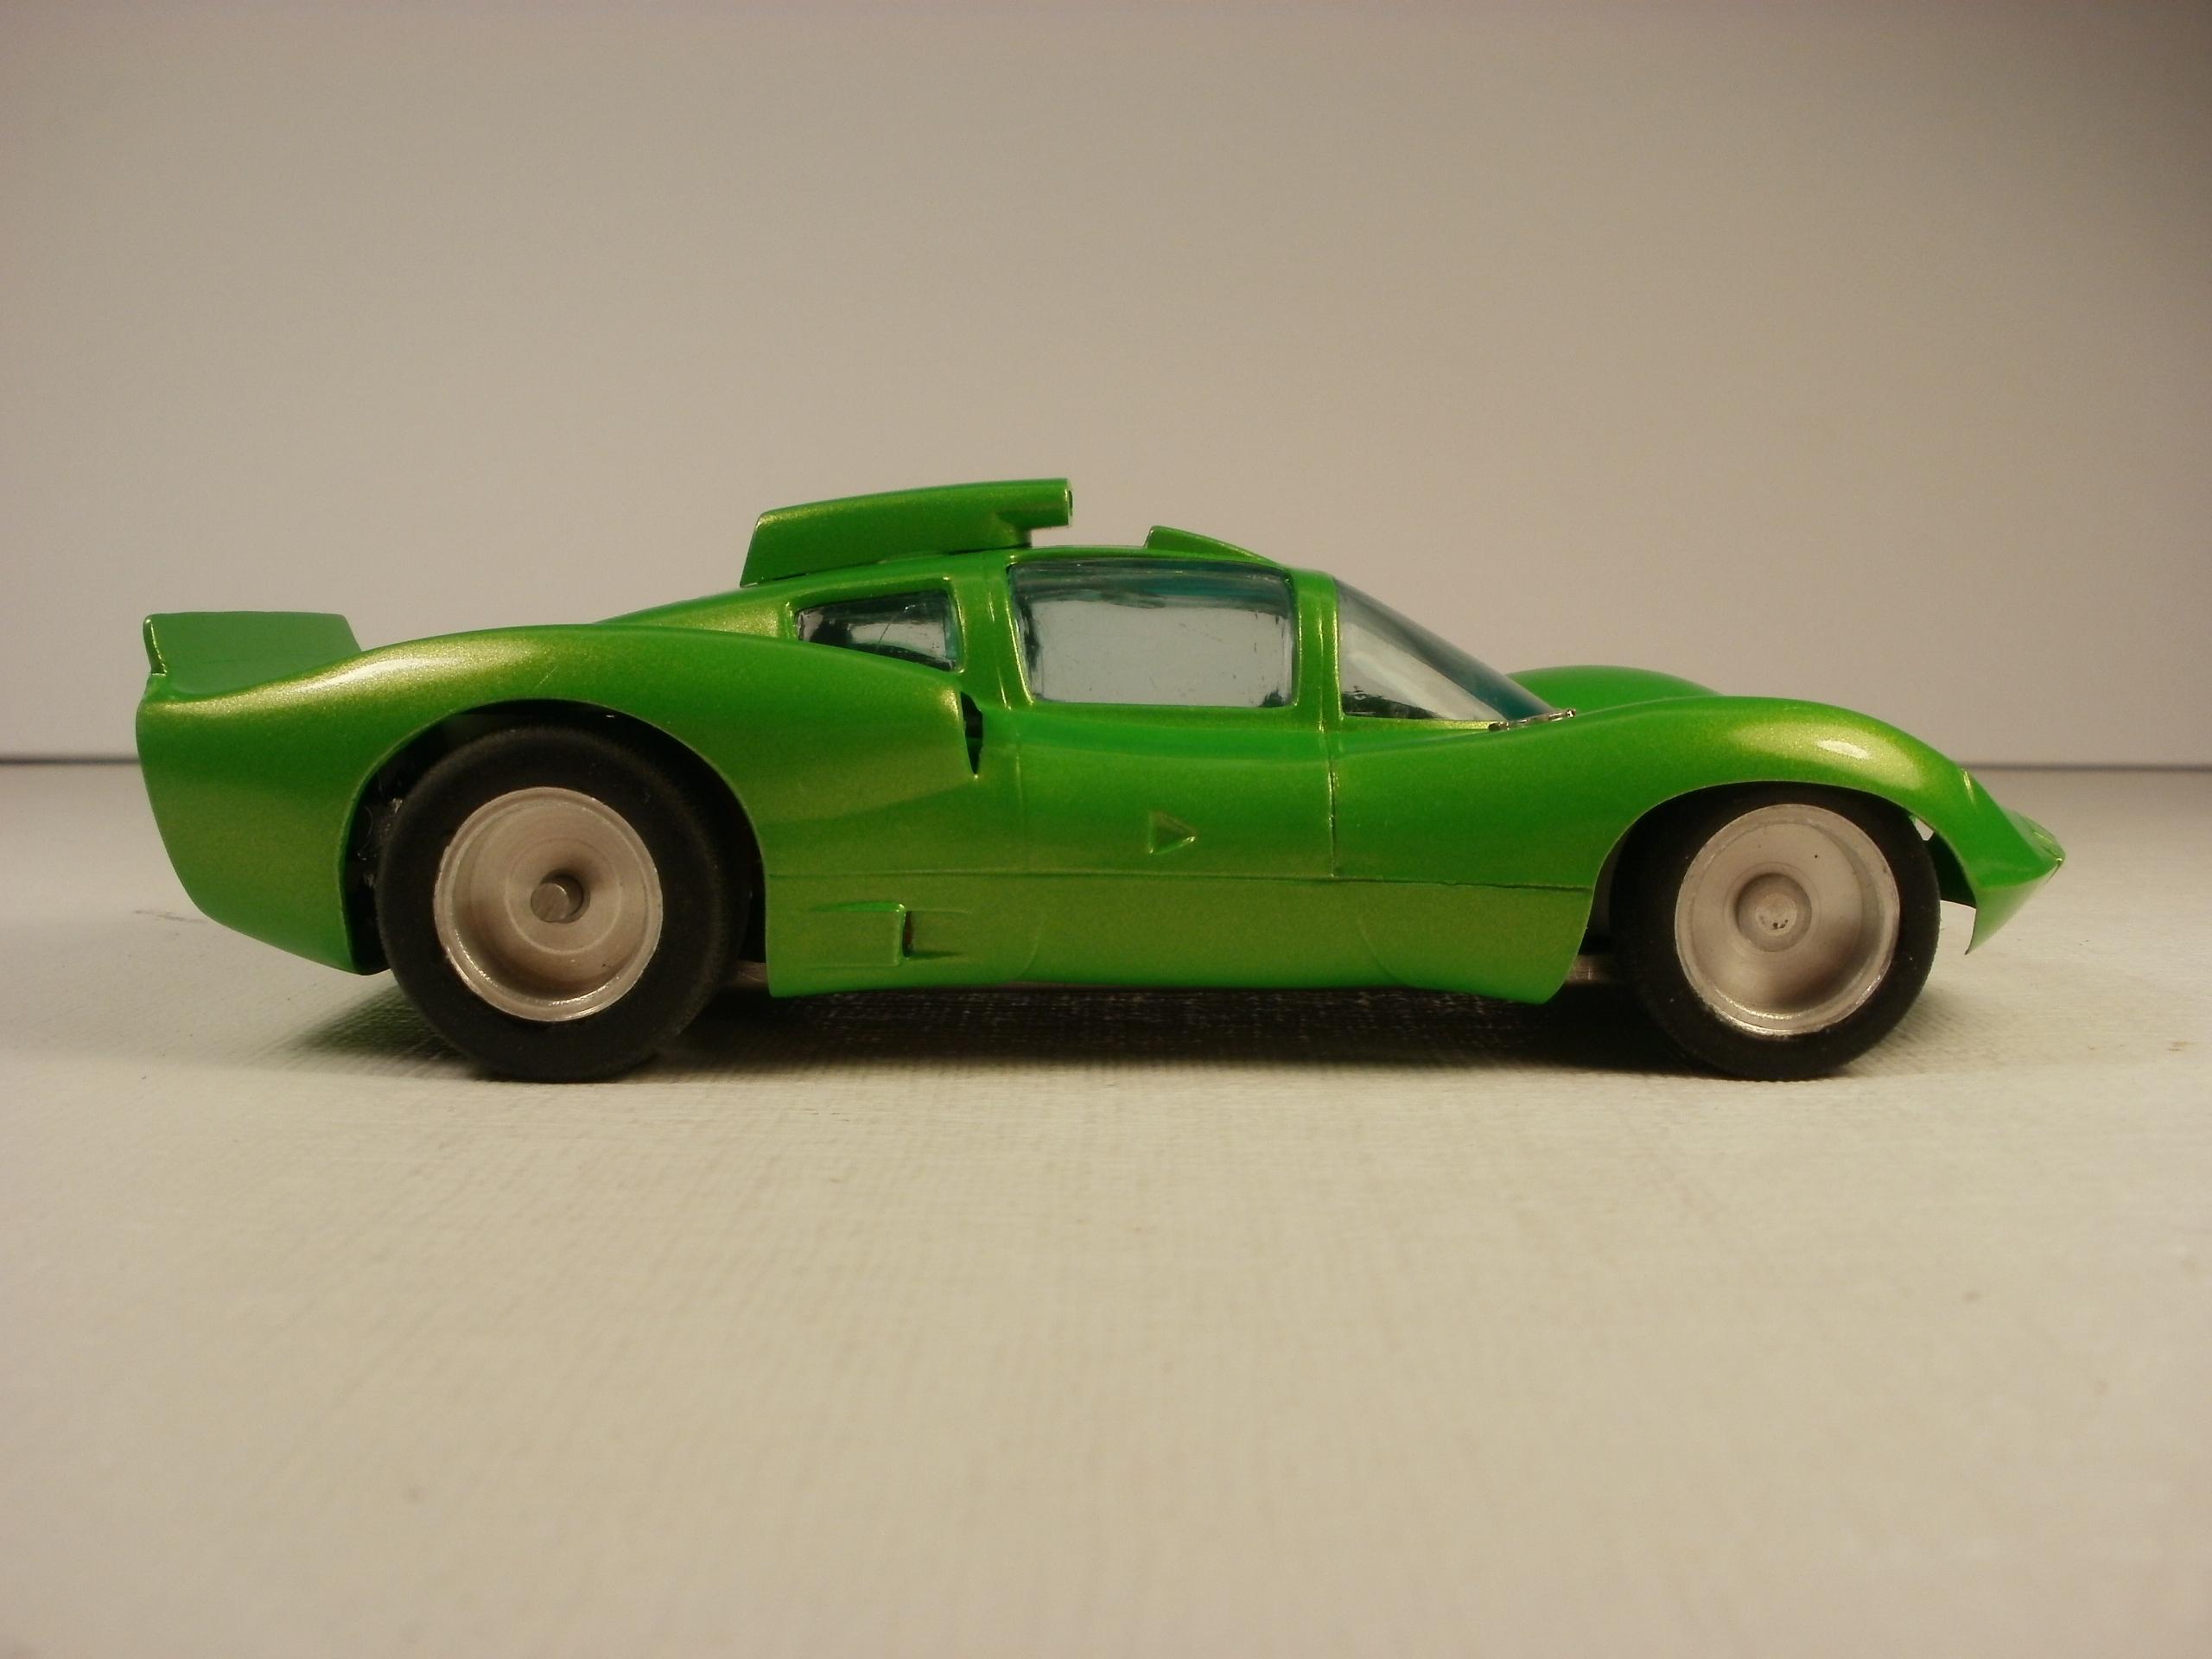
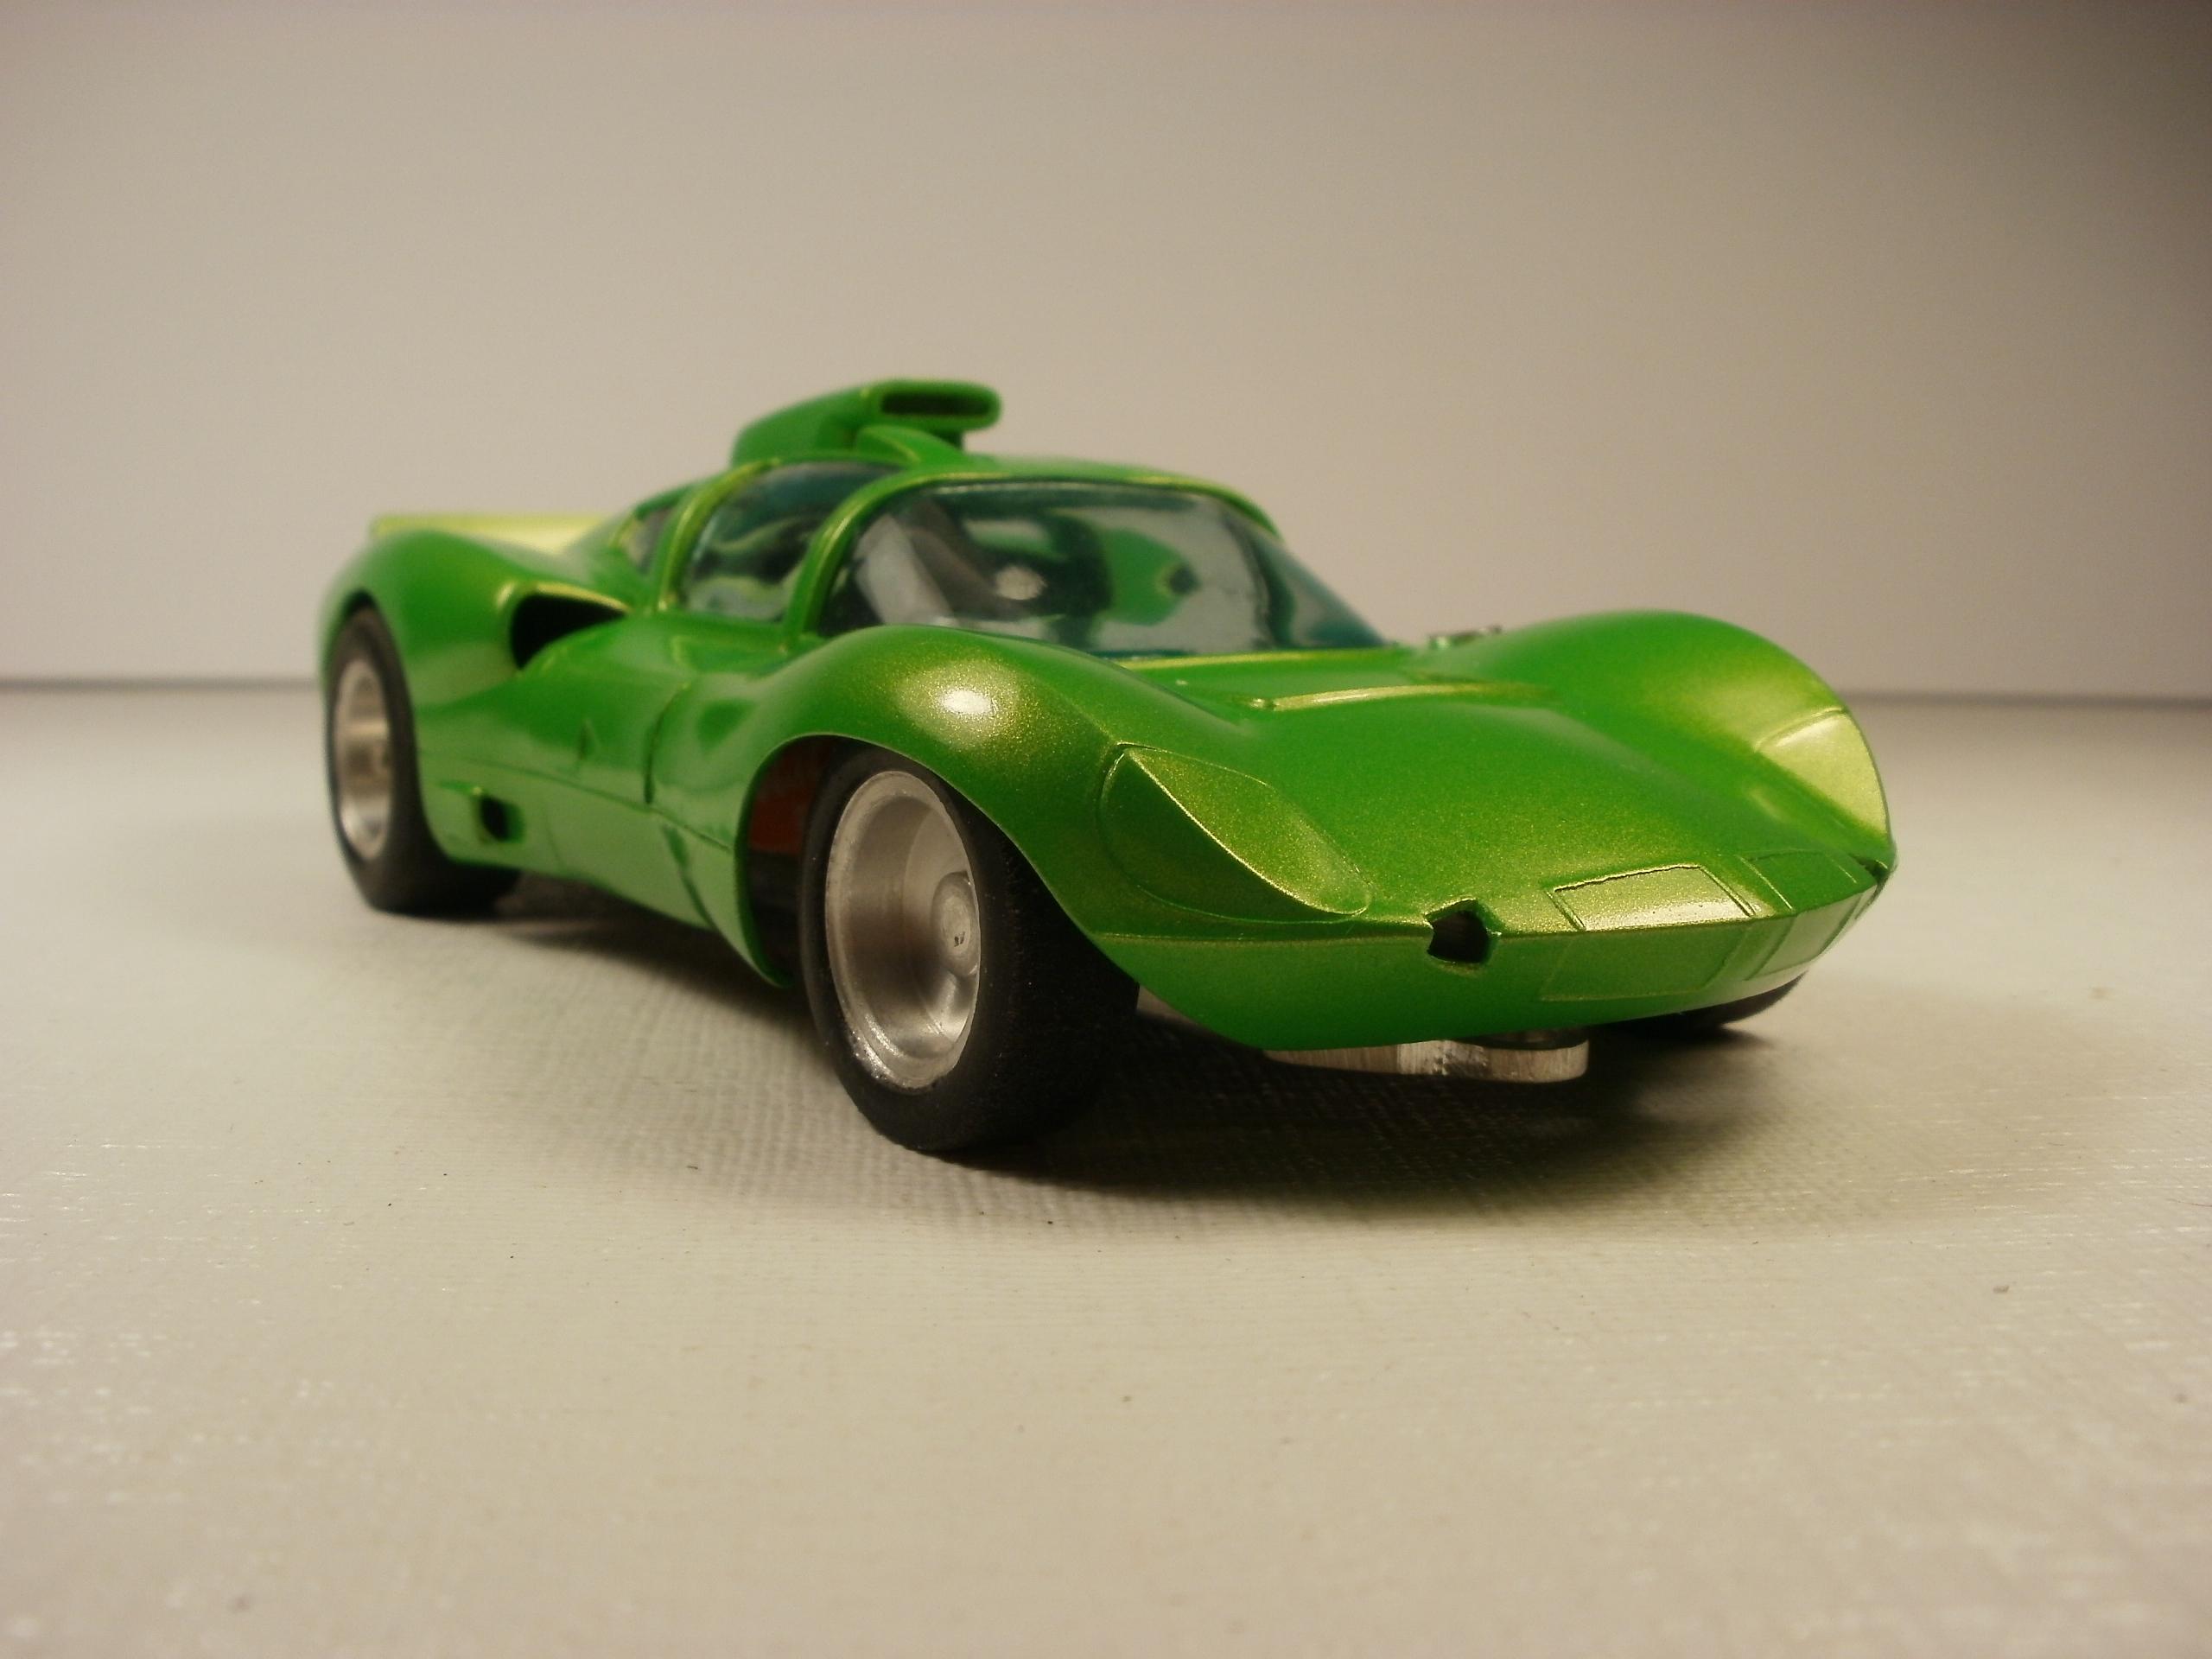
After finishing the car. I keep wondering why it looks so different from the real Ferrari Bardahl Special? You need to lay one picture over the other to really spot the differences. And they are major differences.
1) The kit has more of a taper from the cockpit to the nose. The real car had more of a straight hood towards the nose before dipping down.
2) The rear end of the kit is much shorter from the head rest to the back of the car compared to the real car. That makes the wheelbase longer than the real car.
3) The middle of the body is longer on the kit than the real car. Making the wheelbase even longer again.
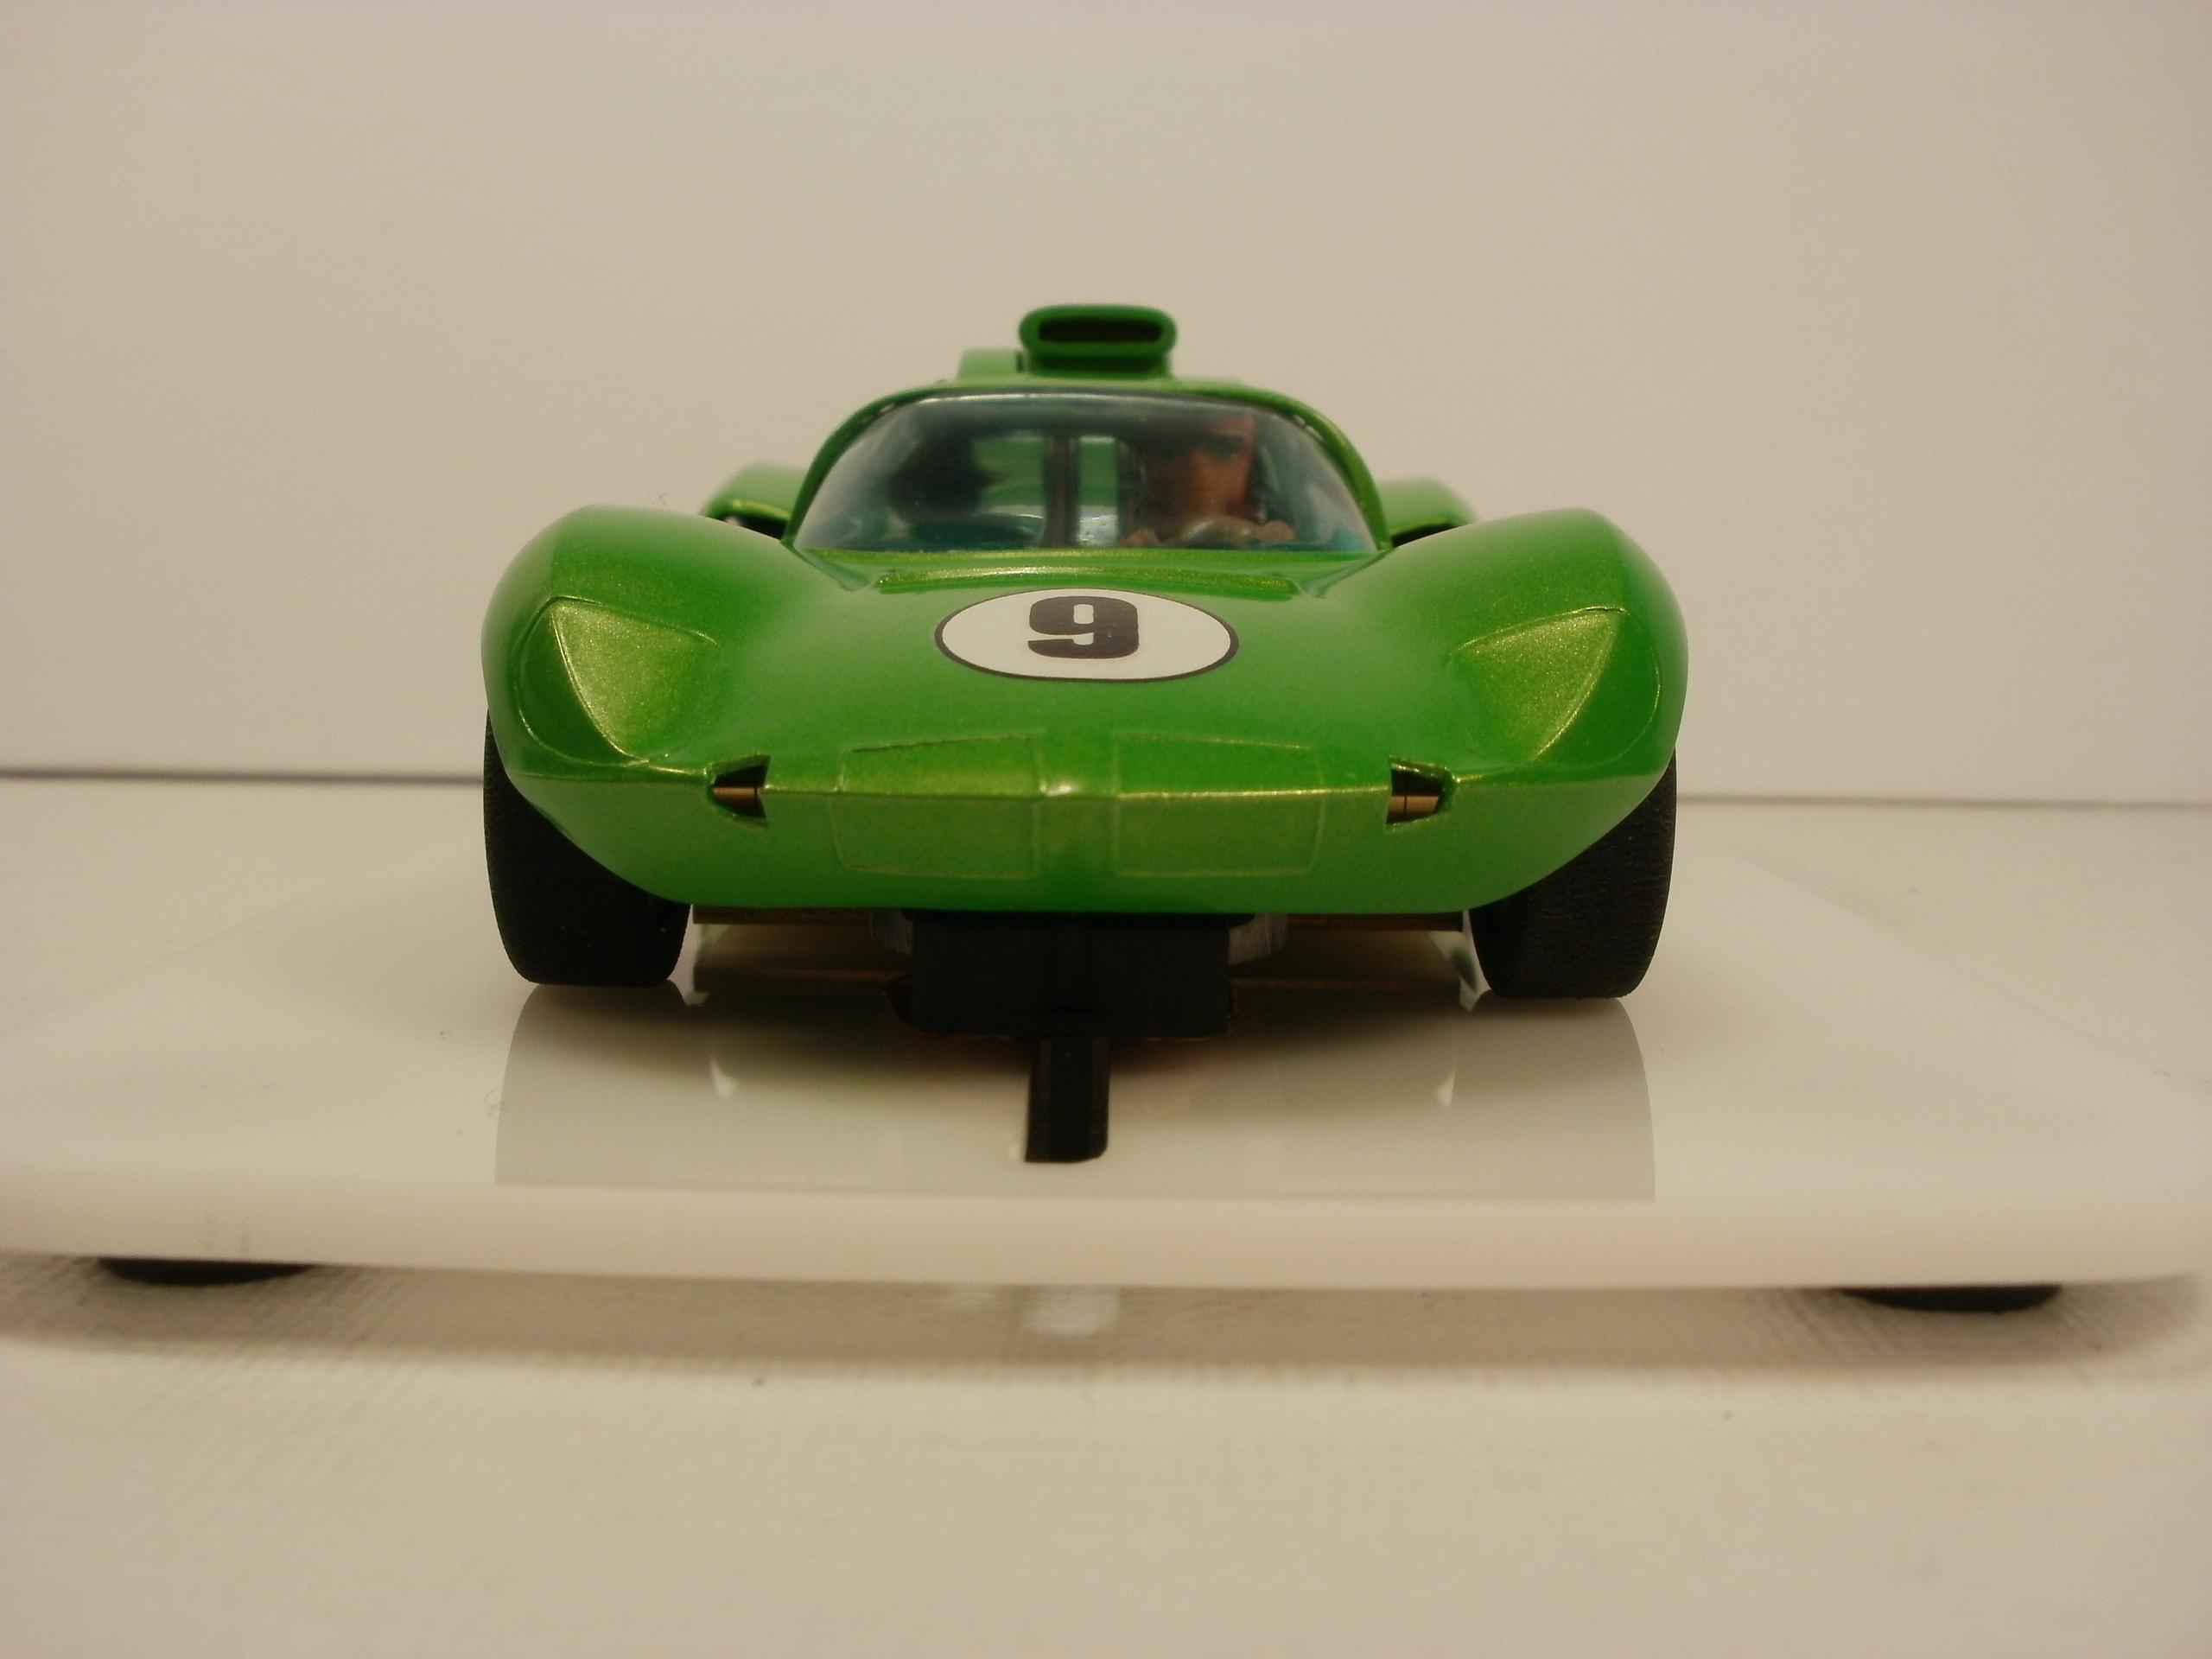
4) From the front view. The kit has squared edges at the top of the body. The real car is more rounded.
So if you want a tapered nose, shortened rear, long body, squared edged Ferrari Bardahl Special? Then this is the car for you! :yahoo:
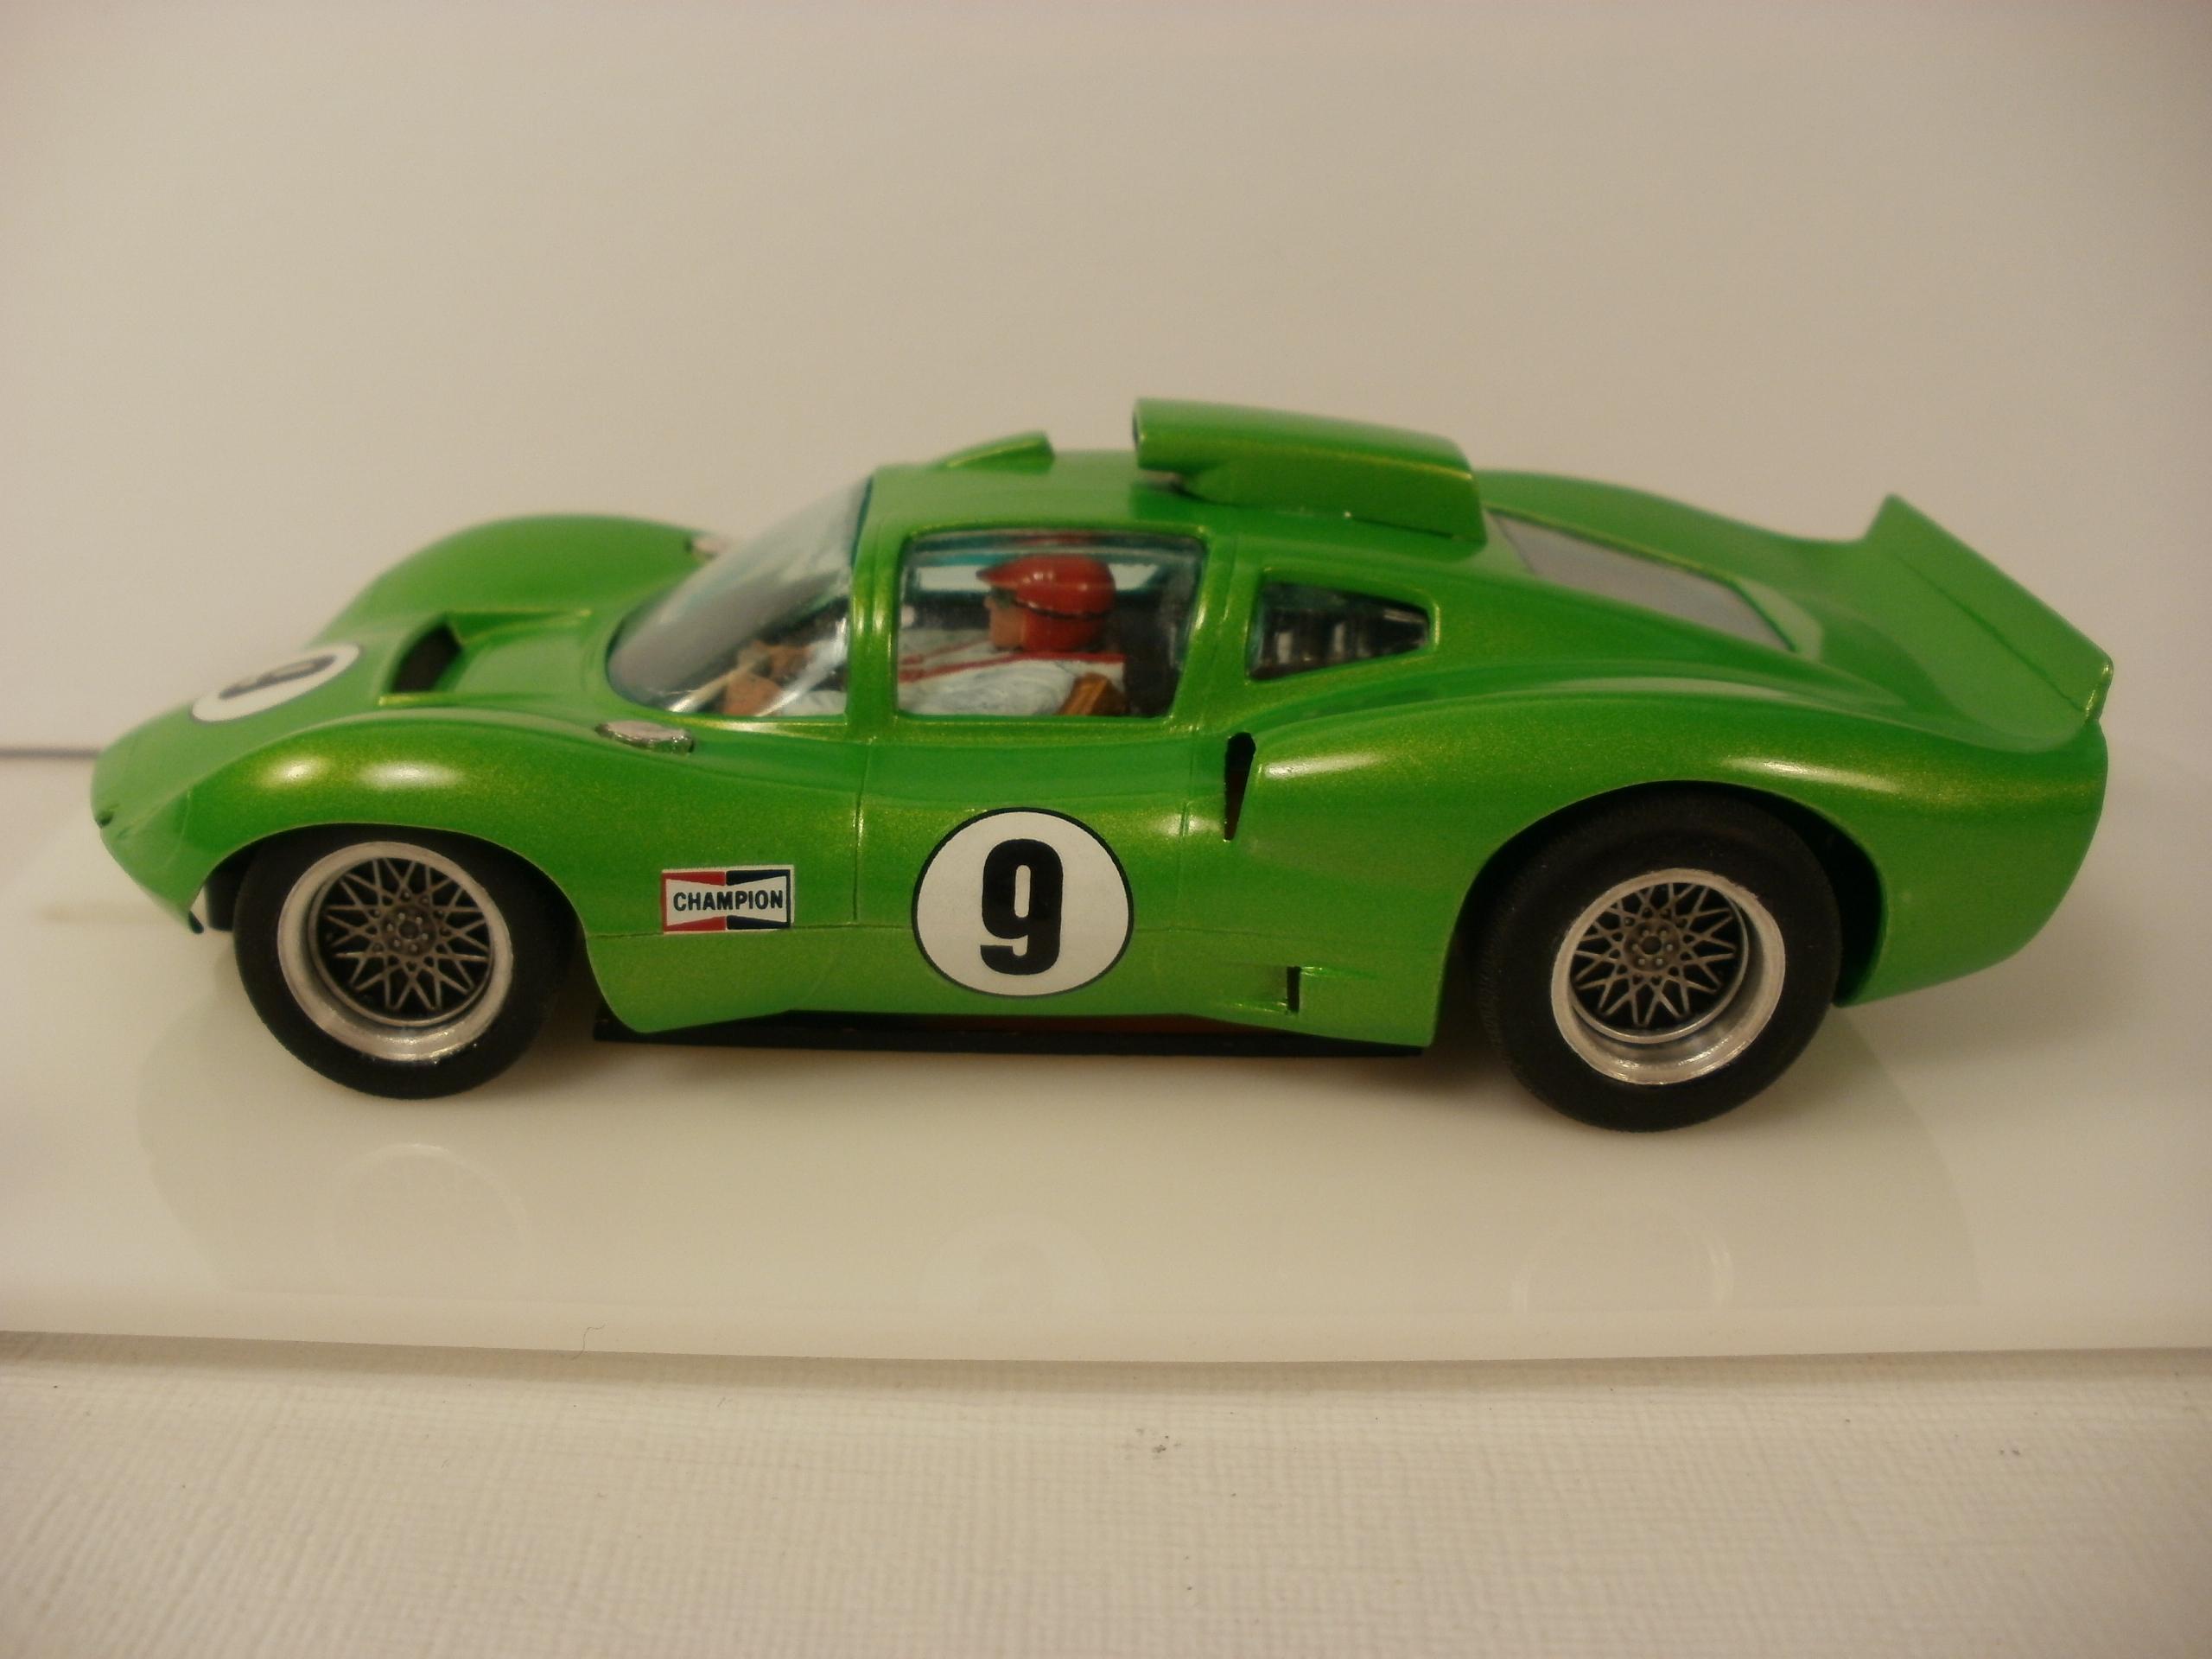
The louvers on the right side of the body also don’t match the real car.
I’m fine with it because it’s a start towards the Indy-500. And it looks good as a slot car. If someone doesn’t like the way it looks? You need to talk directly to Geodies. I’m just a humble builder. You sure can’t argue with the price of approximately $30 including shipping.
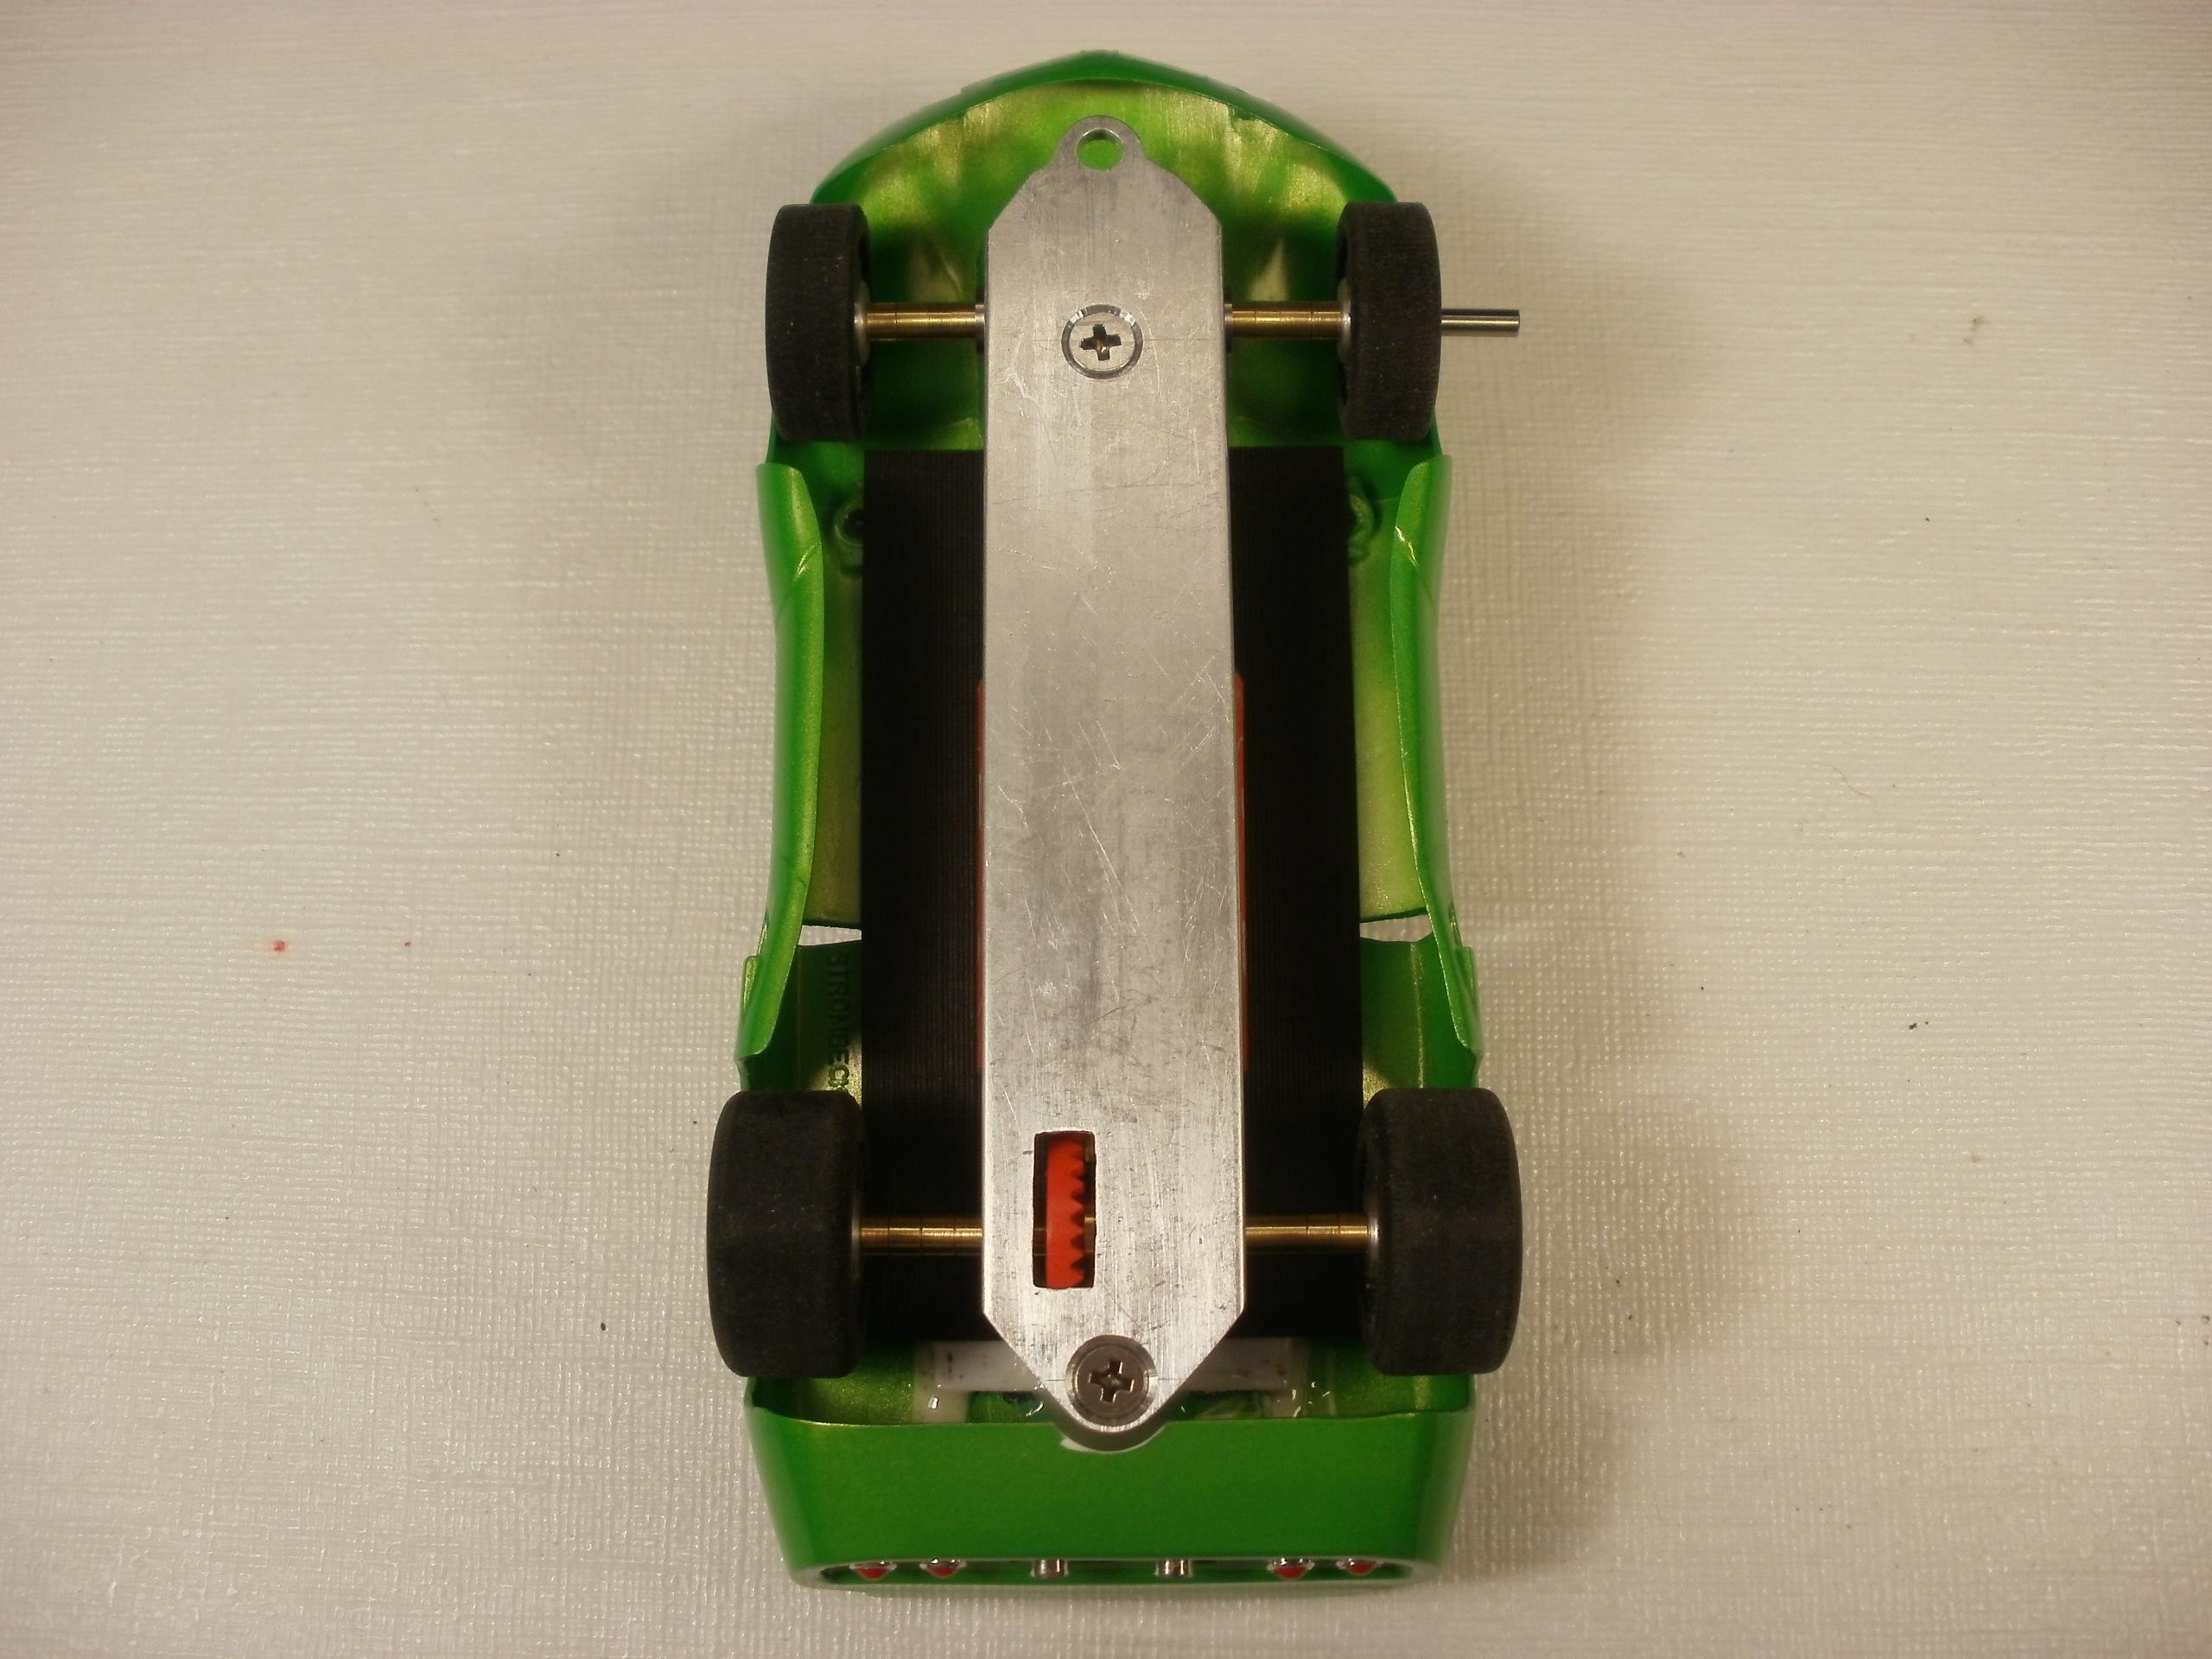
The body is mounted and has full body float. I had to recalculate and shorten the track width several times before it looked right. Final track width front = 48.3mm. Rear track width =51.3mm. It’s time to prep the body for paint. It will likely be the hardest part of this build. :wacko:


Thank you F1nutz. I know what brands to consider in the future. I have two ARII Porsche 911s and an SRC Porsche 914 to build yet. That will have to satisfy the German in me for now (0.02%).
I really love German Bratwurst though. :yahoo:
Thank you very kindly for the offer Porsche911. I do appreciate it!
However. I have so many cars right now that I’m trying to sell some. I need to focus on the direction of what I really want to build in the future. Please check classifieds.
I look forward to Art’s next few cars. I’m trying to slow down buying, and build what I got. That’s a task in itself.
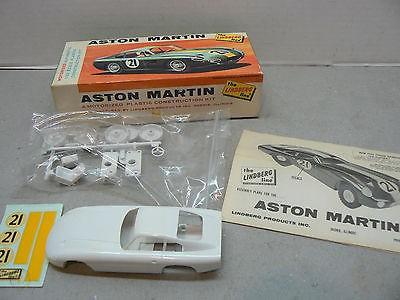
An unopened 1966 Lindberg “Aston Martin Project DP214 R2 ” model kit is a bit of a rare fluke or it would not have tempted me.
Thank you very kindly for the link Porsche911. Some very different cars on that site.
The Disco thing is a strange car. It looks heavy. The site says resin bodies. Many of the bodies on the site look a bit clunky and heavy on the inside/interior. It looks a bit like someone created a 3D template and started molding copies. 3D printers still have difficulty making the interior side of the body panels thin. But I like the VW Karmann Ghia. It’s different.
Just about all the D’Art bodies are a dream to build. All the D’Art bodies I’ve built so far are super light (9-cars). My build threads show every detail including my mistakes. In fact it was my fear of making a mistake that initially prevented me from starting my first car. When I finally jumped. It was quite liberating. :yahoo: My advice is… Just jump. But, pick a less expensive body kit so the whole thing can be replaced without too many tears.
The best part about building a D’Art body is… We know the maker of spare parts. If you mess something up very badly, you can can get almost anything you want. :good:
I look forward to the new D’Art McLaren M5A and Watson Indi-500 racer. :yes:
F1nutz and Art. Thank you very kindly for the good advice. I will gladly follow it once I can find a way to get the kit from my niece in Buffalo. I need to wait for the border to re-open. Something to do with a world class toilet paper shortage based on Youtube videos.
That pink Aston is umm… pink! :wacko:
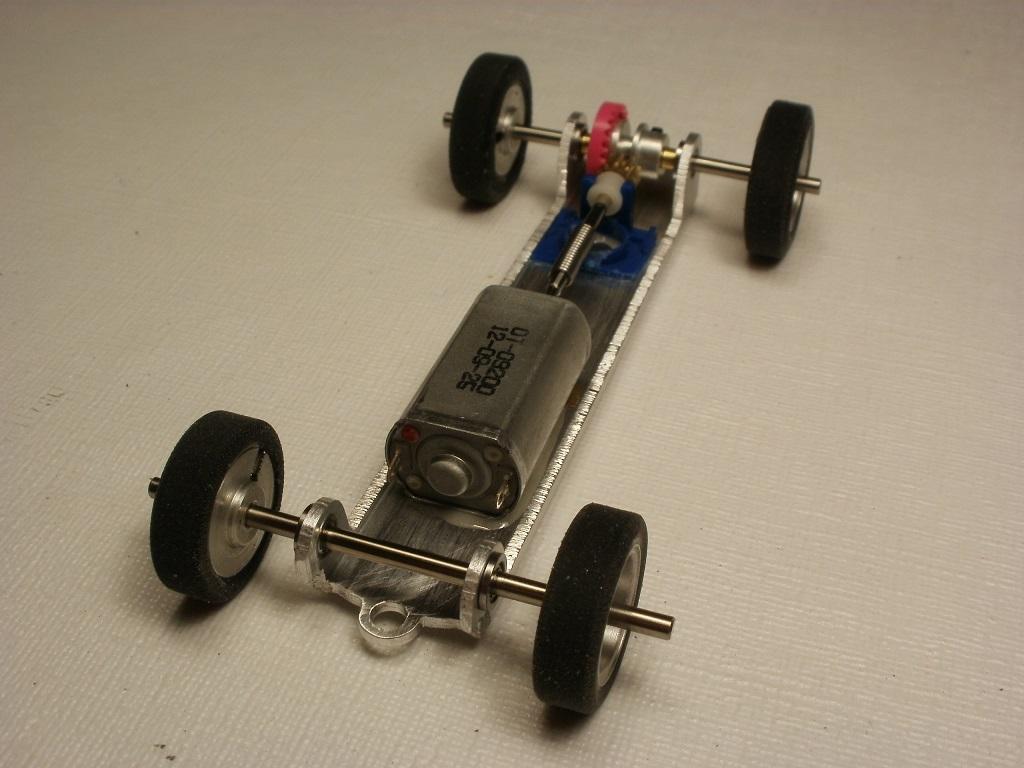
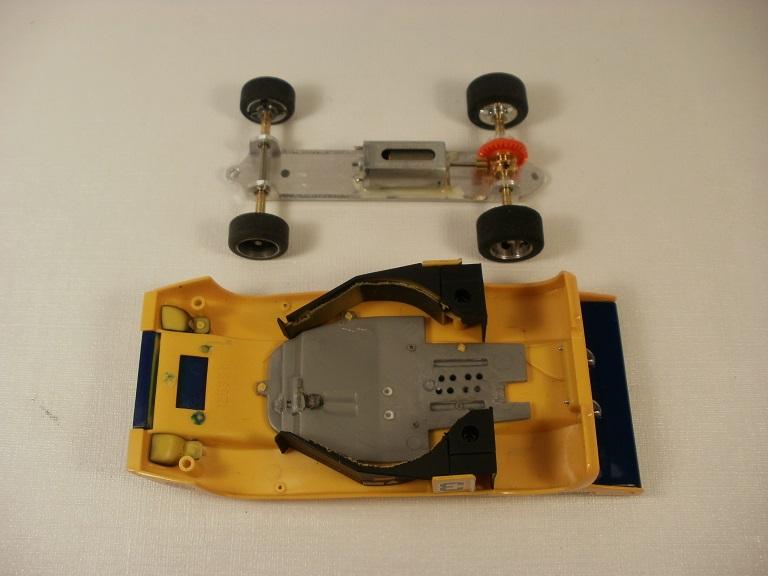
The chassis runs. Everything turns smoothly. Those are very short lead wires.

The body is sitting on the axles and still needs to be raised up a bit. I suspect the body is low enough that the car doesn’t need to be slammed to perform well.


I was able to remove 3-grams of excess material from the inside of the body for an overall weight of 20-grams. Now the body needs some serious pin-hole filling work. The final finish on the body is far from being ready for paint. That’s next, after mounting the body posts.
Track width is 54mm rear and 50.8mm front. Looks spot-on based on measuring dozens of photos on Google Images.
Thank you for your kind words Steve. I also look forward to seeing yours and other builds in how they might differ. No one has a monopoly on good ideas.
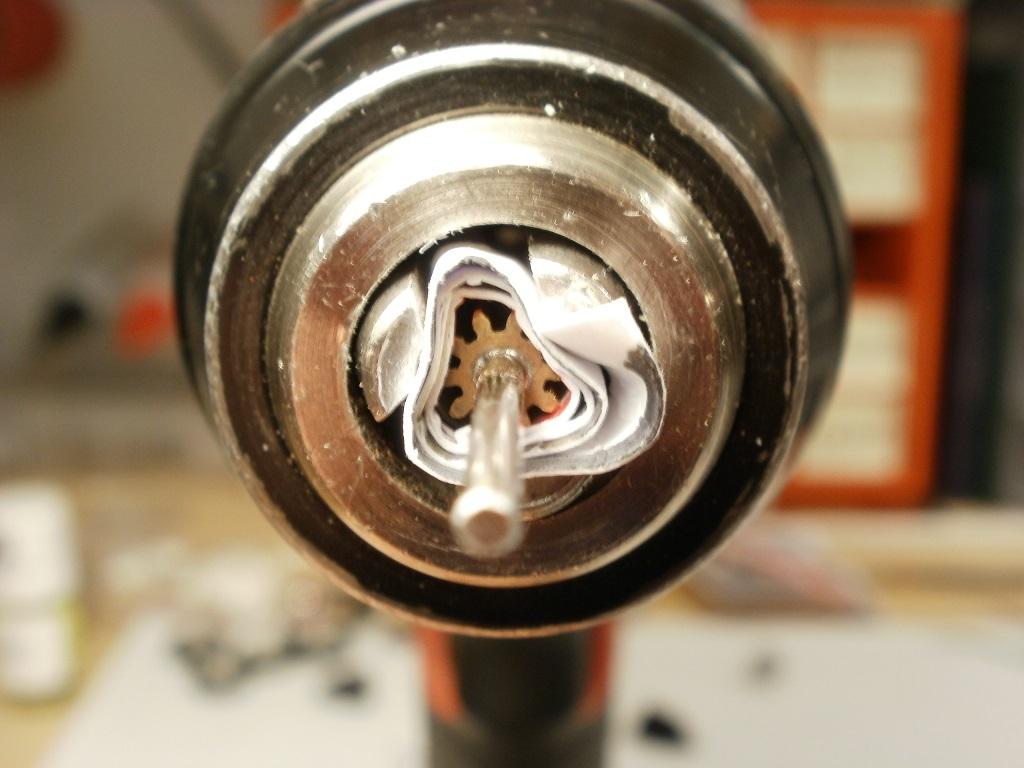
I used cardboard to prevent the drill chuck from marking the pinion. Took a pair of needle-nose pliers to grab a small section of the motor shaft right at the sleeve. Slowly turned the drill until the spring went on a 3rd of the way on both sides. The spring is self-adjusting to go on equally on both sides as resistance builds. That was a no-brainer. Luck.
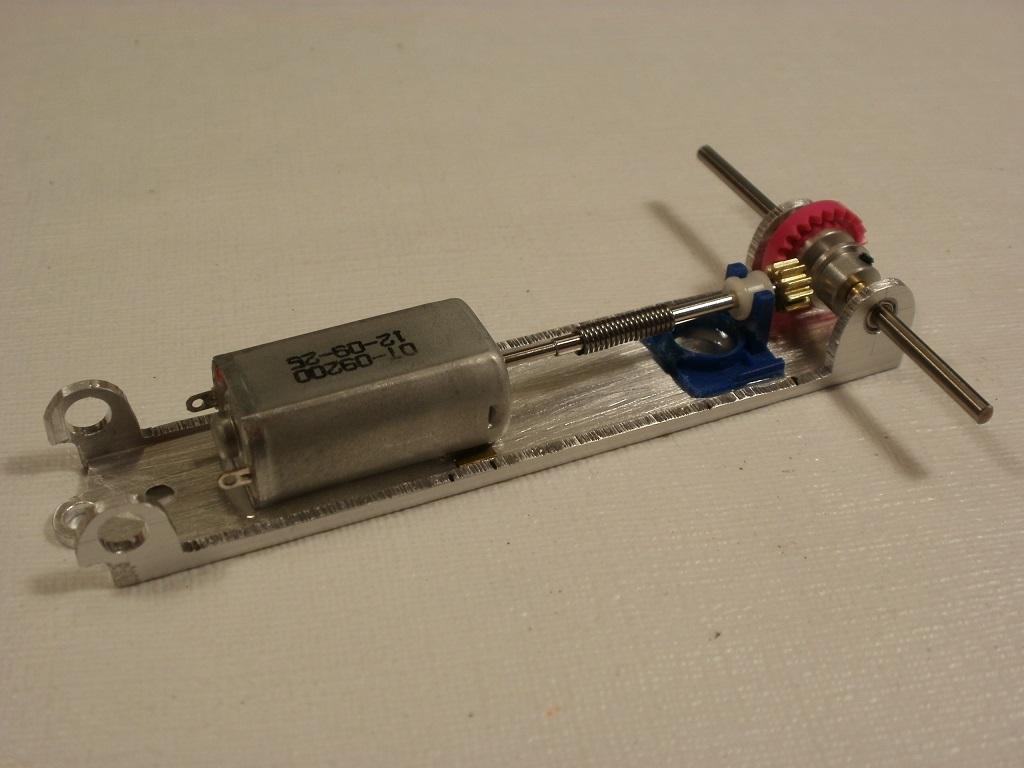
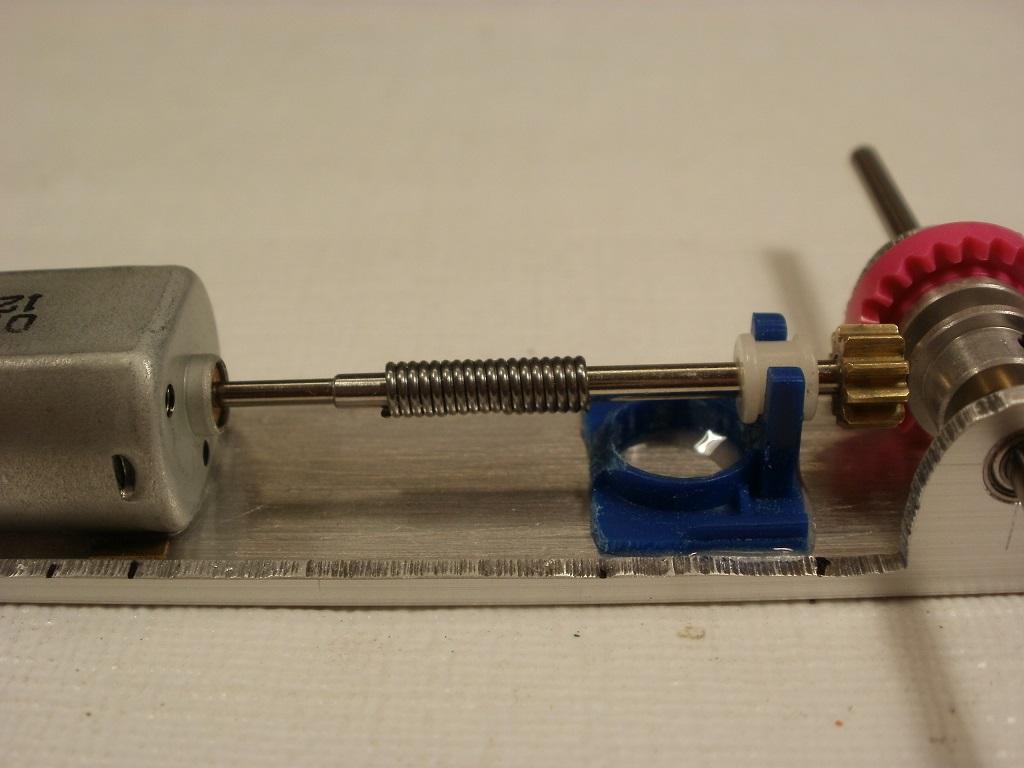
I had a Mr Slotcar 8-tooth pinion that was meant to adapt a 1.5mm motor shaft to a 2mm pinion. I removed the pinion and used the sleeve to create a 2mm diameter motor shaft on a BWMS050. It’s soldered in place.
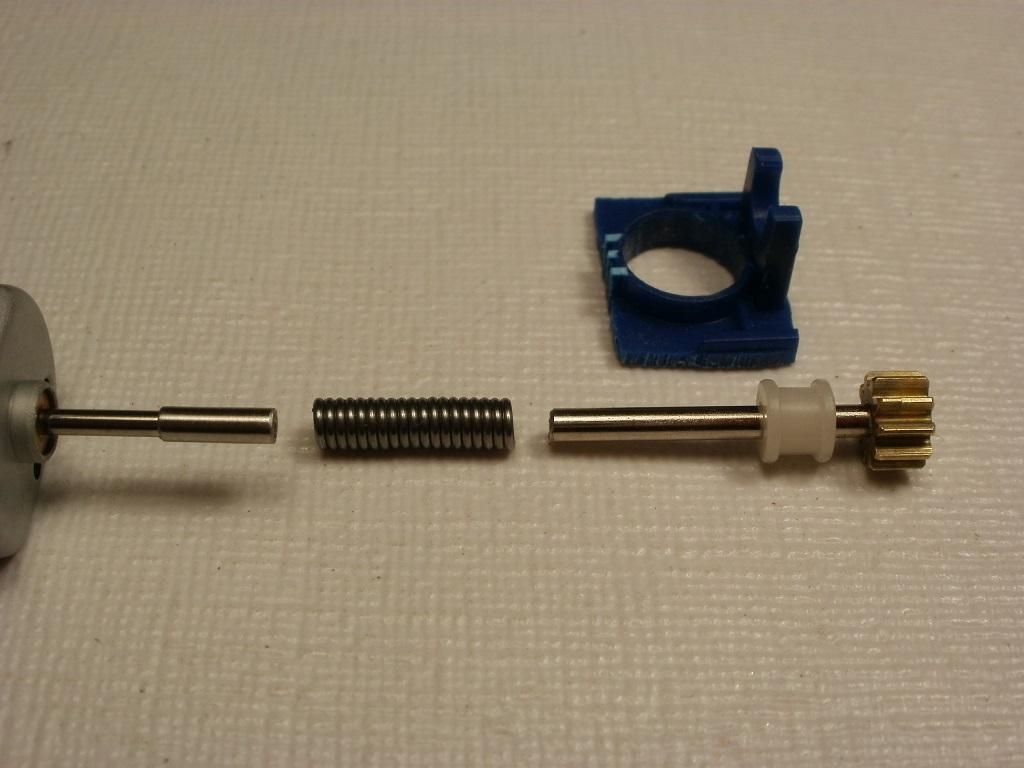
The spring for the Scalextric 250F requires a knurled shaft on both the motor and driveshaft. So I had to ditch the assembly with the exception of the nylon bushing.
I had another longer driveshaft from a Carrera front motor car. It had a smaller spring that didn’t require a knurled shaft. I cut the shaft to length, then cut up the 250F chassis to create a bushing mount. I sanded the bottom of the blue plastic bushing mount until the pinion lined up with the axle/crown gear. The parts are ready to go together. The motor and bushing mount will be epoxied in place once the spring is installed between the motor and drive shafts.

Very cool finds F1nutz.
I found an unopened Lindberg kit from 1966 but the seller won’t ship to Canada. It looks like the chassis will need a lot of work to separate the lower body/chassis into 4-parts to make room for a slot car chassis.
Nice sleuthing F1nutz!
After doing some homework. Here’s what I found out.
It turns out that at the time in 1966. Several companies were puzzled that Lindberg somehow managed to earn the rights to make an Aston Martin DP214 as a 1/32 model kit. I suspect they were the first, or only company to ask?
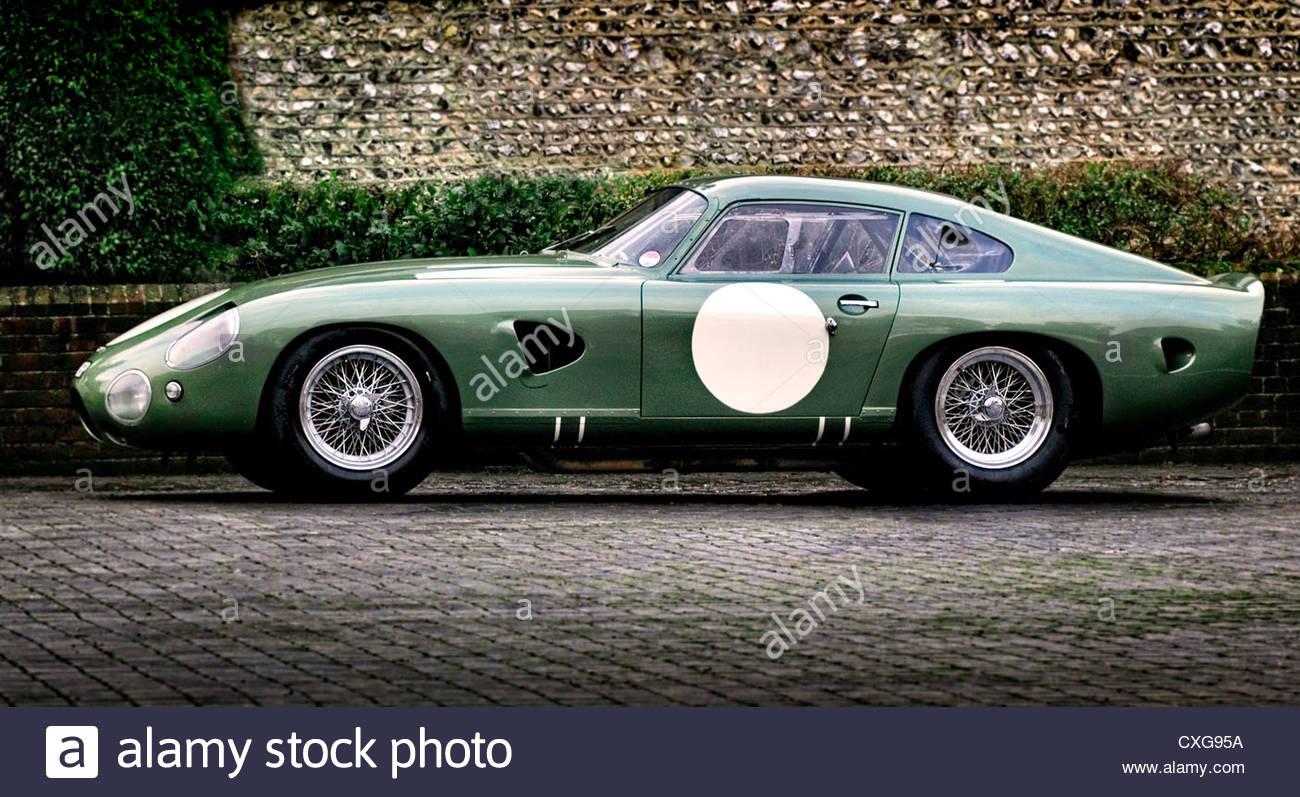
I like rare kits, and rare cars. This one fits the bill. An incredible looking car in my opinion.
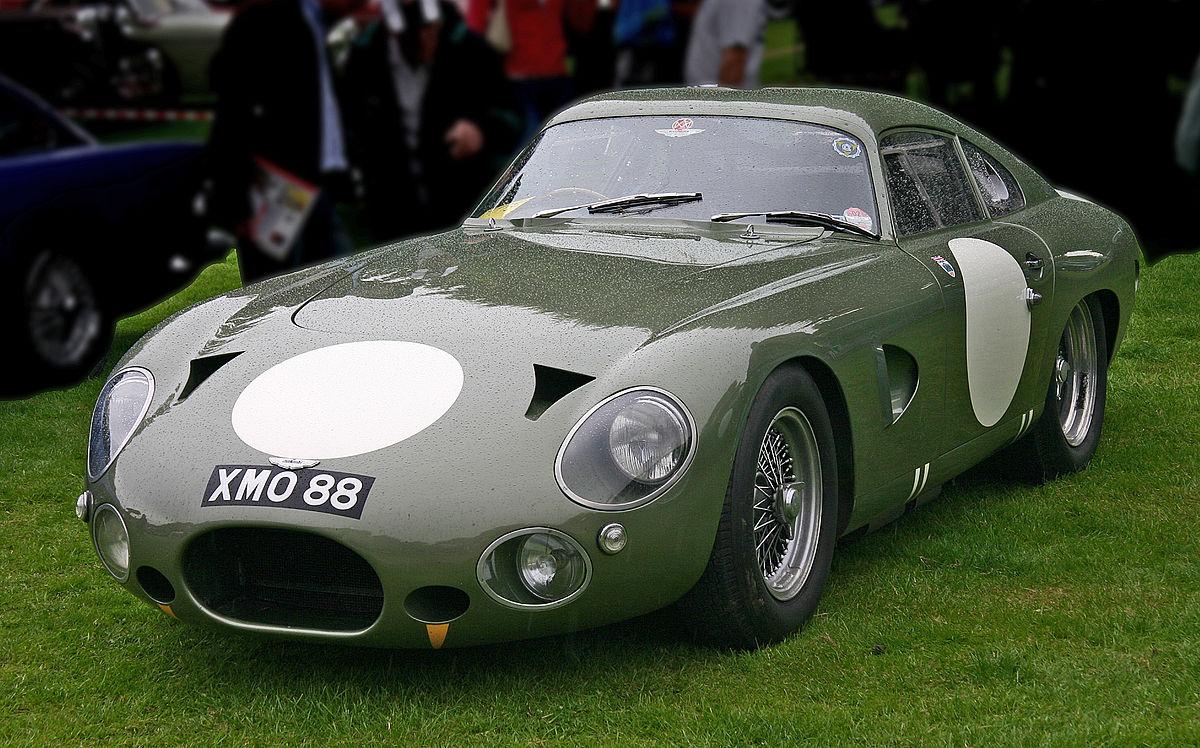
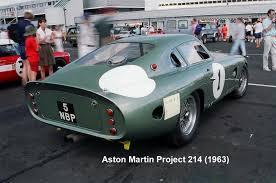
From the rear it looks like a Shelby Daytona before it even existed.
The chassis is finished and needs to be assembled.
Nice video F1nutz. Thanks!
I just did a final calculation on the wheelbase for the Ferrari Bardahl Special, and after checking it 3-times. It came out to 84mm or 3.300″ inches. The Geodies body might be a bit heavy, but it’s very long. There’s also lots of material that can still be removed to reduce weight.
The quest for an accurate wheelbase continues. As I hunt through Google Images. I found some detailed photo’s to help figure out the how this car was put together. The wheelbase appears to be close to 3.187″ of an inch based on the photo’s. The extra 3/16″ allows for just enough room to fit a driveshaft from something like a Scalextric 250F.
It’s amazing that the Offy engine out-performed the Ferrari for this class.

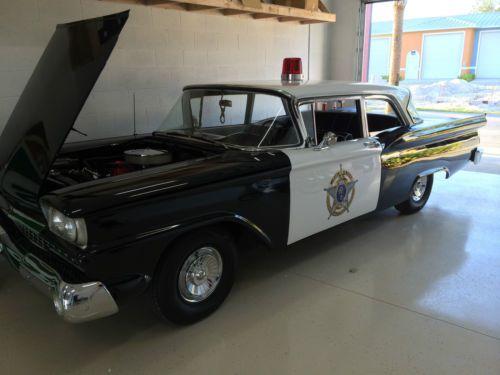
This cruiser will have the old famous “Police interceptor” motor. It should be able to catch any red-light runner in the slow motor class no matter who the driver is. The only difference will be how many laps did it take for the cruiser to catch you? 😉
I found a 59 Fairlane 500 Skyliner kit for $14 plus $7 shipping. We have a police car!
This will be the obvious colour. Note it’s a 2-door cruiser. They actually made 2-door police cars back then. Sporty! :good:
Hi Felix,
This is a fun discussion. I have some technical questions concerning your tests to help me understand.
Is it farther to New York? Or by bus?
How long is a piece of string?
Once attached to the string. Does the car occilate perpendicular to the axis of the earth’s rotation?
Does an explosion make noise in outer-space? If an explosion needs air to produce a shock-wave. Can you stand beside an explosion in outer-space and not get hurt? So many questions…
I actually like in-line configuration for slow-class cars. But also figured out how to make it work. It took some time, and a bit of luck. But this topic probably requires a separate thread. This is about getting Boulevard Cruisers to become a new class.
In my brief experience as a builder. You can’t hit full throttle in the corners where the inline twist you speak of has it’s adverse effects. If you straighten the car out before hitting full throttle coming out of the corners. It’s not so bad. Slow cars have very little difference either way other than different choices of gear ratios.
Fast cars often prefer sidewinder/anglewinder configuration for a more efficient power transfer. Fast inline cars will twist like crazy under the torque of some of these insane and powerful new motors.
Your point is well taken Felix. Life is balance. :good:
I can’t wait much longer. I’m going to start looking at what this 63 T-Bird needs to be completed. I’ve always wanted one of those old Thunderbirds with that cool tonneau cover that has a double head-rest. :yahoo:
Just my humble suggestions…
1) S32 already welcomes store bought plastic chassis if you paint/detail the body. I hope to do some experimenting with nice paint. R32 races are often “win the race even if it means the risk of crashing into another car”. Crashing into another car for an R32 driver doesn’t carry the same meaning as with an S32 driver. Let’s please keep this class to an S32 level.
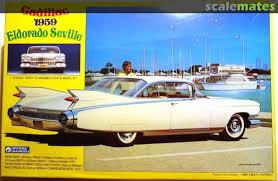
2) I checked EBay for the Gunze Sangyo kits before I started this thread and even though they are discontinued, they are all over EBay. Jonathan was kind enough to buy a 59 Eldorado Seville/Biarritz for me as a test since I don’t have an EBay account (Thank you kindly Jonathan). The kit was $8 “buy now”, plus $10 shipping to my niece in Buffalo. There are lots of these kits out there for everyone. No shortages of the Gunze line of kits. All 7-kits are available to everyone. Add the fact that some of these kits can be built up to 4-different ways… now we have incredible variety even within just these 7-kits. There may be other brands available too. I stopped looking after I discovered these little diamonds littering EBay.
3) I agree.
4) The goal for me is to build cars that look like “eye candy”. No numbers or decals means you really see the paint. More time spent on making the paint and finish perfect. Cars with paint I would never want to scratch. I am not in favour of building a fast class Boulevard Cruiser. Too much risk at ruining the finish.
5) I agree.
I do remember that conversation about the chase car. When do I start on Sheriff Buford T. Justice’s chase car? :yahoo:
I hope other members can chime in and make positive suggestions? I’m eager to start building cars for this class more than any other before it. I’ve always wanted to build a car without decals or numbers. This is it.
Cheers,
Ken
Hi Felix. Thank you very kindly for your input. The rules are not yet made for this class. But they will be made based on everyone’s ideas.
The only ideas that came up to keep things even so far are:
1) Any full size car from the 50’s and 60’s (Station wagons most welcome)
2) One number on the passenger side windshield or licence plate(s) keeping the paint clean.
3) Any slow motor – any style of drive as per Felix suggestion above. Put the motor where you want.
4) 14×5 wheels. White wall tires recommended.
I’m in favour of a minimum weight of 85-grams?
Anyone else want to suggestion something so we can start building?
Nice car F1nutz! It’s a very cool looking body. It’s also an original for this club.
I never heard of Coopers before I joined S32, 2-years ago. I have become somewhat of a Cooper fan since I ended up building one.
Your 1964 “Lang” Cooper Cobra II will fit in nicely, and look great at the next Player’s 200!
1964 Revell Cooper Cobra II would be my guess.
Very nice F1nutz!!! You’re officially the first one with a Boulevard Cruiser.
I think street racers only had one white number painted on the passenger side of the front windshield. That way they could be easily cleaned up and taken to work the next day without drawing too much attention.
What’s in it for a motor?
Here are some pics of the other kits from this manufacturer.
That’s very cool F1nutz. Let’s see a pic of your Impala please?
Hi F1nutz. Here’s an idea.
If a car is $15 and the shipping about the same. Are you, or someone else willing to place an order if club members pre-pay $30 per car until the order arrives and actual shipping cost is known? Let’s find a way to get this off the ground.
Pre-paying will make sure everyone picks up their kits without delay.
After fighting to get this motor to work in this car and a McLaren M20. It’s time to throw in the towel. I’m changing the 35k motor for an 18k Scalextric slim-line 050. The 35k is simply too much motor and not at all enjoyable.
This little RS61 with a 35k motor had the fastest lap at a recent Meisterschaft. But it was at the edge of death the entire way, and did not win the race. Not worth the stress.
The jury is in. I lost the battle with this motor.
I was supposed to run my Surtees Lola T70 at the last CanAm at the Spa and had to use the McLaren M20 as back-up due to technical difficulties.
It was the McLaren’s first official race at the target weight of 104-grams. The 35k motor is officially too much motor. Even with the gear ratio backed off. The tires instantly hit full RPM, and the car fish-tails to the end of every straight including the longest one. Like a moth to a flame I touched it and got burnt. I tried being gentle with the throttle trigger and the potentiometer down to zero. But it’s still way too sensitive. Unmanageable power is a good way to describe it. Like a 1974 Chevy Vega with a 454 big block on skinny tires. Nothing but a simple “tire-fryer”. You sure can’t win a race that way.
Now to choose another motor. Art suggested a Slot.It flat-6. Sounds like a good place to start.
I’m sure there are places where this 35k motor does well. But it’s not well suited for this club. Either that or I have not figured out how to tame the tiger. I’m growing weary of being bitten.
Nice job Steve!
Great ideas using a small tote, in a larger clear tote, and 110VAC PC-fan. Thanks for posting.
I also hope to see your wife’s C4 Corvette at the next Group-25 meeting.
Cheers,
Ken
February 19, 2020 at 7:06 pm in reply to: Painting with Tamiya Synthetic Lacquers – Peter Johnson #13984The trouble-shooting article in this thread is extremely useful concerning the learning curve needed to figure out how to paint. Peter Johnson really knows his stuff. Anyone that paints model cars should have a printed copy somewhere in their shop. At first I made almost every mistake. Then took the advice and chipped away at my mistakes until I became a better painter. Very few people saw my mistakes thanks to “Super-Clean”.
“Super Clean mistake remover” should be added to the bottom of Peter’s article. If at first you don’t succeed? Just start again.
Drew. Thanks for posting this. It was one of the first articles I read joining this club. But forgot to mention how useful it was to me. Many cars painted and still going strong.
The only point I would add: If you can avoid primers, multiple colour coats, and clear-coats. The paint won’t chip as eaily. You can buff some scratches out with car wax. These are slot cars and they will have off’s. It’s a part of our hobby that static modellers don’t experience.
If you’re going to avoid primers. Don’t fight the colour chart by trying to paint a bright red plastic body, white. It will eventually have pink show up somewhere. Stay within the colour range of orange, bronze, etc… Or. If you must change red plastic to white paint? It might be one of the few times to use primer.
Racer68 says he’s also building a Ferrari. But his will be a fantasy red, white, and blue livery. I’m the only all-red Ferrari so far. Please buy your car and just choose another number, or colour. I look forward to the seeing the same car/build from others. I used to worry about racing matching cars or colours as a newbie. Not anymore. There’s no such thing as two S32 cars exactly alike. I’m using Italian red. If you use bright red for example? They don’t look the same even if they are the same livery.
Please buy your Ferrari. That way I won’t feel so bad showing up with a Watson in another colour. :good:
I have a 1/16th inch carbon fiber rod that can help reinforce your body. I have this stuff still laying around from my old RC airplane days. One of these rods epoxied inside the entire length of the body won’t add much weight for the strength it will provide.
I have some newbie questions before I can make a build plan please.
Please explain what a “40mm front motor drive” means? 40mm between the motor housing and the crown gear?
Thanks,
Ken
February 14, 2020 at 11:26 am in reply to: 1934 Aston Martin Ulster kit for the Pre-War GP series in S32 #13963Hi Felix.
Just a quick FYI. Mothballs are harmful to Astons. They make the leather and woodgrain dash panels smell funny.
Not to mention… Aren’t there enough castrated moths running around? Let’s give them back to the poor little guys.
How can we inspire you to restart this beautiful car? :good:
Felix! You are over-flowing with wisdom!
I’ll take the advice that you’ve just given yourself and build an easier car as my next Hot Rod. The show in March should have many of these Lindberg/Life Like/Pyro kits for sale at very low prices.
One last thing Felix. The Lindberg 1949 Tudor also counts as a Hot Rod if you use the BWMS050 motor. It has nice fenders and lower rocker panels to tuck things under. Many of us started there. You might want to consider the same? With the right livery, that one car can race in the Carrera Panamericana, Sportscar, and Hot Rod classes.
Cheers!
Ken
Thank you for your compliments Felix.
The car raced twice. Came in first, and then third. Still need more testing time to get a clear picture about guide placement.
You pretty much answered your own question when you spoke with the European Guru’s. Cars with long wheelbases vs short ones handle differently. Curvy tracks vs tracks with a lot of long straights handle differently. Tracks with compound twists handle differently again. Narrow track width in some cars add another level of driving difficulty. Every S32/R32 track we race is very different. Cars that win at one track can’t reach the podium on another. It’s good to build a variety of cars for all track conditions. Hence the phrase “Let’s get building!”
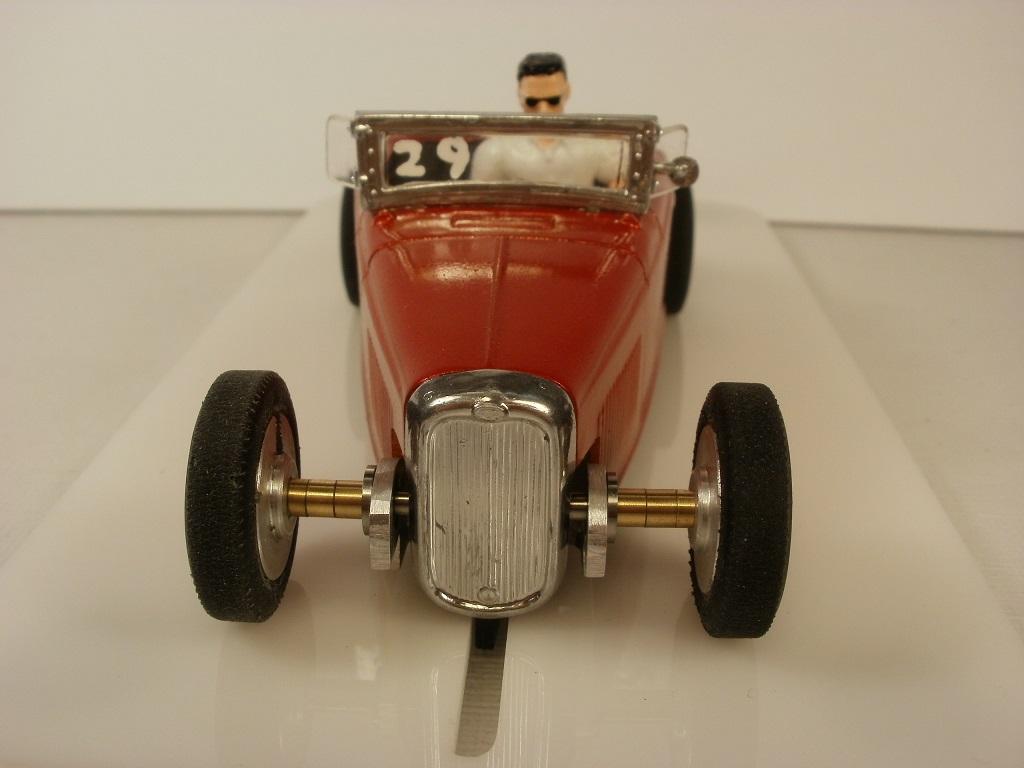
You are also spot on when you noticed that I can’t drop the body because of the rules. I originally wanted to lower the body so you couldn’t see the chassis, but the track width rule was my limitation. I am not an advocate to change rules that have been in place before I joined. I would rather make another Hot Rod than change this car. I made this car specifically in memory of my dad who passed away last April. He had a 1931 model A hardtop a few years back. I sat in the rumble seat while he drove to Dairy Queen.
I might add headlights and tailights yet. But car #29 has a driver, and his name is Stanley Slotrod. He can easily be seen through your windshield as he pulls away from you. You’ll get a perfect view of that fancy and powerful BWMS050 motor, and pink crown gear.
Felix. I look forward to seeing your car build/thread finished with functioning front steering. You might have to skip a 1/24 race. :good: 😉
Thanks for looking!
Ken
Hi F1nutz. I’m interested in one car. But I no longer have Paypal. I would need to pay cash and add it to someone else’s order. I patiently await other responses to your suggestion.
I looked at all the “Orange Crush” logos and they all seem a bit boring.
I preferred this one after searching what feels like the entire world and hope it prints with good resolution on white decal paper. It should be easy enough to cut along the lines.

Thanks for posting the link Racer68. Nice variety and selection of bodies at reasonable prices. I look forward to this new event.
Thank you very kindly MIA.
I’m learning to dig for more facts. But no one comes close to your sleuthing abilities. :good:
Thank you very kindly Art.
The Monogram Shelby kit comes with a very extensive parts list with many options. It has 3-styles of front grills to choose from. One with fog lamps and two without.
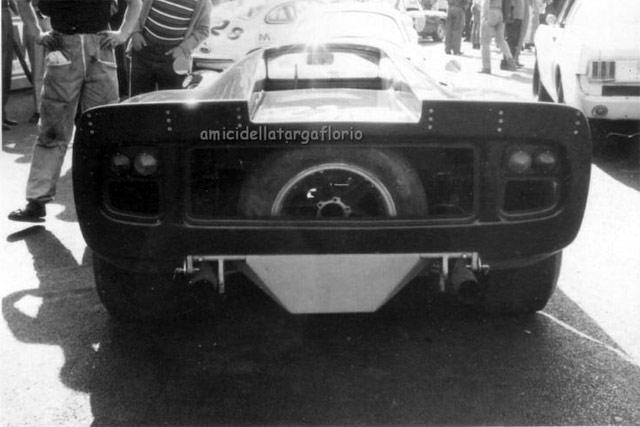
As I go through the parts to complete the car. I notice the back bumper is missing. The sprue doesn’t even have a spot for it. Very strange. Then I re-examine the photo’s of the real car I’m trying to copy and can’t believe my eyes. The back bumper was removed. Looks like this Shelby was meant to be.
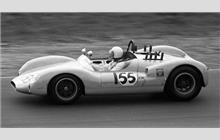
Even though the back of the Lola takes up 80% of the this next photo. The Targa photo is listed under the heading “Shelby GT350”. If you look in the background on the right side. You can see the white Shelby without a rear bumper. Perfect!
Thank you very kindly Art.
Yes it will get a roll bar, extinguisher, and steel inserts. I might be looking to you for suggestions on the roll bar and steel inserts for Slot.It wheels please?
The 5-spoke inserts exposing the shiny rims are there only for these photos. I like the look of the cars before all the decals go on. It shows off the body lines a little better without distractions.
The bright orange colour is causing me to reconsider the livery/sponsor. “Orange Crush” to… crush the competition? 😉
The windows were a pain to install. The one piece idea didn’t fly. It had to be separated into 3-parts to sit in the window frames correctly. The rest of the car was fairly easy.
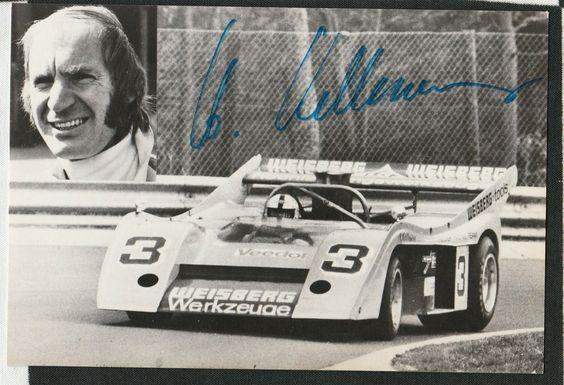
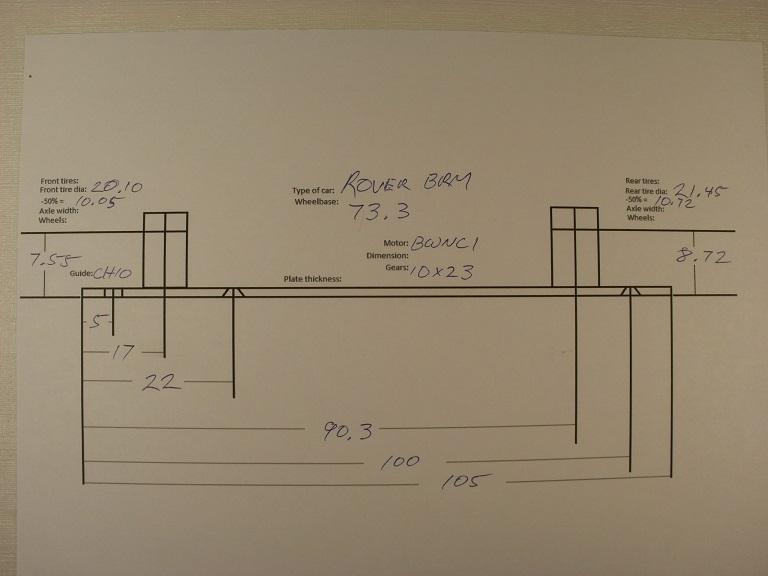
1964 Rover BRM #26. Driver is Sir Jackie Stewart. (SP)


Thanks for looking!
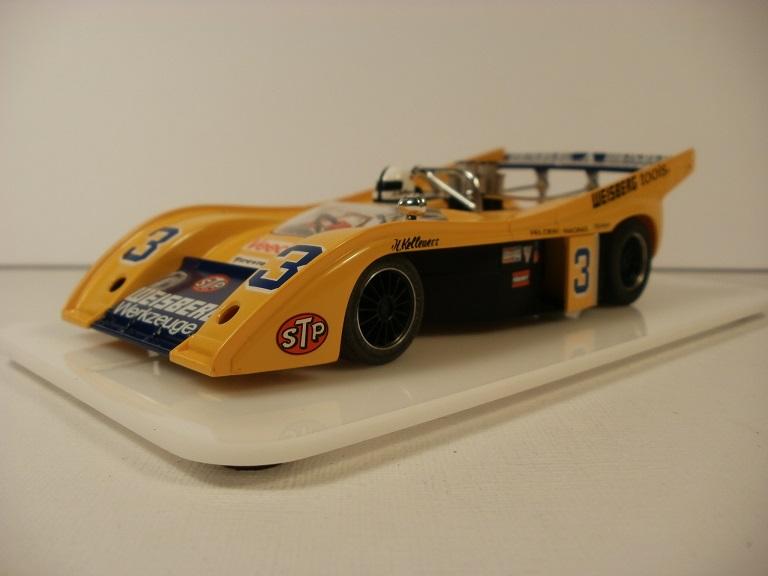
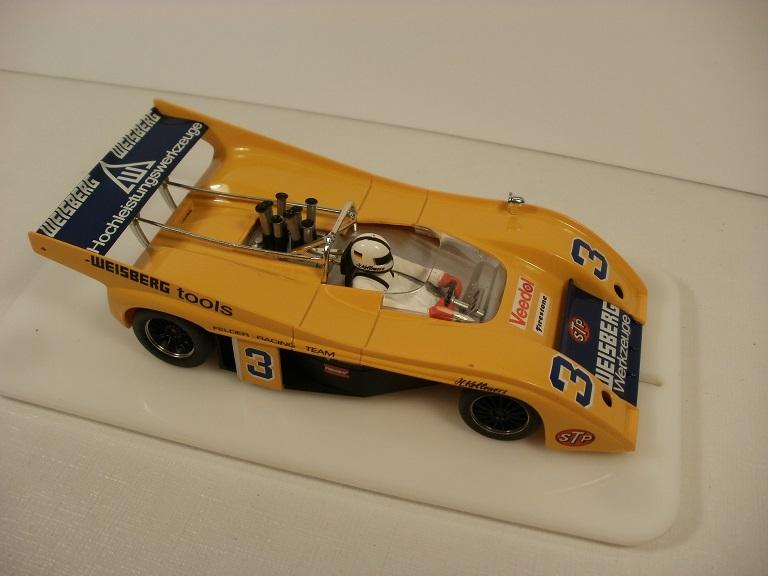
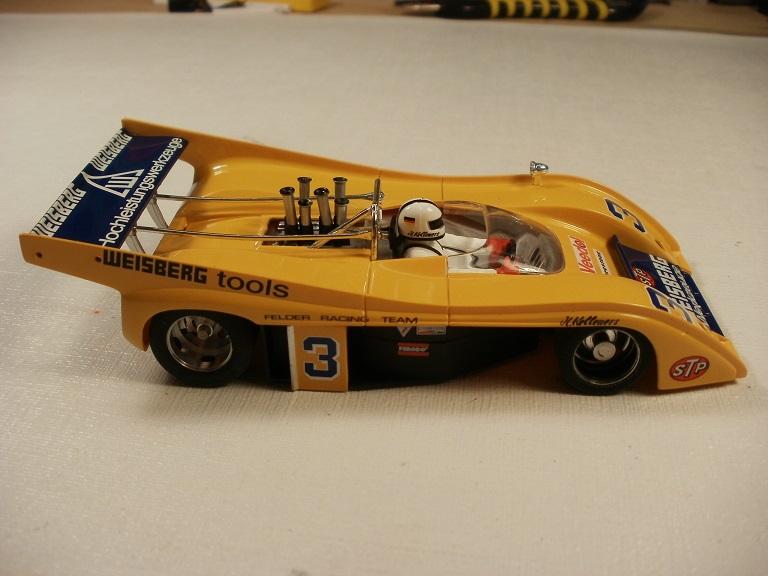
This is a nice photo of Helmut at the wheel of his McLaren. Those rear tires are insane!
MIA finds the coolest stuff. He sent me a link to this car from “bring-a-trailer”. Very close to my car in many ways. I had to post it. Thanks MIA!

MIA, you are not far from the truth about the 40k motor. I was hoping to have a second unlimited car. With only one body to build now. I prefer it to live a long life.
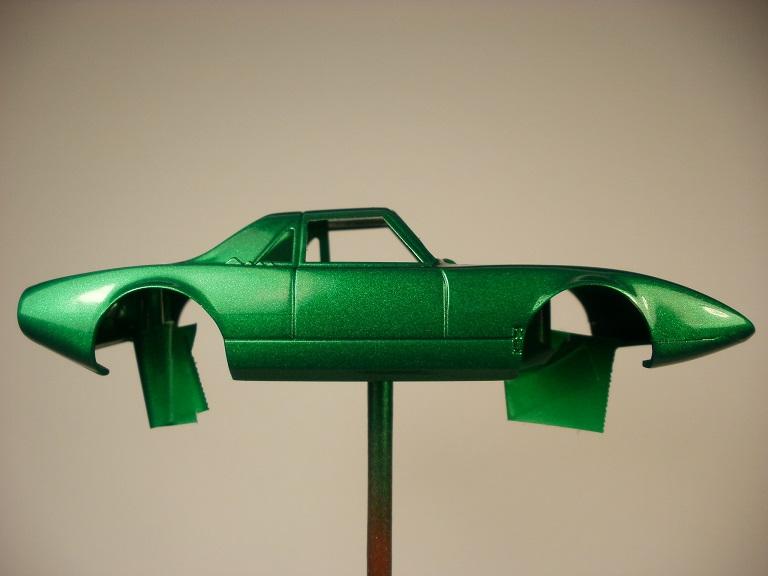
I found some pics of the rarer 1964 version without the big air-scoops. It was entered in the 1964 race and supposed to run as number 26. But never made it. You can tell straight away it’s the same car as the Aurora model by the smaller air scoops and unique headlights. The headlights on the car that Jackie Stewart actually raced in 1965 are rounded at the bottom.

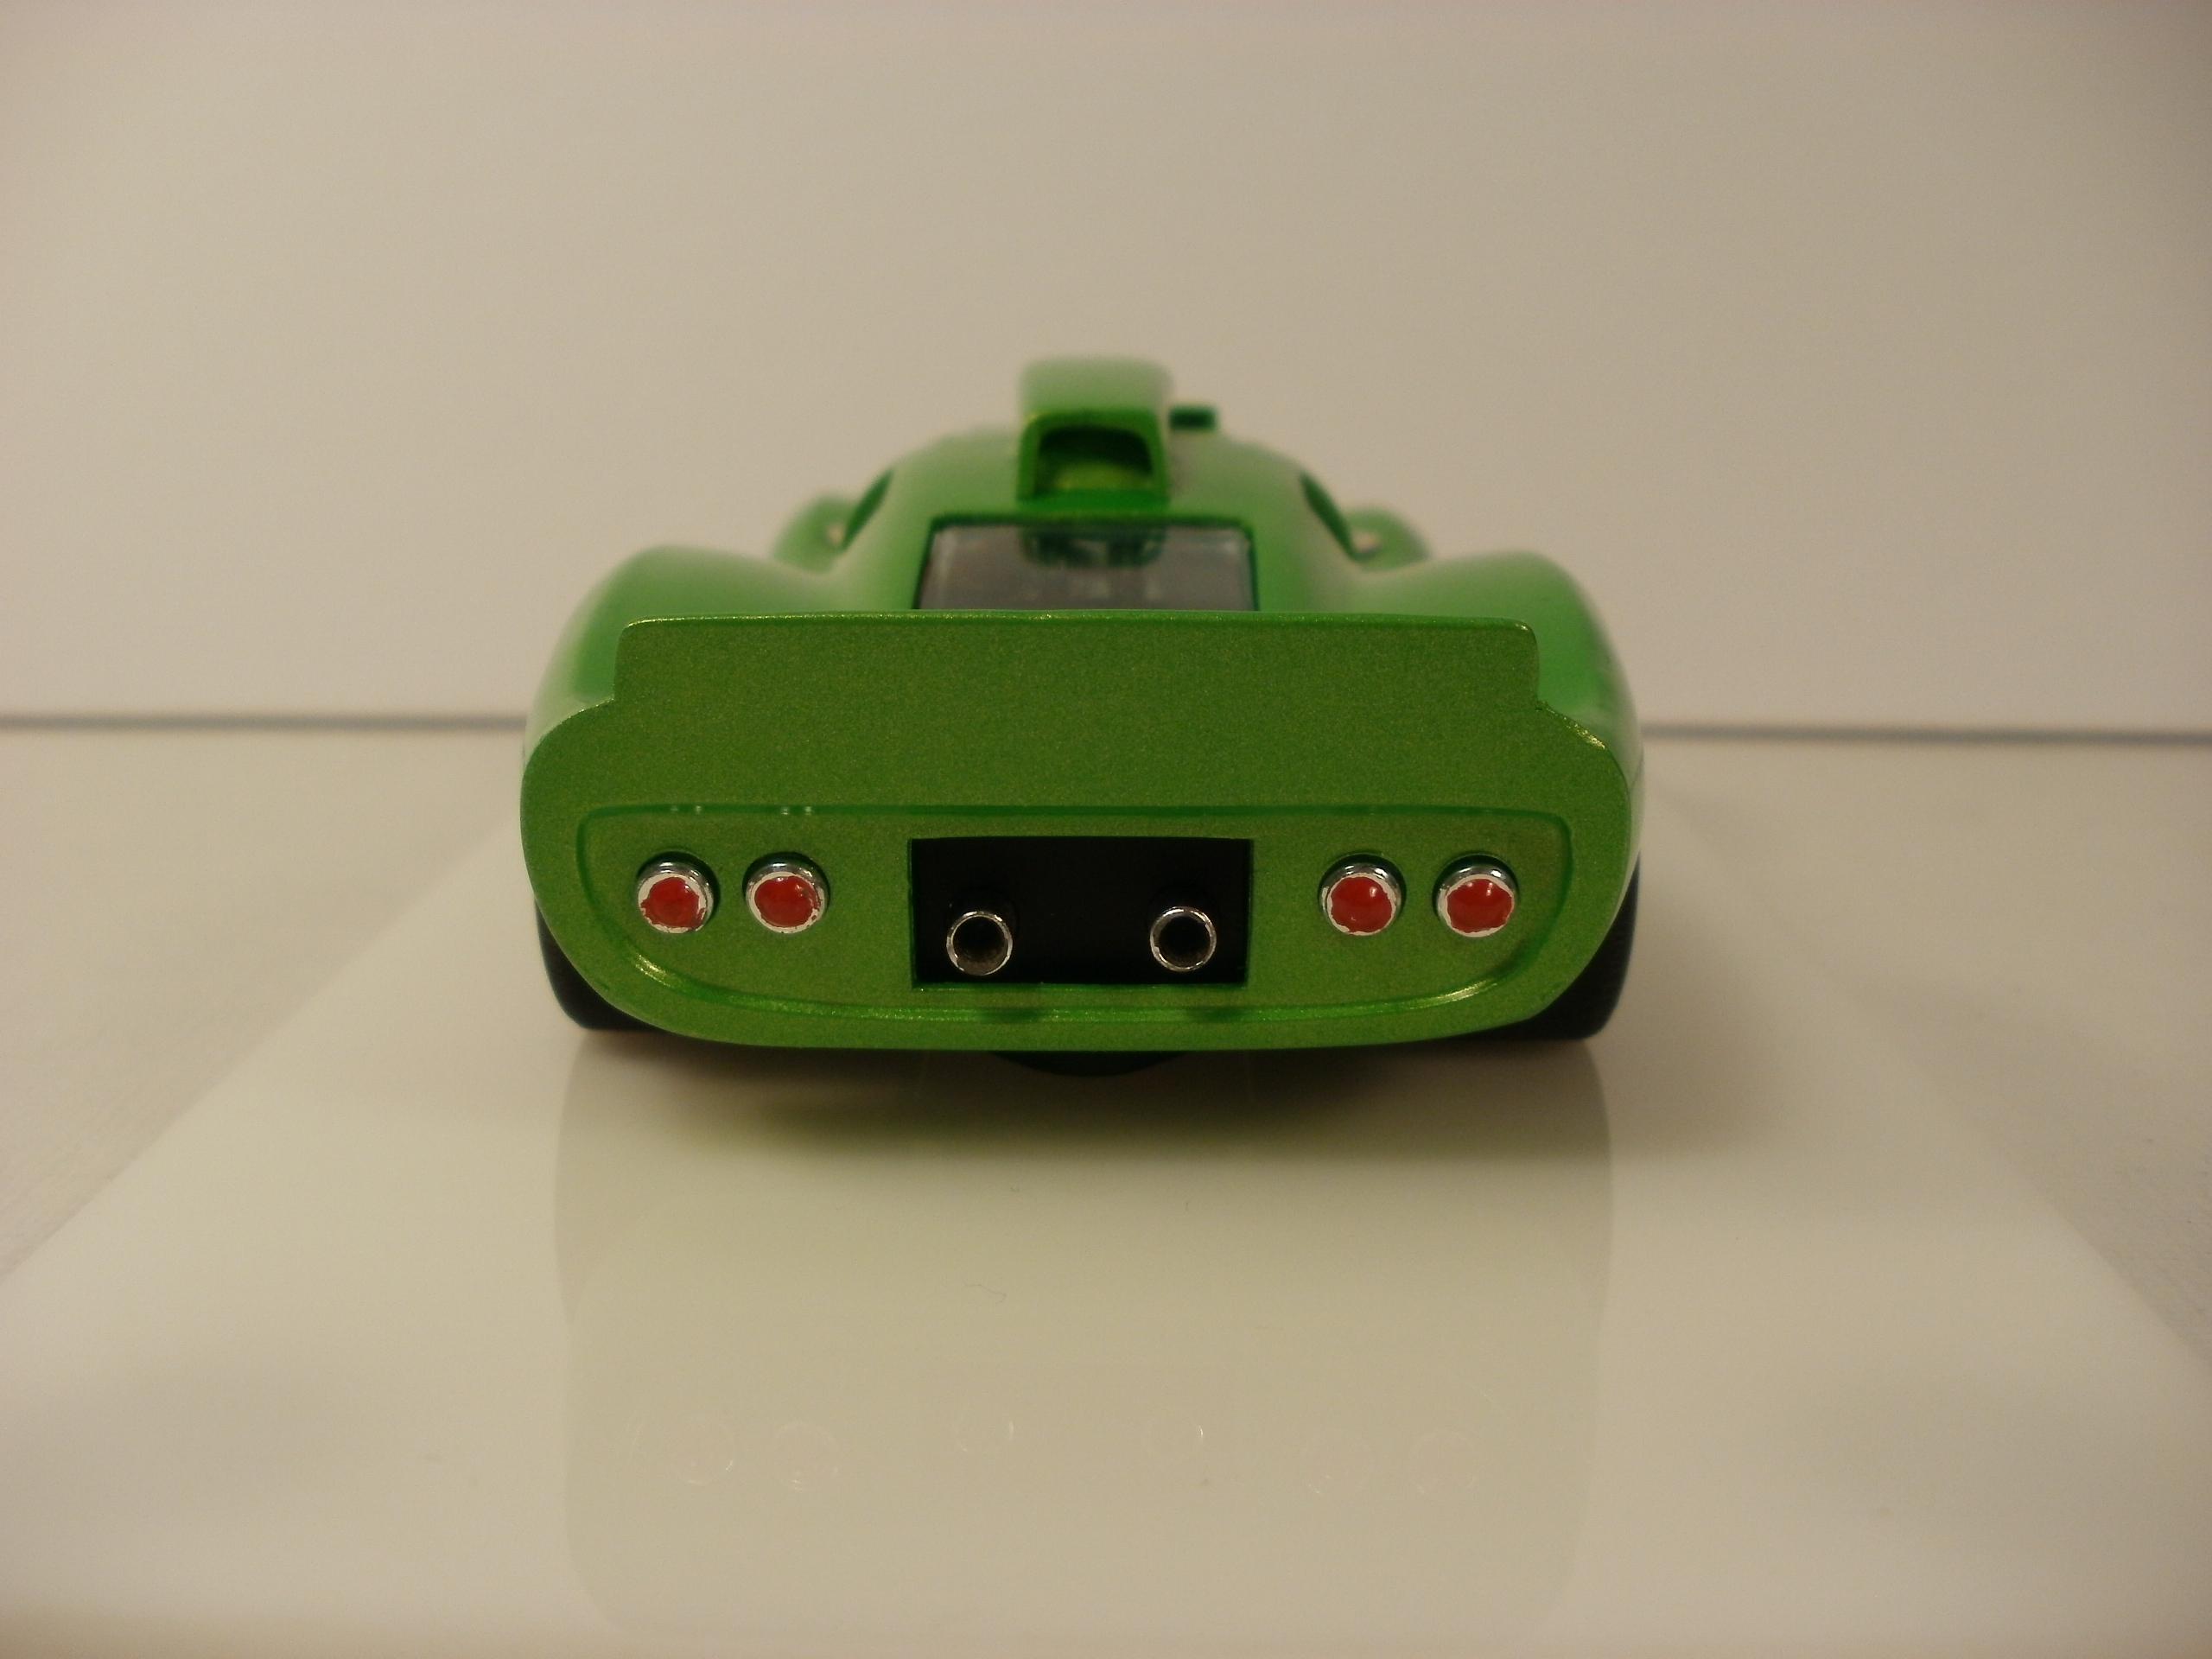
Interesting that it has an all silver tail-light panel.

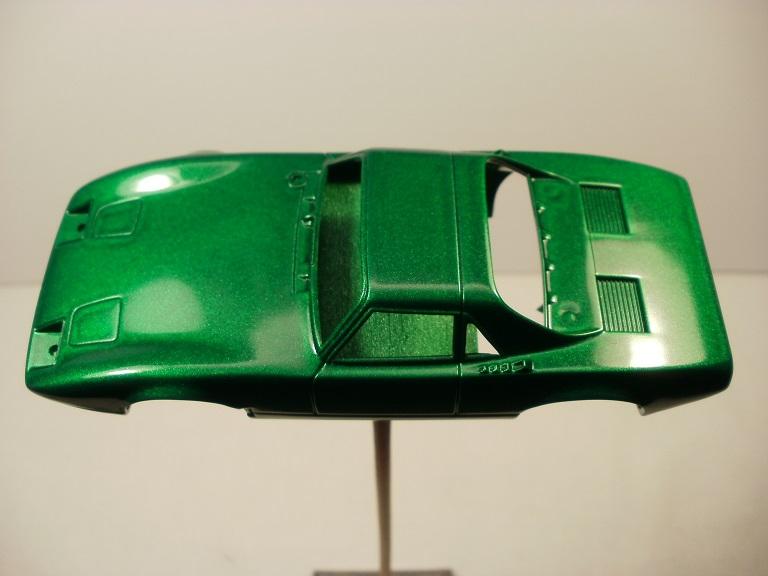
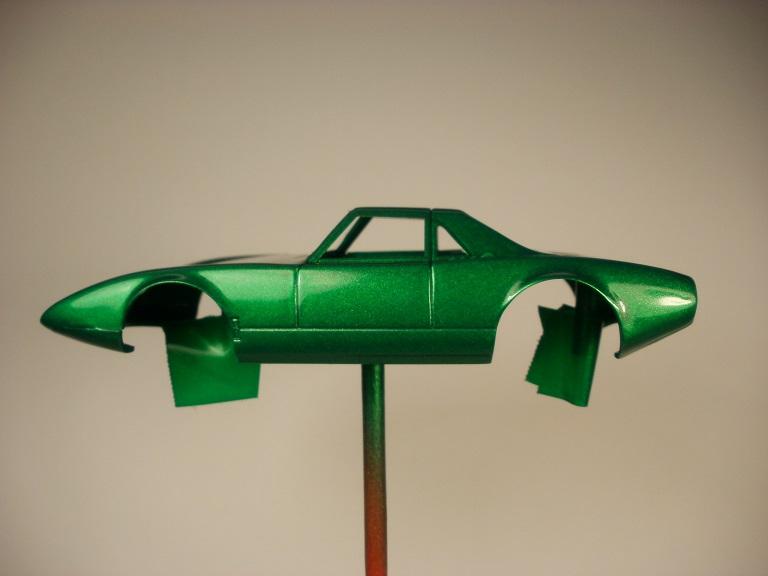
I like the colour of this car. But it has huge injection molding lines through the roof and rear deck.
Before paint.
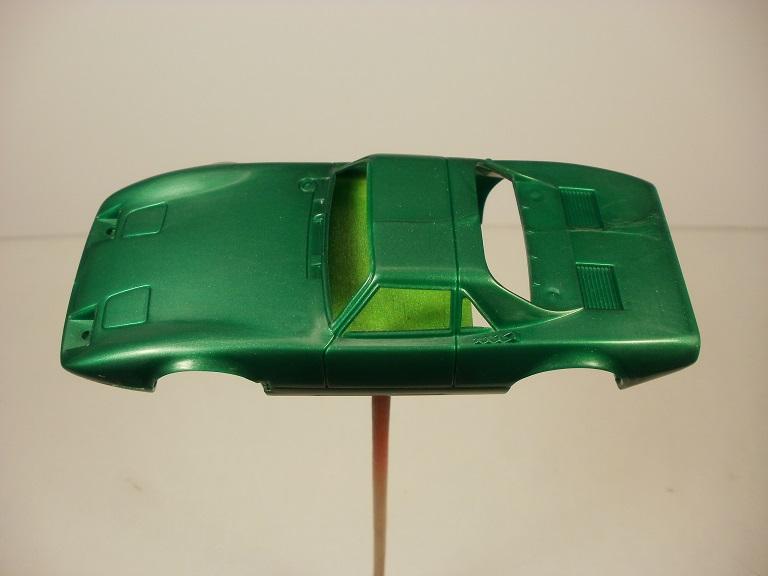
After being painted. I take back what I said about Testors being the same as Tamiya. The metallic pools like crazy on this Testors colour (Mystic Emerald). I’m not happy with the paint. It would lose the epoxy bond on the body posts if I threw it in Super Clean. So I live with the paint as is.
Thank you for your inspiration MIA.
Good news is that the body is still available at Pendle. You can still get one if you wish.
https://www.pendleslotracing.co.uk/rover-brm-resin-kit.html
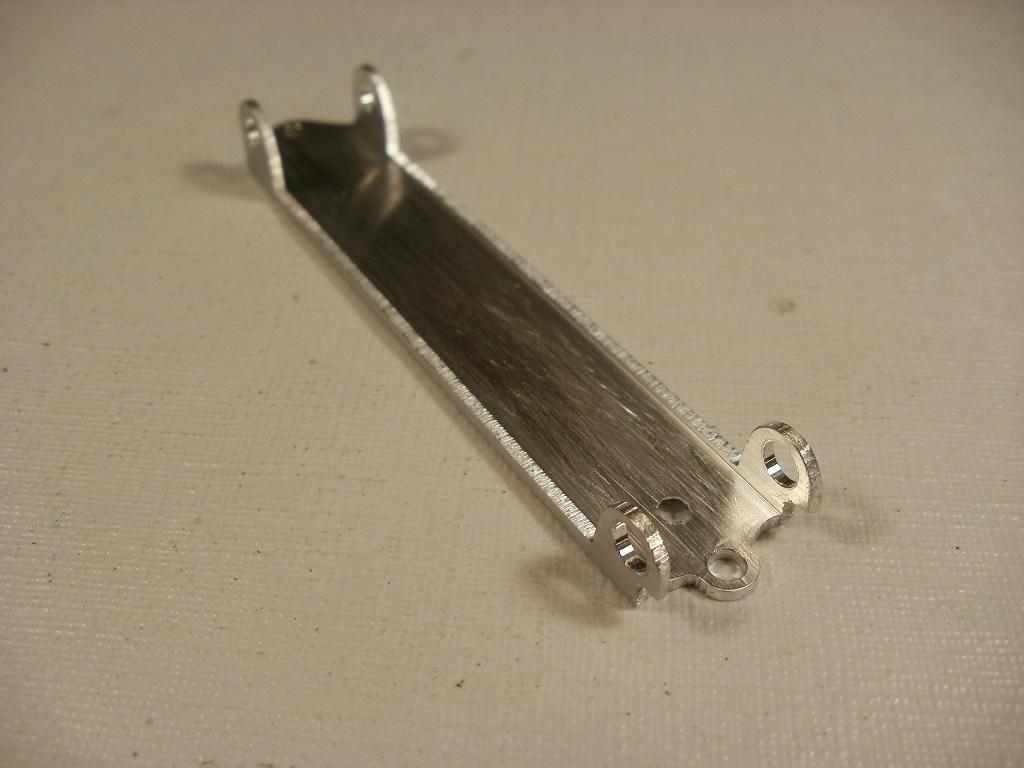
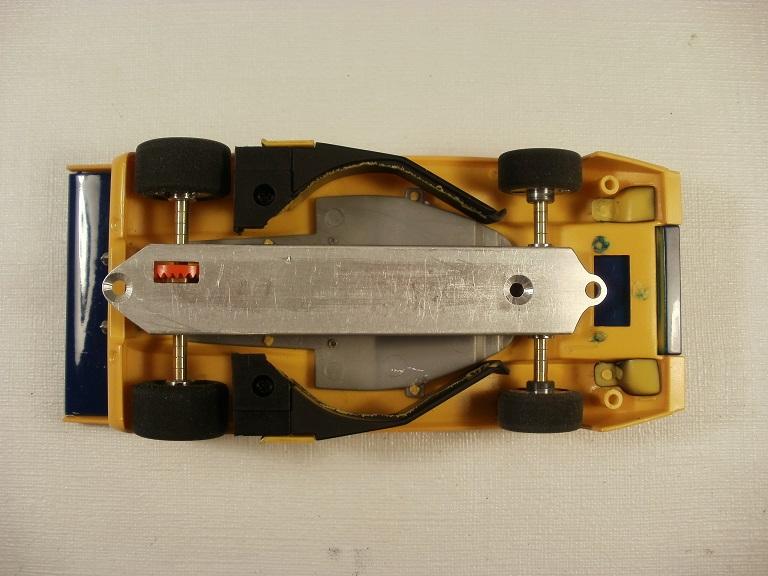
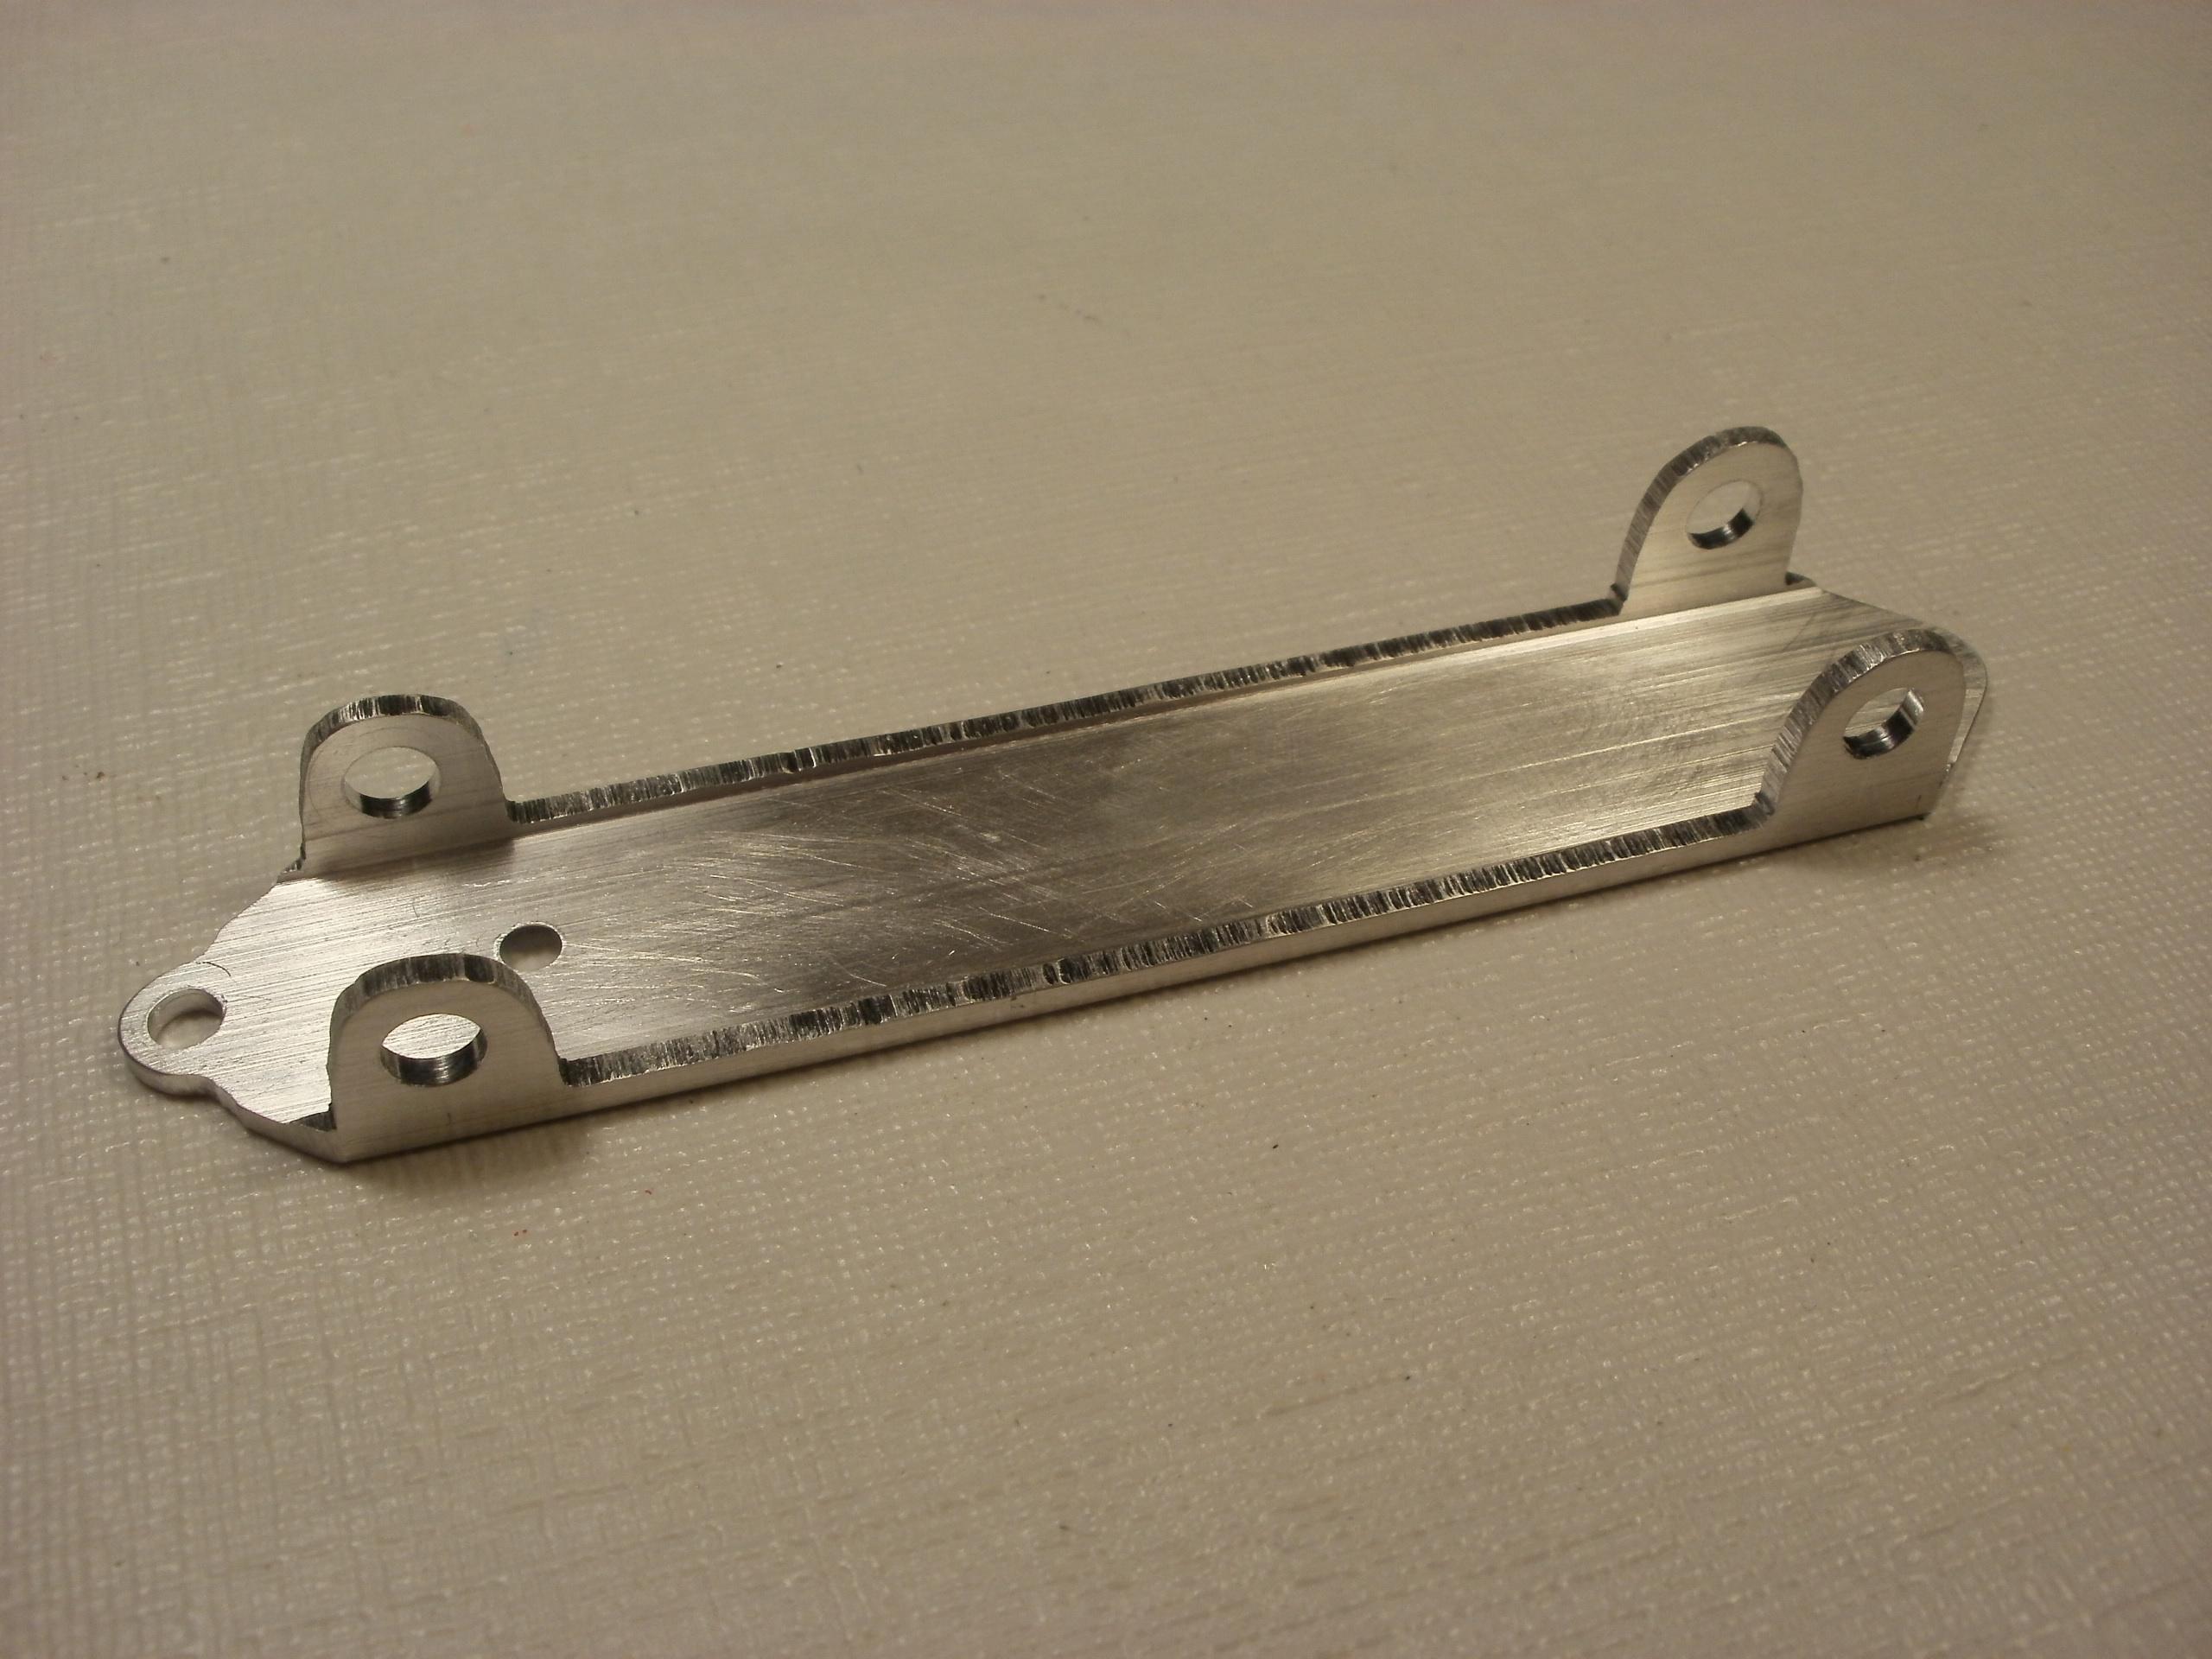
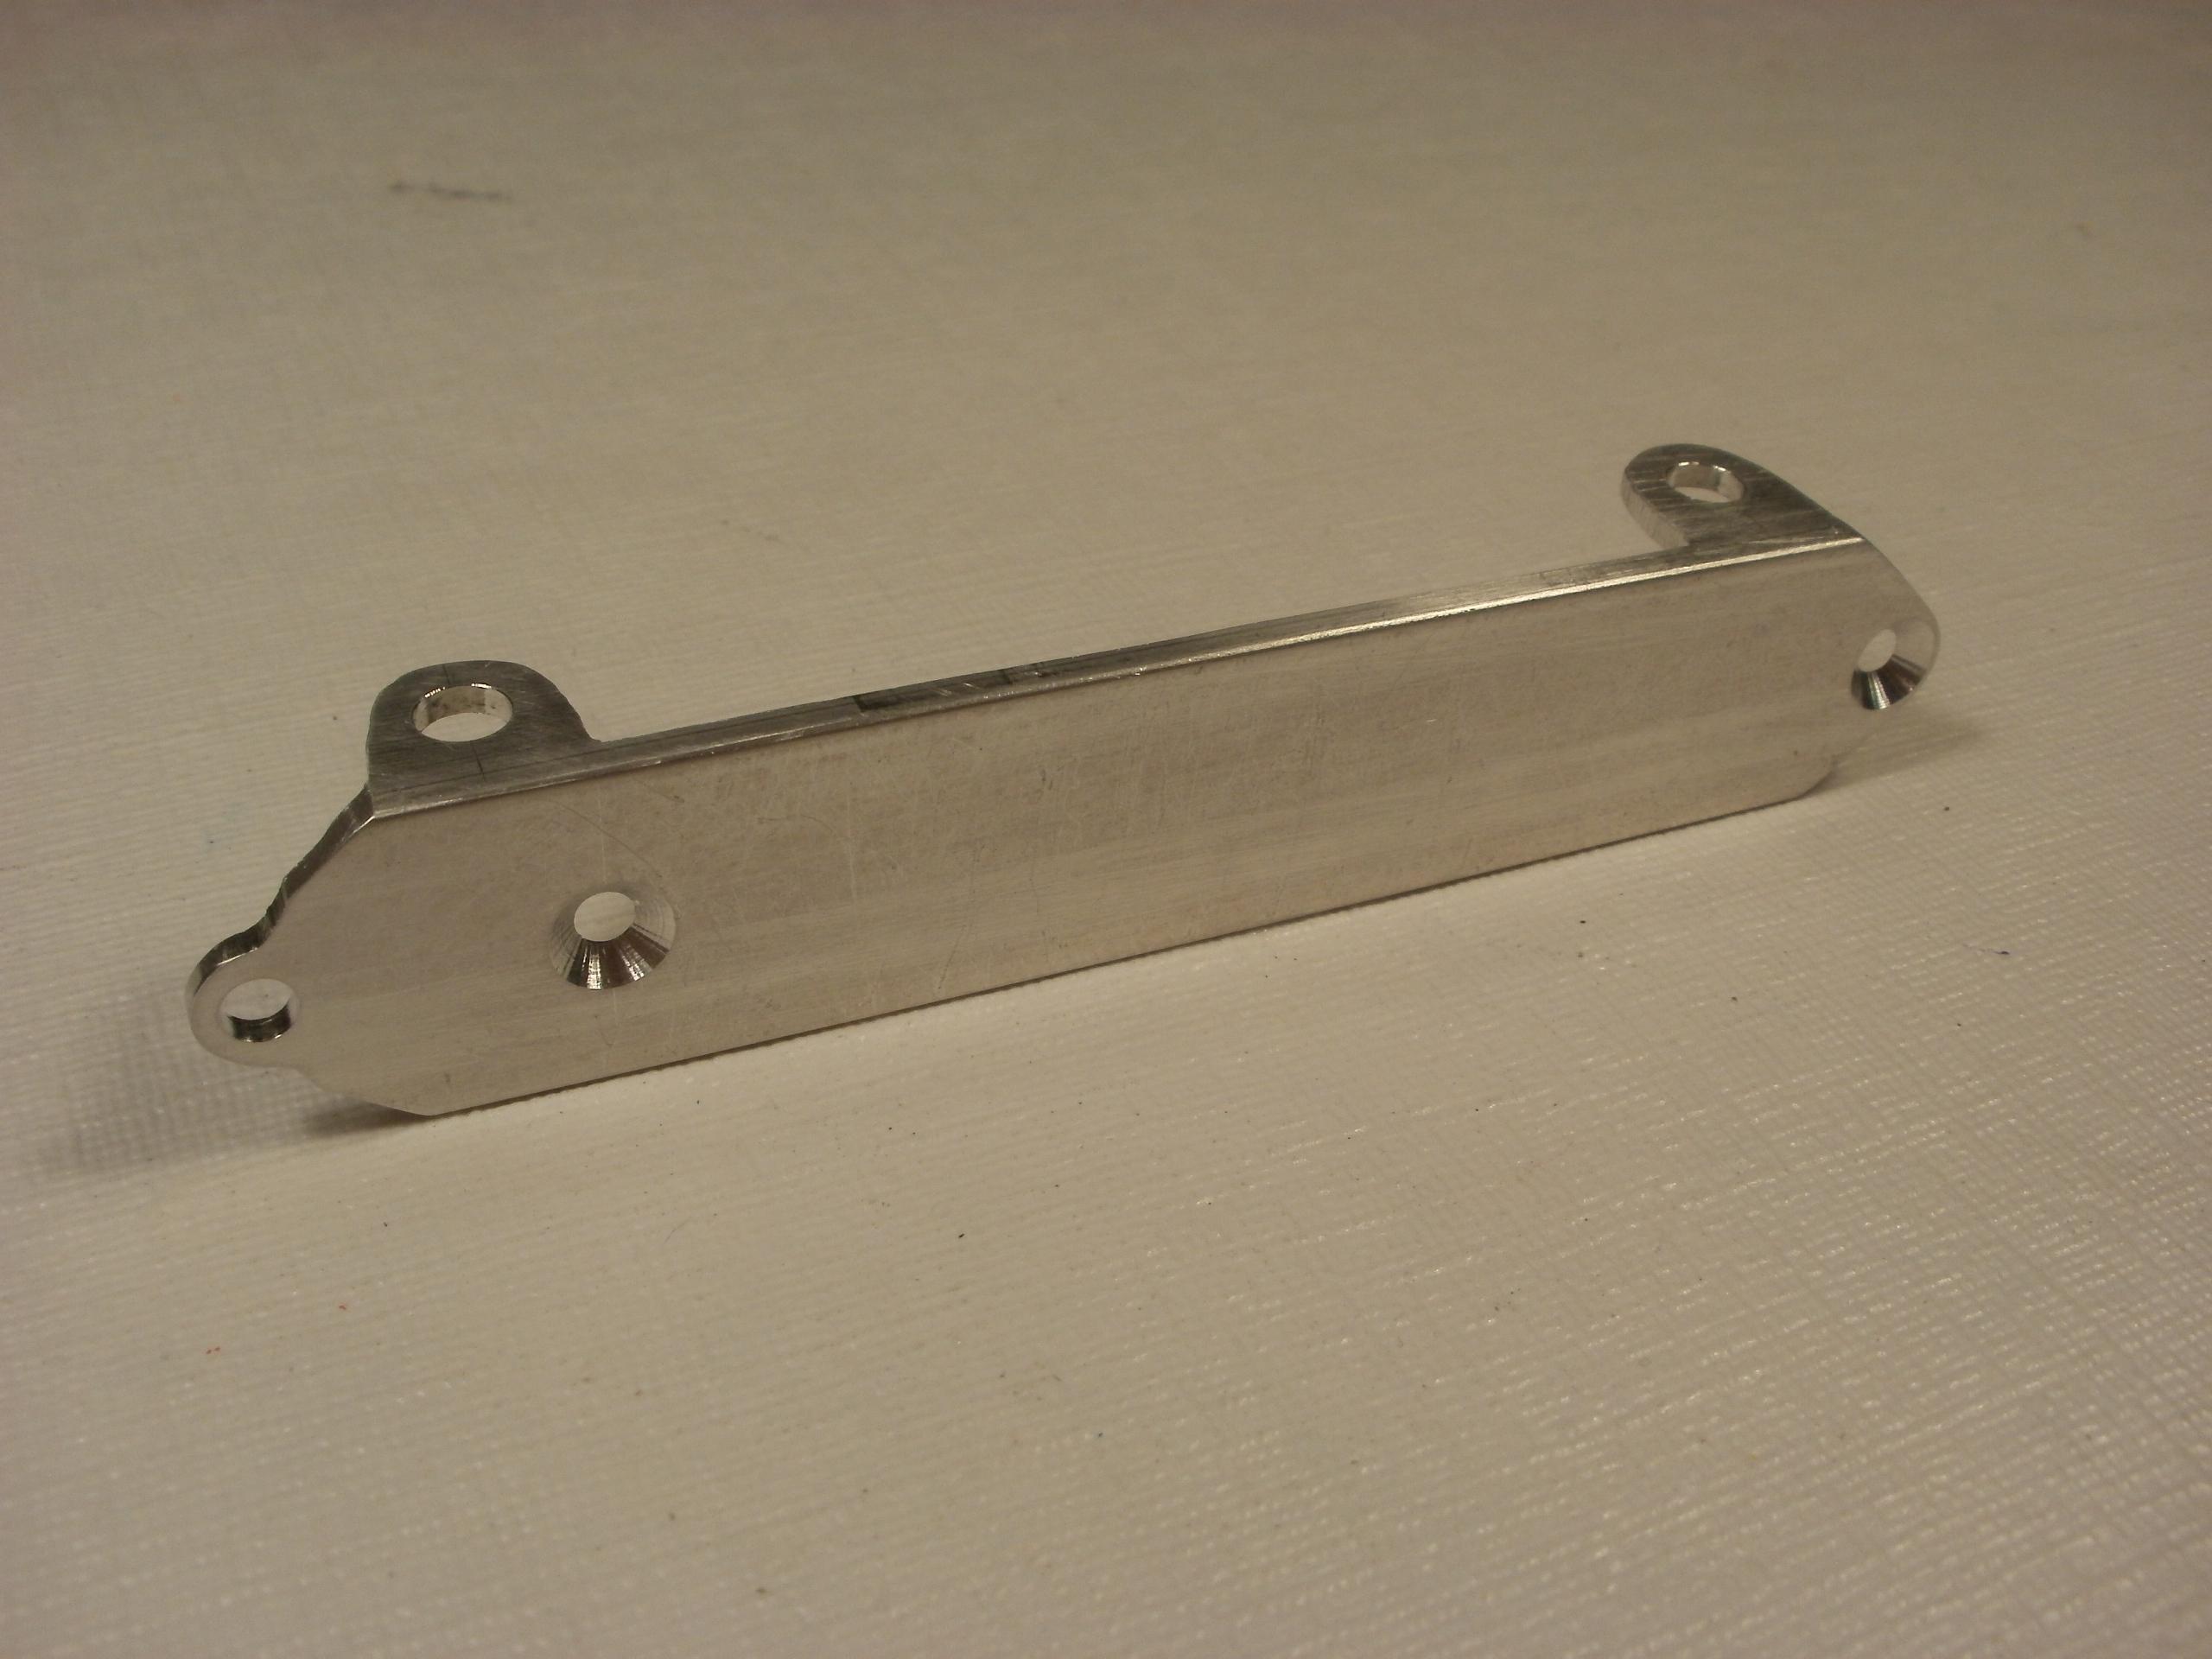
First step to making an aluminum chassis is to cut the material.

I use the end of the part to measure from so it’s best if all the ends are square to each other. I touch the end of the tubing to the sanding disc 4-times, rotating the tubing a quarter turn each time. It’s usually square after 4-rotations. Make sure your sanding disc is 90-degrees true before you start.

A permanent marker is used to mark the general area where the cross-hairs are going to end up. It easily comes off with lacquer thinner when the work is done. You can see at a glance that the drawing lines up with the marks on the aluminum.

To locate the center-line for the body posts and guide. I switch the calipers to inches. It’s been reading metric up until now. Measure the overall width of the tubing. Easy to divide 0.752″.

Then scribe a line with the calipers using another larger peice of aluminum along side the work to have less wandering. Flip the chassis the other way and scribe it again. There will always be a slight deviation. The space between the lines is the exact center. I can easily drill between the lines with a pilot drill.

I also use the larger aluminum tubing at the ends of the chassis for scribing lines with the calipers. Makes for very accurate cross-hairs.

Once the cross-hairs are scribed. To the drill press it goes. Please refer to the following workshop for drilling and reaming for bearings.
Monday, October 29, 2018 (7:00-9:30pm) Basic Aluminum Chassis Design/Build


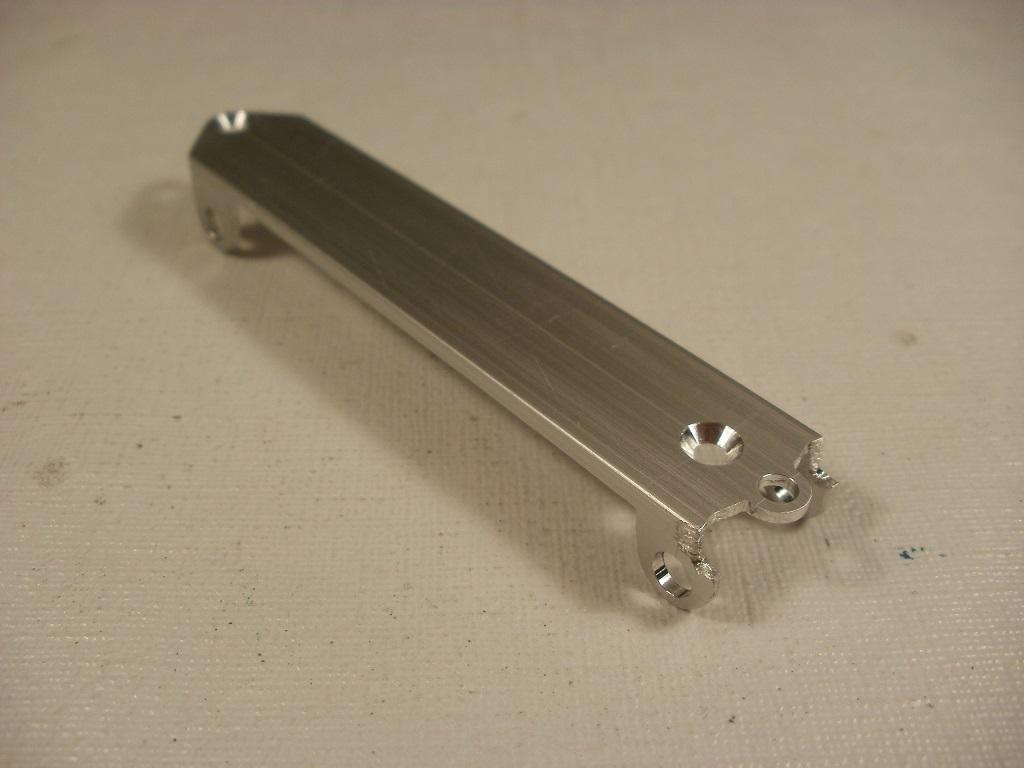
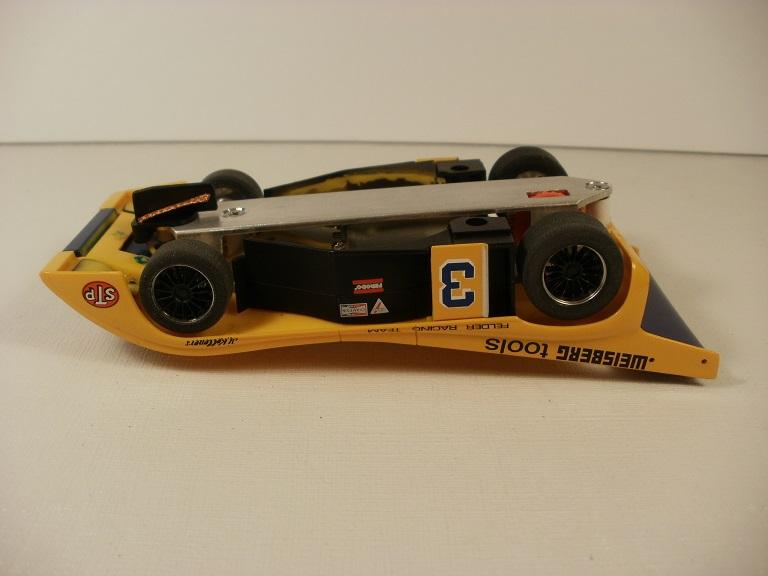
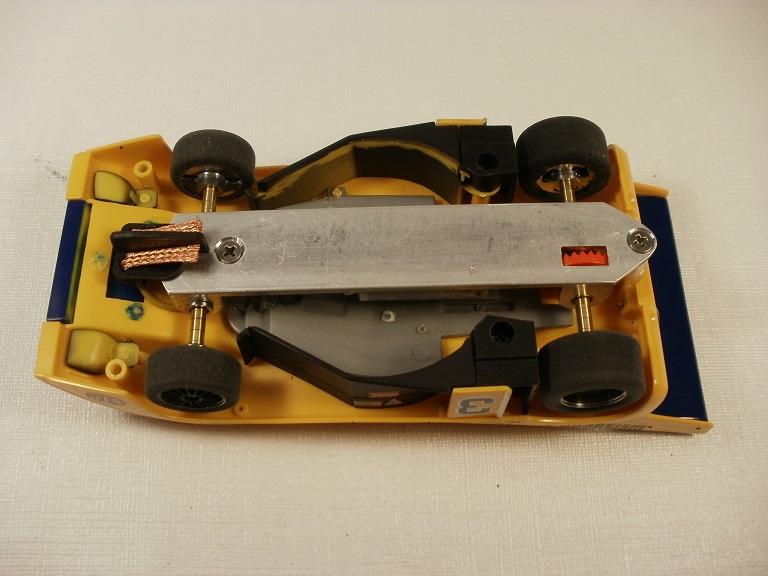
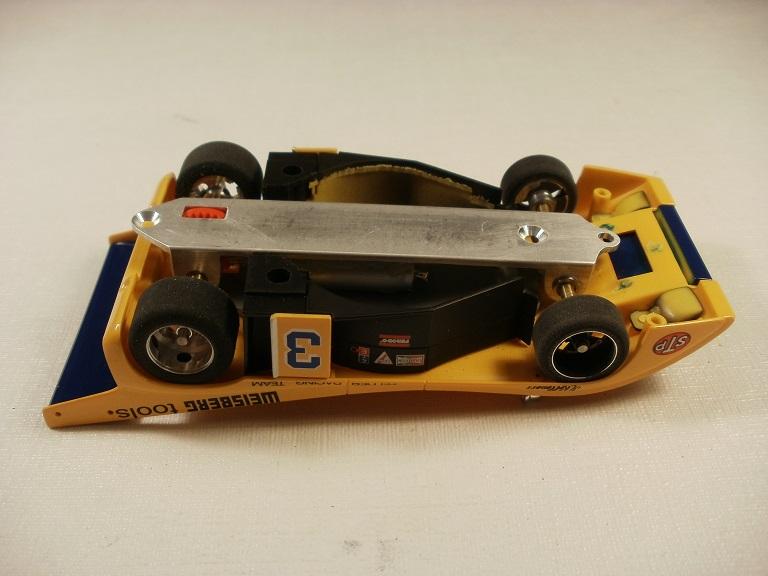
The tubing visits the bandsaw to cut away the top excess material. Then the sharp edges are sanded smooth. Final wash. Then install the parts. Body posts are install on the chassis waiting to be epoxied into the body.

Looks about 3mm too high yet.

After removing and test fitting the posts a few times to shave a little more material. We finally have contact with the fenders. Then epoxy the posts. Final step is to install the body washers. We have body-float.


It runs. It needs a driver, interior, windows, paint, head/tail lights, and livery. Hopefully before Monday.
Thank you very kindly Porsche911.
It uses the slowest motor we race. It won’t be leaving the stripes behind at the starting line or anything blistering like that. But I hope it handles well.
Thank you for your kind words Porsche911. You always make me laugh. :good:
Thank you for the invite to the Spa. I will try not to forget it.
The next step: Decide what class this car fits into. Slow class “Sportscar” for S32 works for me. That leaves the BWNC1 or BWMS050 motors in an inline configuration. I measured the body and the BWNC1 fits. I use the 050 when the S-can doesn’t fit. Other slow class motors are allowed but these are too readily available. Why take the hard way?
I then decide on wheels/tires. Glue and true them. Then fill in the blanks on the build sheet. I would be happy to provide a blank build sheet for anyone that wants one?
Now I can start building the chassis.
The car runs and has full body-float, but has not yet seen the track. It needs about 25 or 30-grams of weight added to the chassis.
There aren’t many choices of Slot.It wheel inserts for this car. At least they’re black which is the same colour as the original 4-spokes.
I’m not exactly sure of the exact formula on how to make a fast car work well right out of the gate. There’s much more to it than just a higher rpm motor. However, I pulled out all the stops for this one. Magnesium wheels, 35k slim-line motor, 9×30 gears, etc… We collect stuff when it goes on sale and say “I might use that one day”. That day has finally come. At least for these parts anyways. Every car is a bit of an experiment. This one is no different. So long as they’re fun to race. We’ll find out at the next CanAm event. :good:
The chassis has been drilled, cut, and assembled.
I had to cut a bit of clearance in the grey section with a Dremel for the crown gear to lower the body.
The tires touch the body on front/top fenders. The motor touches the body at the back. The axles spacers hold the tires tight to the inside of the fenders so the body lines up perfectly with the chassis during the installation/epoxy of the body posts. I’ll remove 0.5mm axle spacer from each corner upon final assembly of the car. It creates a close clearance without touching. Adding the body washers creates the body float and tire to body clearance.
I’m looking forward to the Group-25 model and slot car flea market in March. You’ll find more kits there.
The original wheelbase of the kit was 80mm. So I simply matched it. I did not want to have anything look out of place. That put the front axle exactly half way between the grill housing and body panel. Challenging build.
This also answers the question of “can you mix Testors clear-coat lacquer with Tamiya base lacquer?”. Yes you can. They are no different to me other than colour choices. So I found out.
I was a bit nervous to post a pic of the side profile. I don’t like seeing that much chassis. At a certain point I have to remember that this is a Hot Rod. Scratch building a Hot Rod is open to the interpretation and imagination of the builder. 75% of this build was spent on trying to hide the guide from open view. The other 25% was spent on the five dollar “Candy Apple Red” paint. Mission accomplished… I think.
I did the spinners with a Molotow pen. I also did the rumble-seat handle. Not much to chrome on this body.

Just before spraying the clear-coat, I did a test. The chassis has one coat of gold and one coat of clear. If the chassis didn’t pass the red clear-coat test. I would have left it gold and skipped the red.

Thank you again for your kind words MIA.
Interesting to see all that work put into a car and still retain drum brakes up front. Probably built before disc brakes were readily available for Hot Rods.
The song you’re referring to for youngsters was released in 1963. Yep, I was only a few years old back then. :yahoo:
Thank you for your kind words MIA. The ZZ-Top Ford Hot Rod is an icon because of the singer/musician/owner. Besides, they never wrote a song about the “Roadster”. Just the coupes. “She’s real fine my… Roadster?” It just doesn’t make for a good song.
This is the latest in slot cars. “Guideless” cars are newest rave these days.
I decided to leave the grill and the housing 100% chrome.


It’s impossible to hide the chassis on this car. You can’t drop the body between the rear wheels without going beyond the legal limits of the track width. So I tried sanding the sides of the body. It can’t be done without taking away too much. It has a severe rake instead. You can’t have everything.


Just in case it rains and you need the optional roof.


Oops. I found the guide after all. It was hiding behind that crazy chrome grill. Who knew?

It hides in a little pocket I made with the Dremel. It even rotates. I just took my time with the smallest bit.

And the other way. Cleaner photo of the space behind the front grill.

Thanks for looking.

Ready for paint.

I used Testors “Inca Gold” for the base. It had more yellow content than any other gold which make the red pop a bit better. Tamiya clear-coat red by itself over white is almost a pinkish red.

There’s more dust on this paint than any car before it. Hopefully the clear-coat will take a light buffing without damaging the paint. One coat of gold. Two coats of clear-coat red. Candy apple red it is. A little luck doesn’t hurt.


Front grill housing painted with a 2mm Molotow chrome pen. Not sure if I should leave the actual grill section chrome, paint it flat, or gloss black?

A running chassis waits for the body to dry. A driver, steering wheel, windshield, and interior details wouldn’t hurt either.

I stand corrected (again). Porsche911 has a 32 Deuce Coupe. His hardtop looks amazing in green. It inspired a few of my paint jobs.
This 32 Ford is called a “Roadster” as seen on the box art (ragtop-convertible).
This will be another paint experiment. Metallic gold base with clear-coat red over top. The theory is… it’s supposed to end up as “Candy Apple Red”. I’m diving in head-first. What ever happens… happens. It’s all being done with rattle-cans, so don’t hold your breath. I finally get to use the new can-spinner I made from scrap wood.
“Candy Apple Red” paint on a real Hot Rod is easily worth 10k. This will be the “no-budget” or “I can’t even afford a free lunch” version.
The guide area was mostly done by hand with several small files. I didn’t want to see the guide. I also didn’t want to destroy the look of that amazing grill. So I set it back behind the front axle. This will be my first car with the guide behind the axle. Should be an interesting test.
The first hard hit on the front axle will be the end of this chassis. Aluminum this thin breaks easily. Drive it like you can’t afford it. :wacko:

A look at the underside.

Guide fits nicely.

The guide even rotates (a little).

The driver’s name… Stanley Slotrod. :good:
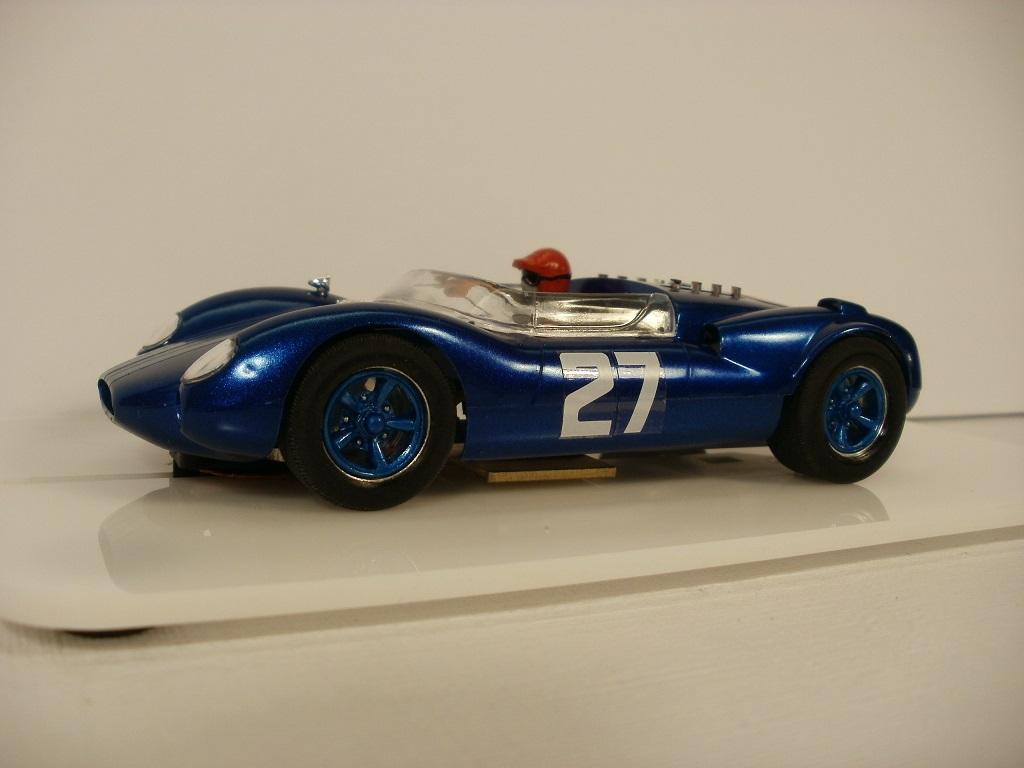
Numbers are on. Inserts are painted the same blue as the stripes.
Driver’s name is Cyril (Cy) Cooper. Car #27.
Super Clean has saved my bacon more often than I would like to admit. No one sees my failures because of this stuff (except me). Nothing like totally starting over when you ruin a paint job.
Art. Thank you very kindly for this very useful tip.
If anyone doubt’s their fresh paint. Don’t hesitate. Lacquer is time sensitive. The faster you get it in Super Clean. The easier it works. Leave the paint on for more than a week and you’ll need a credit card to scrape the paint off even after 3-days of soaking in Super Clean.
One more thing. Super Clean loosens Epoxy bonds. You’ll need to re-glue any parts that required Epoxy. Good thing epoxy lifts off fairly easily after Super Clean.
MIA. In my humble experience. If you’re stripping an old livery. Best to water-sand with 2000-grit before paint. If the body has been sanded and you’re stripping a mistake to re-paint. It should not need sanding again. Just wash the body after the Super Clean and paint it.
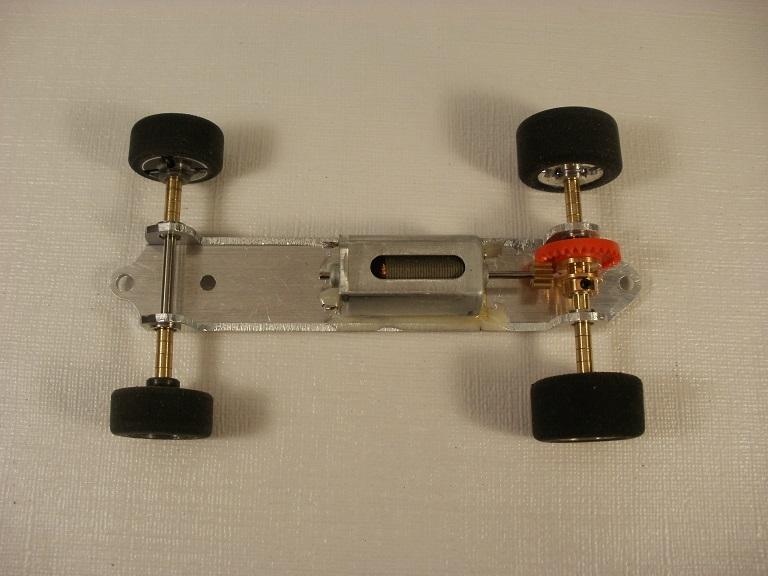
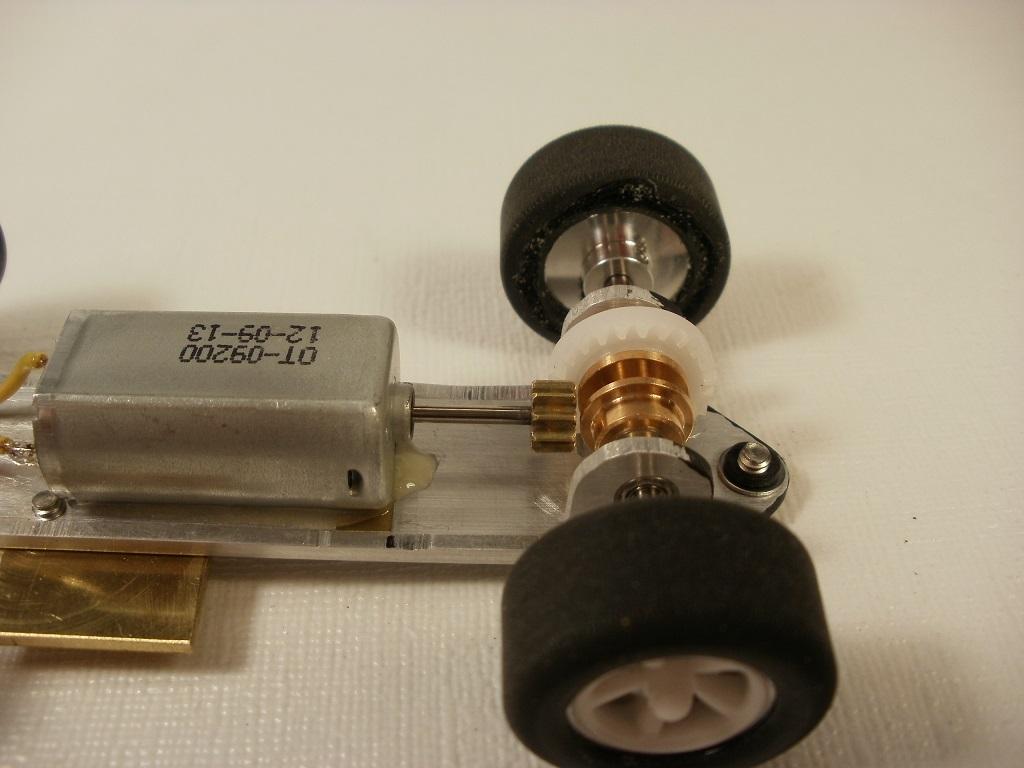
Chassis is finally complete.
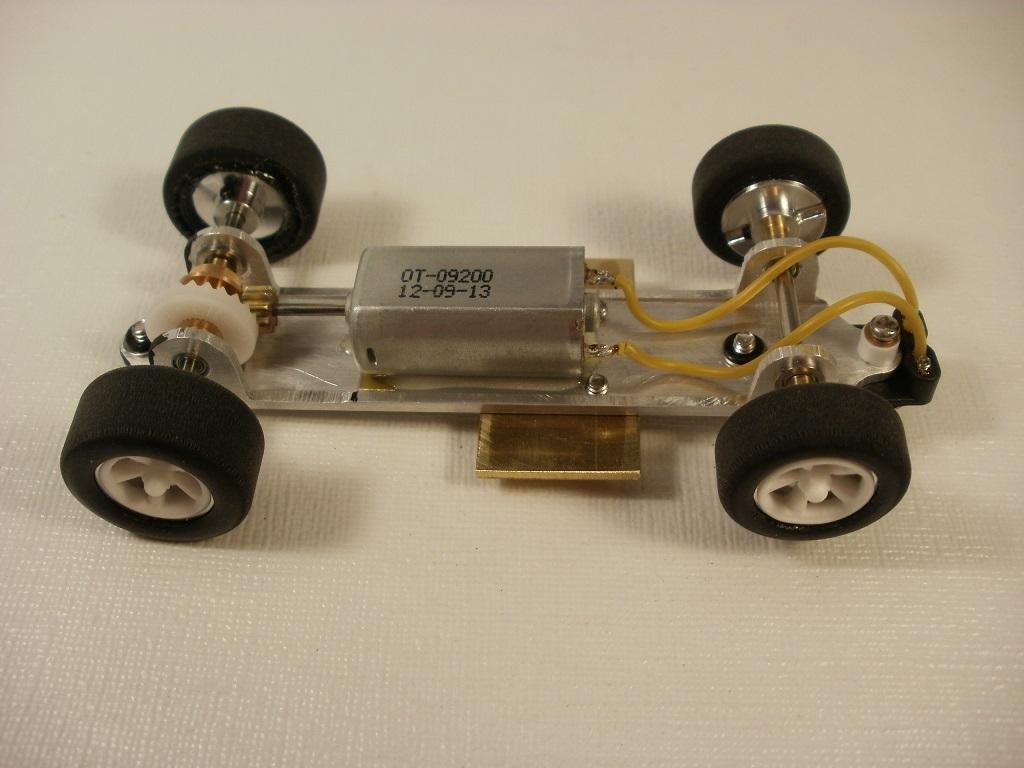
This one has a 23-tooth offset crown. The motor shaft lines up 1mm lower than the axle. A test bench of sorts.
It has Slot.It wheels with Art’s 5-spoke inserts. They seem to fit the body style.
The car weighs 68-grams even with the brass weight. Thanks for looking.
Thank you very kindly Art.
It’s impossible to have too many SCCA cars. Just my humble opinion.
Just a quick update on this car.
At the last Internationale Meisterschaft. The 35k motor with an 8×29 gear was lightning fast. But the gear mesh had a very bad noise I could not get rid of no matter how I re-adjusted the mesh.
I spent extra money on a special self-aligning 8T pinion from Mr Slotcar (Ernie’s). The car made a lot more noise and slowed down considerably.
At Art’s suggestion, I recently installed a 9-tooth pinion. Changed the crown from 29T to 30T. Installed the motor back in the car. Now it’s perfect! No noise and still lightning fast! :yahoo:
This car is a test of reaction time and nerves. Driving anything after this car will be in slow-motion. Had I tried this experiment when I first started racing, the car would surely not survive. Actually, the survival of this experiment remains to be seen. But at least it’s debugged.
Just a quick validation that this car raced without fender skirts as a Cooper Ford T61. The sister car, the King Cobra… has fender skirts (spats if you live in England).
I ran short of 7’s. Number 26 it is. Thanks for looking.

I can’t thank F1nutz and yourself enough for informing me about this pen. It was one of the first things you showed me when I got into this hobby.
I have since found out that the ink can pool into unwanted areas. So I use the pen upside down if I think it will run. It helps prevent pooling when doing fender emblems, door handles, window trim, etc… In fact I rarely use it right side up anymore. Too much ink can easily ruin nice paint.
The rear axle spacers are now removed. They were used only to square up the car. The chassis runs.

The body has been opened up slightly here and there to fit a 3/4″ inch wide chassis.

The front post was fairly normal. The back post was a new experience altogether. It had to be hidden away in the transmission. The crown comes close to touching the body just about everywhere… but it doesn’t. :wacko:


Creating a pocket in the transmission for the crown allowed the back of the car to drop considerably. The body sits level.


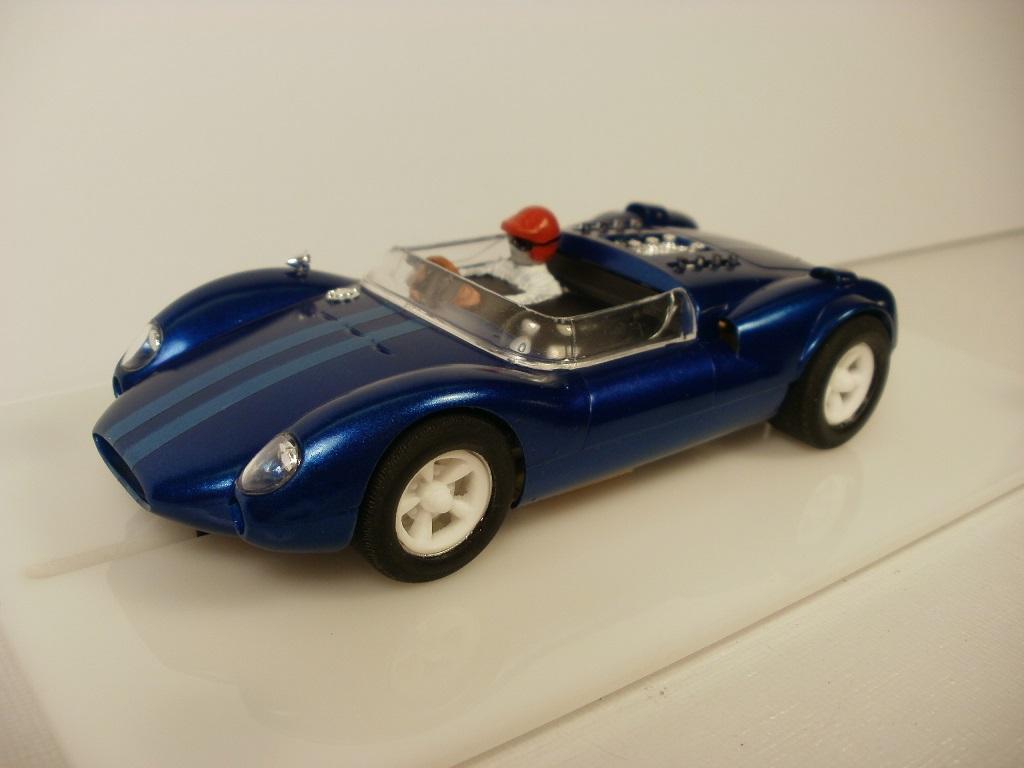
I usually paint the rear body post and chassis flat black to hide it. I might leave the chassis as is, and paint the post aluminum.


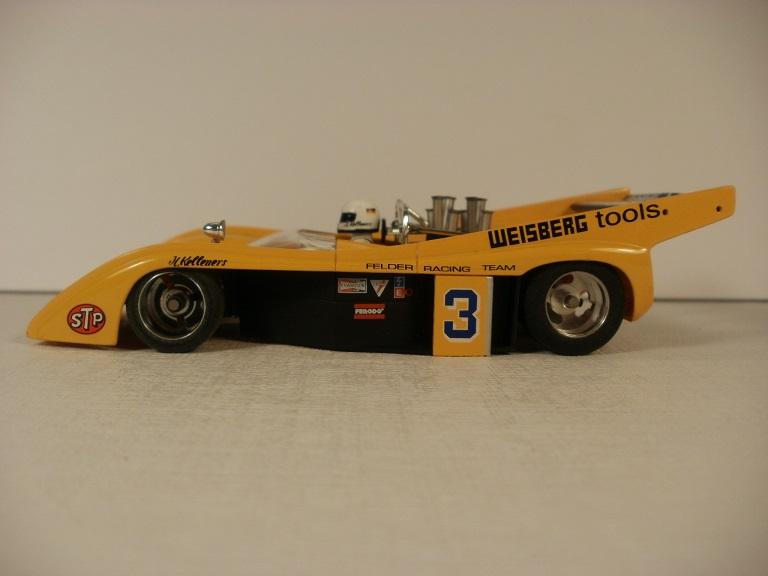
This is when I think the car looks best. Clean lines. Before numbers, livery, or sponsors. It won’t look like this ever again.
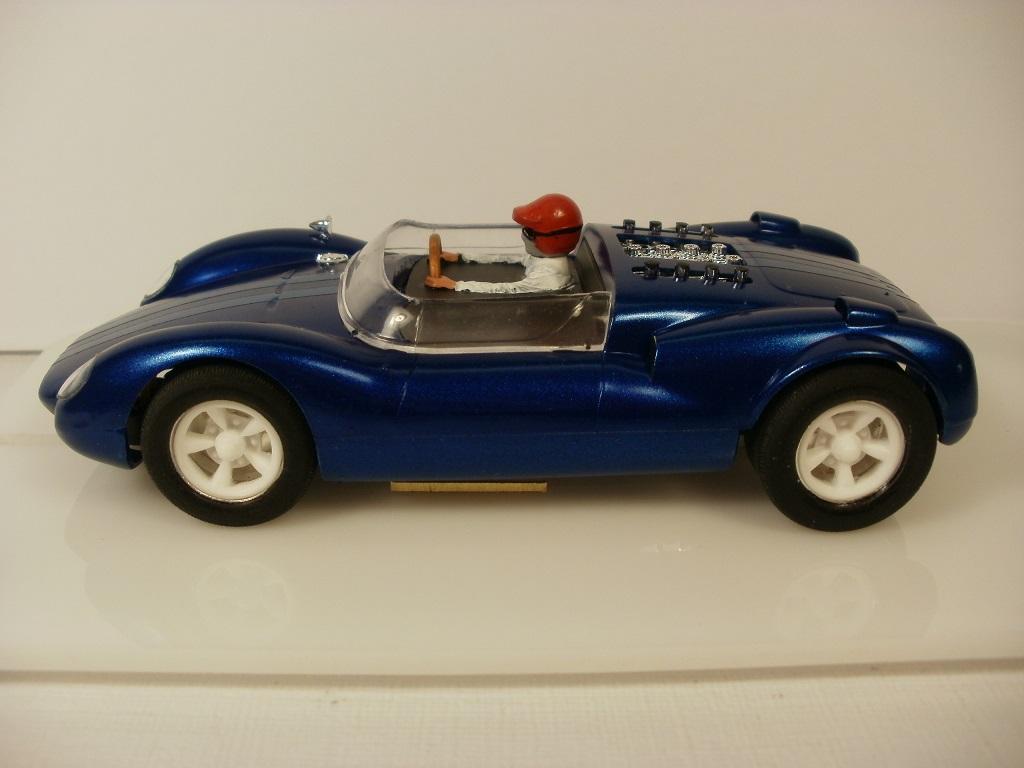
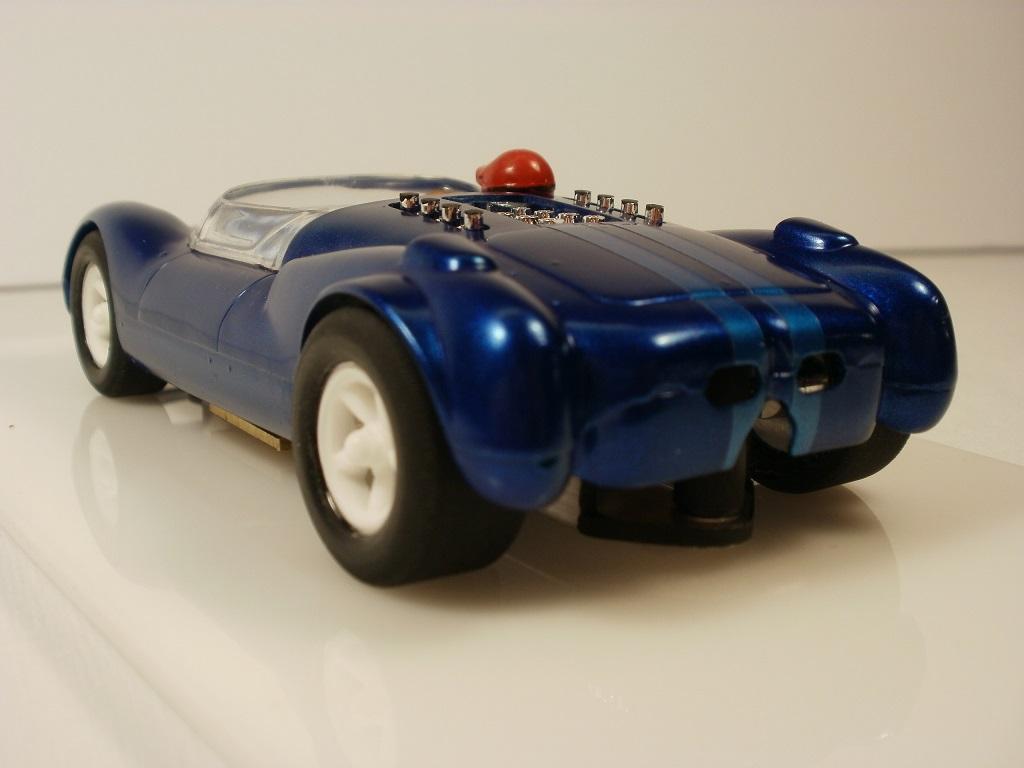
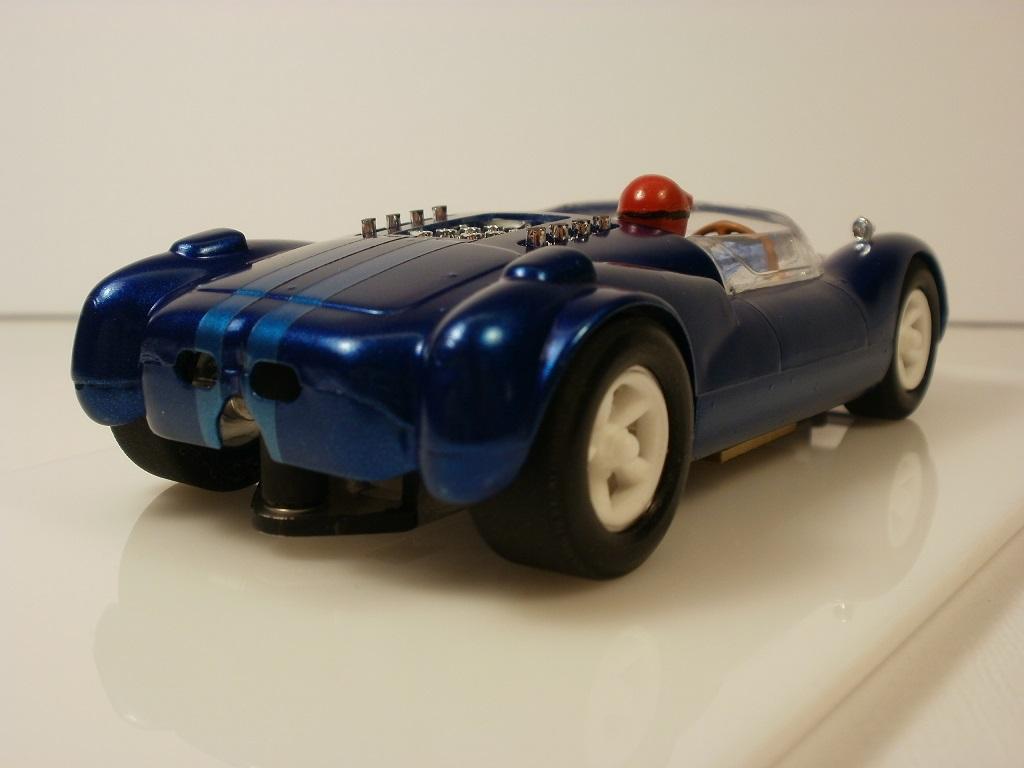
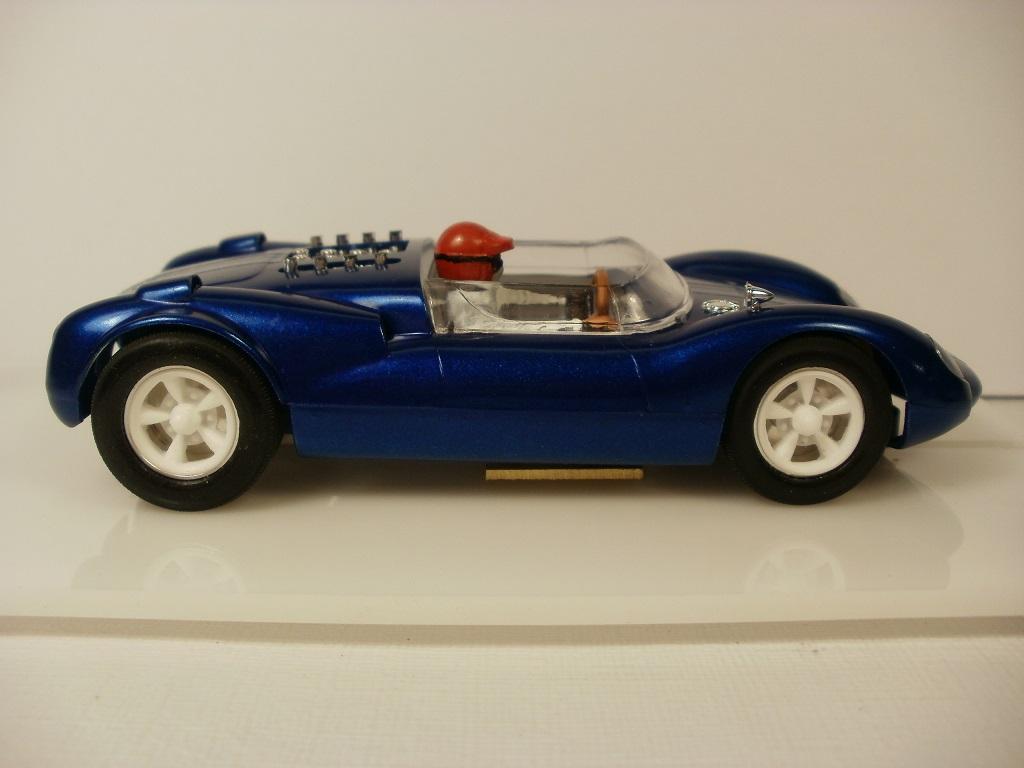
Driver’s name is: Lyman Zerga – 1968 Matra #27.

I could not figure out how to decorate this car. Not many variations of the real car to get ideas from. So it sat on the shelf. I wanted some contrast. Eventually, I came up with this.

I painted the ends of the wings red. Then touched the edge with a Molotow chrome pen. It nicely covers where the red meets the blue.


I had to lightly sand the outer edges of the inserts to fit the rear wheels. They fit nicely now. Call me crazy, but the back of a none painted wheel looks like disk brakes through the spokes to me.

Driver’s name is: Indigo Montoya – 1973 Shadow DN1 #15. Thanks for looking.

Thanks again MIA. I hope I inspire others to do better than me and look forward to the other builds.
The car is an absolute pleasure to race. :good:
MIA found another great site for acquiring car specs. :mail:
https://www.ultimatecarpage.com/
You can’t have too many resources. Thanks MIA! :good:
Thank you very kindly MIA.
You can’t have too many resources. Thank you for adding more. Your calculations on the wheelbase is more accurate. The back axle is locked into a slot. But the front axle could have been moved forward 3.1 mm. Live and learn.
When mapping out your chassis for an Auto Union. Take into consideration that increasing the wheelbase may put the guide directly under the front axle. A sheet of paper will not fit between the guide-screw and axle on my car the way it is now. They can’t occupy the same space. All I can say is. Measure twice, cut once. I had a bit of luck on my side.
Thank you Luis.

Bearings, axles, wheels, and motor are installed.


The rear body support needed to be trimmed to keep the body low and still fit the crown gear. It’s amazing the dust you don’t see with the naked eye or I would have dusted the car off before the photo.

The body is sitting on the motor at the back, and sitting on bearings at the front at this point. The body can’t get lower than this. The supports will be trimmed to the exact same point. Then a stainless steel and urethane washer on both body posts provide the perfect, minimum clearance. It took me several builds to figure this out. The rear body post fits into a small pocket in the transmission. Or, I might eliminate the rear post altogether and go with just one. I’ll cross that bridge later. Body detailing is next.

I should have gone straight to “The blueprints” to figure out the wheelbase.
https://www.the-blueprints.com/blueprints/cars/
I’m trying to be accurate in figuring out the ratio of the front wheel track width vs the rear. I stumbled across this site:
https://www.the-blueprints.com/blueprints/cars/matra/19398/view/matra_ms10_f1_gp_1968/
Pictures aren’t helping. But this view of the car really helps. They have a lot of cars on file. Check out the site.

There is not as much room as I first thought under this body. But still enough to complete the task at hand.

The rear bearing supports have been cut to a minimum to fit between the body and transmission.

It took some trimming. But the bare chassis sits below the body. That’s low enough for me.

This chassis required a much more precise fit to the body.


The crown gear will be the limiting factor to the overall body height. It needs to move freely with body-float.

I have gone an entire race without any de-slots. After 3-off’s in 3-minutes last Monday. I’m not quite ready for a single post body mount yet. I need the car to withstand punishment. It’s very fortunate that the rear body post will dissappear inside the back of the transmission on this car.

Luis. The only thing giving me nightmares so far is your Avatar! B-)
Where’s that car of yours? Pictures my brother! :yes:
Have you noticed my Avatar is the Chaparral 2D like the car in this thread? Your worst nightmare maybe?
Art,
I just found drive shafts in stock at Electric Dreams. They are like hens teeth. I posted that as well.
Cheers,
Ken
This Corvette has gone though several changes. Mostly to make it legal to race in the Targa Florio. A Fox-10 was installed by mistake.
The Fox-10 has been removed and a Scalextric slim-line 050 has taken it’s place.
Weight was removed. It used to weigh 107-grams. It now weighs 86-grams.
Funny thing is the performance is almost the same. This is my first time using a Scalex 050 in another car other than the new F1’s. All I can say is “Wow!” :yahoo:
My other white Corvette with a Scalextric S-can (#76) is a dud compared to this car now. The S-can might be defective? Need to investigate. What an eye opener. :wacko:

Art. Thank you kindly for your words of encouragement.
The upcoming Matra build is actually a great candidate for eliminating the rear body post. It’s going to be a snug fit for an aluminum chassis. Okay my brain just went into overtime thinking about how to do it.
Cheers!
With each build I learn something. Fendered cars need tire clearance for fenders. I thought I could slam this car nice and low. Then came the F1 learning curve. This is the first Shadow DN1 build thread so I had little to dig up on the subject.
The crown gear is the hurdle to lowering the rear of this car. I already know that the motor likes 3/1 gear ratio from the F1 cars we race. 9×27 is typical of the F1 gears. Anything outside 3 to 1 is an experiment. However the 9×27 tooth gear is much larger than an 8×24 combination. I went with a 9×28 to experiment. I had to raise the back of the body to accommodate the large crown gear.
The front body height is limited by the tire diameter. I left too much meat on the front tires to lower the front more than it is. The car has body float. But bearings almost touch the inside of the body.
If I were to build this chassis again. I would shave the front tires down to 16mm or 17mm diameter and run 8×24 or 8×25 gear ratio. I might actually make a new chassis for this car after all the classes are filled (getting close :wacko: ).
It runs, but needs a number and decorations.


The wire from the motor to the guide did not fit over the front axle because the body is too close. Crossing the wires at the guide allows the guide to move freely with the wire under the axle, and out of the way of the body post. Pinching wires under body posts shorts out the car. I figured that out the hard way.

This is a simple and fun car to make. The hardest part will be choosing where to put stripes. I look forward to racing a Shadow DN1 for the first time! Thanks for looking. Ken

The motor I chose for this car is a Scalextric 18k with a short shaft.

It came with a 9-tooth pinion installed, and a spacer/sleeve for the 2mm groove in the crown gear.


The class allows a track width of 68.5mm. The back axle can easily handle it. But the car looks ridiculous with the front wheels spaced that far apart. I took about 12mm off the front axle. It looks a little more like the real car.

Thank you for most of your kind words Luis. 😉
Now that I’m awake. Let’s see some pictures of this elusive nightmare. B-)
Chassis assemby is next. I thought this would be an easy car to slam close to the track. Turns out the bearings or bushings are the limiting factor to the body height. The bearings/bushings hit the inside of the body. It would need shorter tires before you can install fuzzy dice on the mirror and call it a low-rider. It will be more than low enough for a scale look by the time it’s completed.

We have numbers and a sponsor. Let’s go racing!
When this car first came out. It came with either a small-block, or big-block chevy V8. I thought it would inspire the next Corvette to be mid engine. That didn’t happen. But Chevrolet did take a cue from this 1966 car for the front end of the 1968 Corvette.
In very small letters. Somewhere on the back of the car it says “Eat my dust Luis!” Oops. Did I say that? 😉
The original interior was a mix of plastic and nylon. Epoxy won’t stick very well to nylon. The driver looked interesting. But lacked colour and was all blue like the rest of the interior (except for his head). A few minutes on the bandsaw and the driver was separated from the nylon interior.

It took six colours to paint just the driver not including his head. Flat white – driver suit. Flat brown – seat back. Light tan – driver hands. Gloss wood – steering wheel. Flat black – space in front of driver. Red – seat belts. I finished off the back of driver’s helmet with a black strap for his goggles.

I think this car qualifies for the Classic Era Challenge and Prototype. It isn’t a slow-class car, that’s for sure. So I installed a flat-6. It leaves lots of room for the original driver and chrome intake stacks.

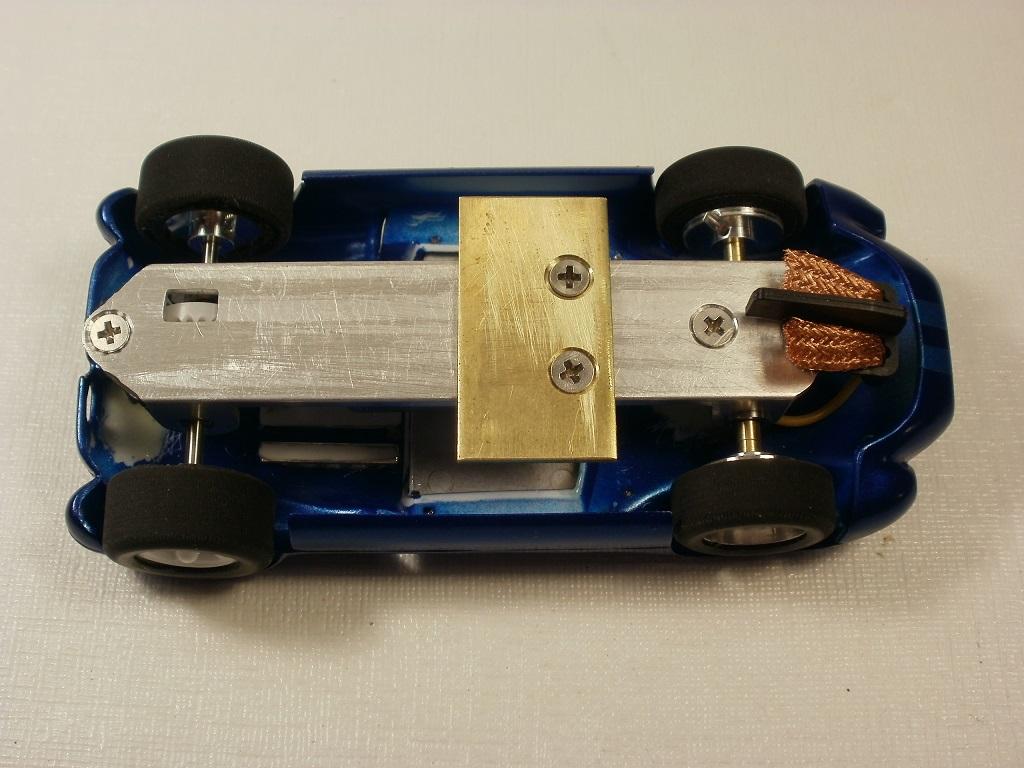
This is by far the largest piece of brass I’ve ever used as a weight. I didn’t know .064″ inch brass sheet comes 2″inches wide. It wasn’t available at most hobby shops. The finished car weighs 108-grams. A 4-40 screw and epoxy together hold the brass in place.

Underside of the body came out clean. Black “Martha Stewart” card-stock from Michael’s Craft store makes up the interior. Very handy stuff.

I must give Art full credit for the period correct Chaparral wheel inserts. He painted them himself, and I got lucky enough to win them as a door-prize. I’ve been itching to use them ever since. They look sharp! Thanks a million!

I got brave and took flat-black to the inside of the air-scoop. One wrong move with the brush and it’s a mess.


This car makes me smile like the little kid that got his first Strombecker set. My very first set had the Chaparral 2D, Porsche 906, Ford GT40, and Cheetah. The 2D was the nicest looking in my opinion. :good:

Driver’s name is Joakim Bonnier, and the car will be #9, my CEC number. Thanks for looking. Ken
The front end of the car could not be any lower or the tires would rub. That pre-set the height of the rear in order to be level.

The chassis is ready for assembly.
 I had to post every photo separately because the system would not accept more than one photo per post at a time.
Cutting away the unwanted material, cleaning up the guide, and removing the sharp edges took another hour.
Drilling out the guide, body posts and bearing saddles took about an hour.

Mapping out the chassis took about 20 minutes.

I just did a little more Mini Cooper homework.
In 1967. The front grill started to go through small changes from a smooth line all the way down both sides. To having a sharp bend in each side. See Google Images.
In 1970. Mini’s started to change outboard door hinges in favor of inside hinges. They also phased out the sliding door glass in the 70’s.
https://www.minimania.com/Classic_Mini_Cooper_Identification_Guide
I’m of the opinion the Mini in the Targa was not a new 1972 model off the showroom floor. But an older model best suited to race across the countryside. It was likely a used car from the 60’s based on the old outboard door hinges, and smooth lines on an open space that used to be the front grill.
The doner car is a 1961. The body looks 100% identical to the real car that raced.
That’s just my humble guess on the year/identification. Thank you very kindly.
Now that the Mini is behind me (boy am I glad) :wacko: . Did I mention I’m making a green Chaparral 2D on another thread? :good:
Hi Porsche911. Both Art and I have edited the conversation several times and have already made peace with it in private. So Art and I removed what you just posted. I apologize you saw it. The subject is now written in water to be remembered no more.
Art was worried that the flood gates might be opened with the creation of this car. After the trouble it took to align the tires with the flares so they don’t rub… this will be my last set of custom flares. From now on, I will just take a wiser path and buy a car with a wider body to save about 15-hours on the build. Not to mention preventing a few extra gray hair. It was an interesting experience. But not worth the time. Too many wide, low, and light bodies out there to choose from. This top heavy little car is so tall, it hits the roof of my breadbox.
Fred Steinbroner and his Tudor will eat this Mini for breakfast.
Porsche911. Please vote if you still see the need to revive the topic? I’m not here to fight the world over making one car. I just want to enjoy some friendship, making cars, racing, and a little peace.
Ken
Thanks,
Ken
Thank you for your kind words Porsche911. Also, thank you very kindly for your generous offer.
I was tempted to chrome many of details with a Molotow chrome pen. But the real car had all the chrome removed or painted over.
Taking your advice from a previous post. I installed black grills behind all the exposed bumper and turn signal holes. Gives the car a finished look.
While the car qualifies for SP. It will run about 10% slower than most other cars because short tires. Gear ratios are limited. Please let me know if anyone locates an 11-tooth inline pinion for a 1.5mm motor shaft? Thank you kindly!
-
AuthorReplies